Active Directory Federation Services (ADFS) SAML Setup
This guide walks through a basic setup for connecting Kasm to ADFS on Windows Server 2016 via SAML. Active Directory user accounts are assumed to have a populated email address attribute.
ADFS Signing Certificate
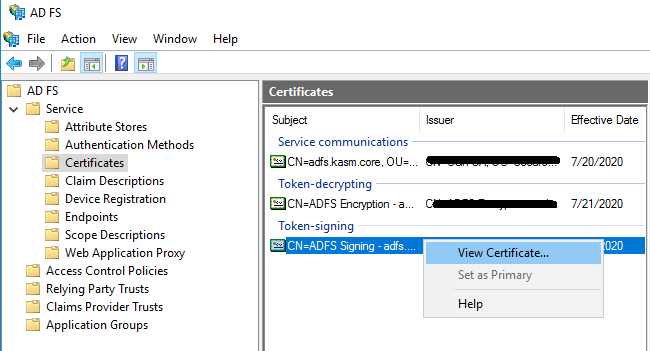
From the ADFS Management console, expand Service, and select Certificates.
Right-Click the Token-signing certificate and select View Certificate.
View Cerificate
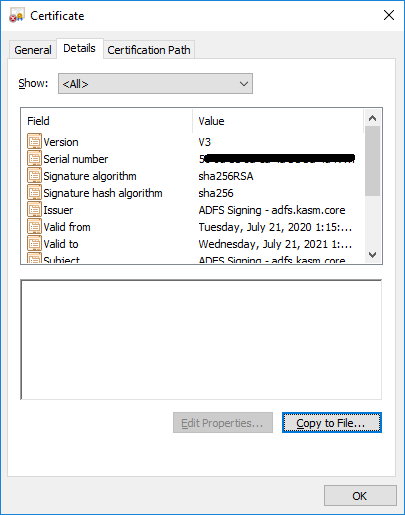
Select the Details tab, then click Copy to File.
Copy Certificate
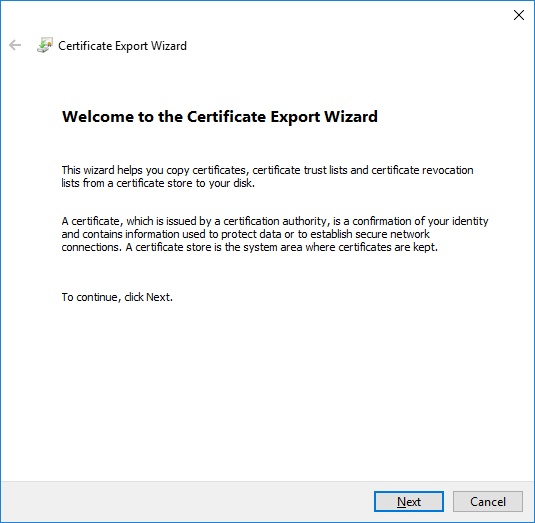
In the Certificate Export Wizard, click Next.
Export Certificate
Select Base-64 encoded X.509 (CER) . Click Next.
Select a desired output file and click Next.
Click Finish.
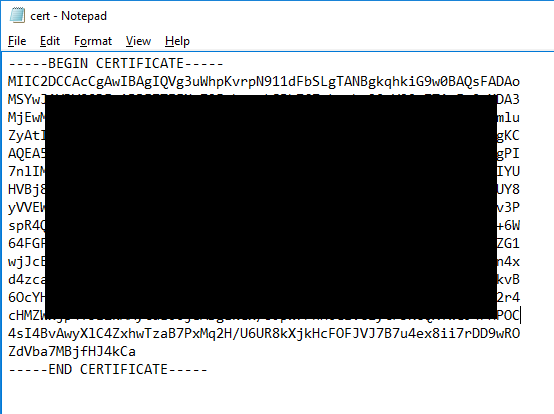
Open the certificate in your preferred text editor. This data will be used in the creation of the Kasm SAML configuration in the next section.
Certificate Contents
Create a new SAML configuration in Kasm
Log into the Kasm UI as an administrator.
Select Access Management -> Authentication -> SAML -> Add Configuration.
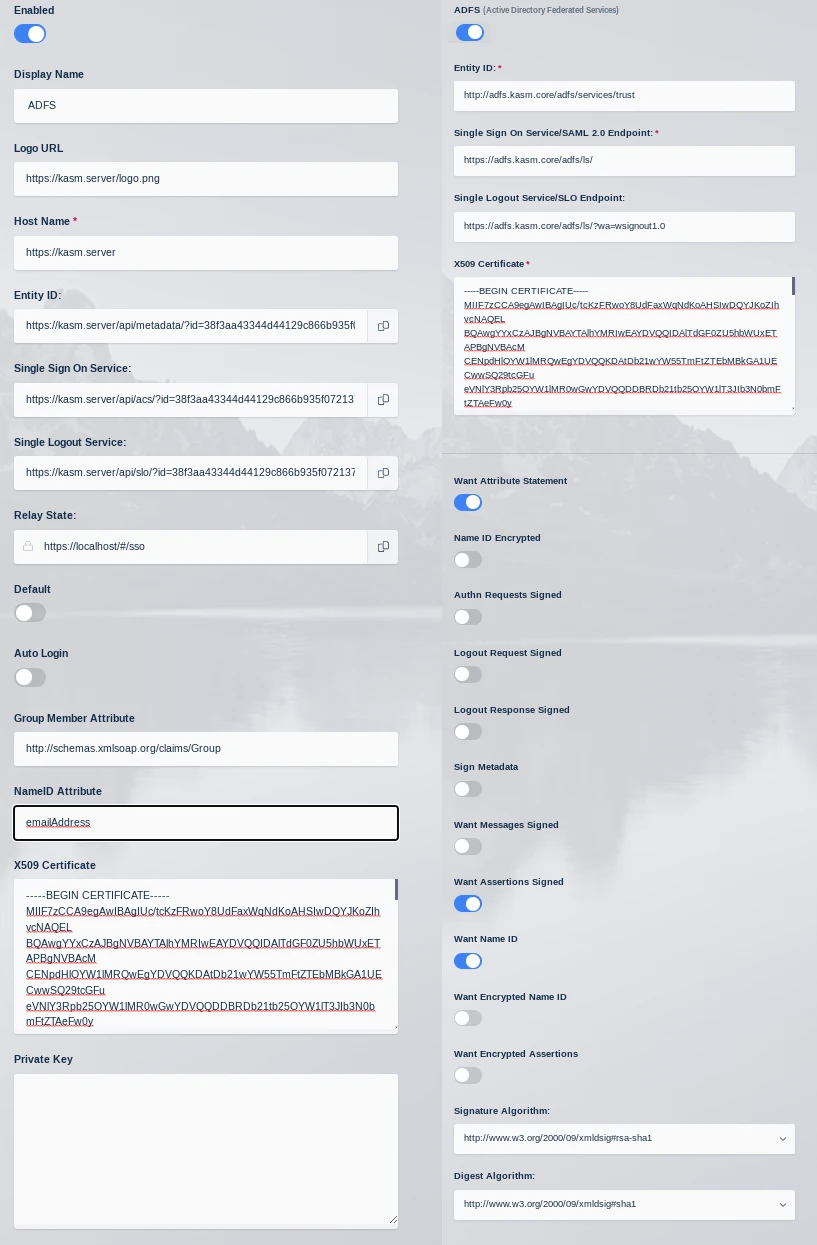
The SAML 2.0 Configuration page will auto-generate the Entity ID, Single Sign On Service, Single Logout Server, and Relay State values.
Edit the auto-generated Entity ID value to remove the query argument in the URL. (e.g https://kasm.server/api/metadata/?id=123 => https://kasm.server/api/metadata/ )
Update the form with the following entries.
Setting |
Value |
ADFS |
Checked |
Debug |
Checked |
Digest Algorithm |
|
Enabled |
Checked |
Group Member Attribute |
|
Identity Provider: Entity Id |
http://<adfs server>/adfs/services/trust |
Identity Provider: Single Logout Service: |
https://<adfs server>/adfs/ls/?wa=wsignout1.0 |
Identity Provider: Single Sign On Service |
https://<adfs server>/adfs/ls/ |
Identity Provider: X509 Certificate |
Certificate data from the previous section |
Name |
ADFS |
NameID Attribute |
emailAddress |
Signature Algorithm |
|
Want Attribute Statement |
Checked |
Want Assertion Signed |
Checked |
Want Name ID |
Checked |
Kasm SAML Configurations
Click Save to save the changes.
Click the Edit icon to re-open to SAML configuration. Leave this page open and continue to the next steps.
ADFS Party Trust
Log into the ADFS Management Console.
Right-Click Relying Party Trusts and select Add Relying Party Trust. The wizard will open.
Select Claims aware then click Start.
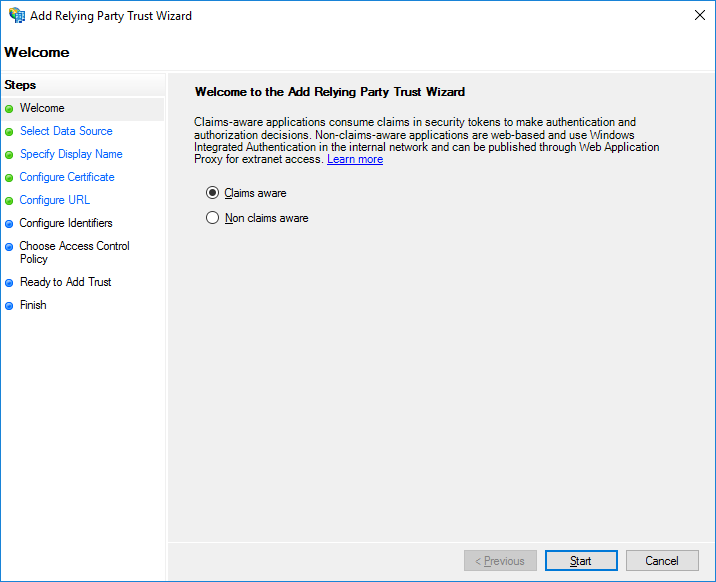
Claims Aware
Select Enter data about the relying party manually and click Next.
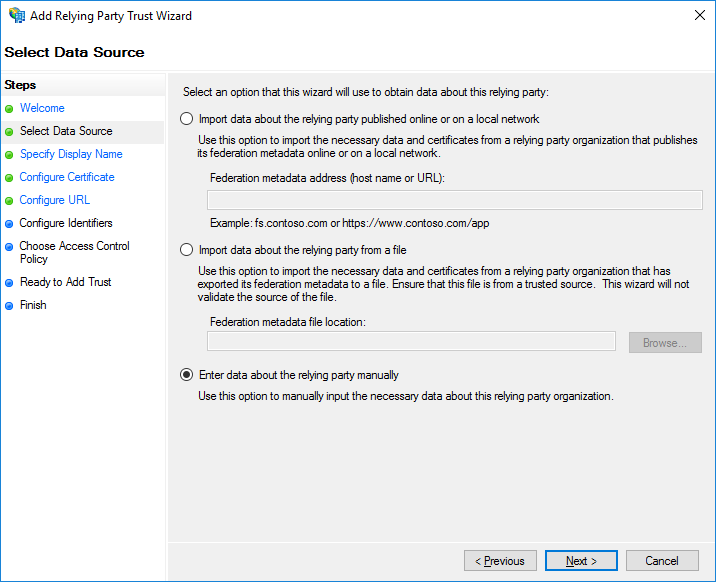
Relaying Party Manually
Enter a Display Name and select Next e.g (Kasm ADFS).
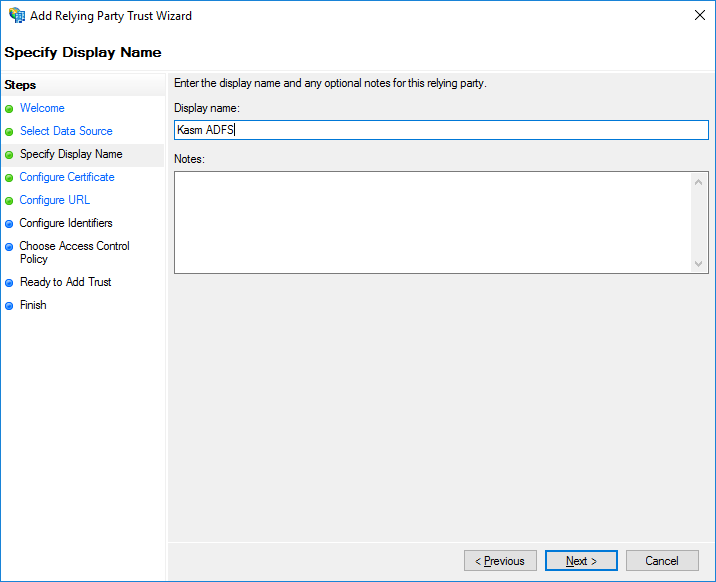
Display Name
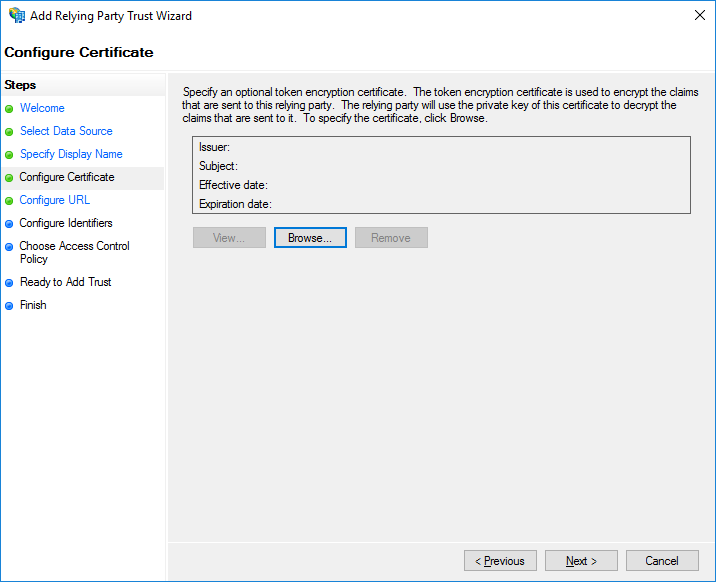
Click Next to accept the defaults for the Configure Certificate step.
Configure Certificate
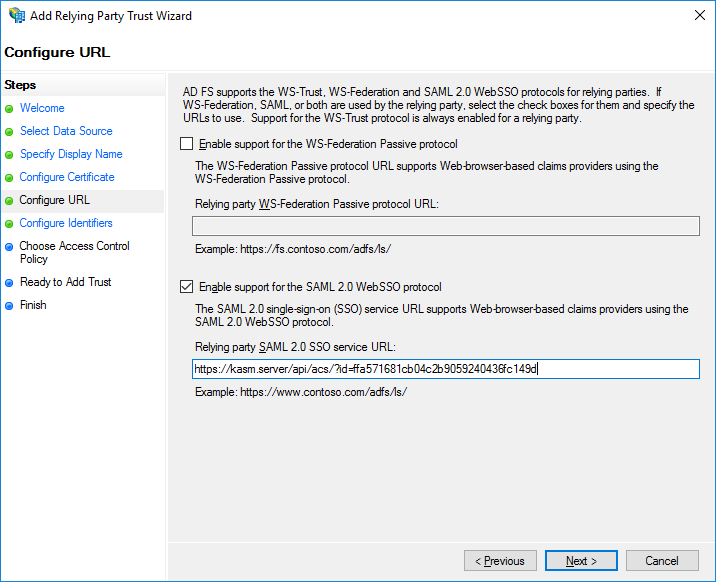
Select Enable support for the SAML 2.0 WebSSO Protocol. Enter the Single Sign On Server URL from the Service Provider section of the KASM SAML configuration page started in the previous section. Click Next.
Enable SSO
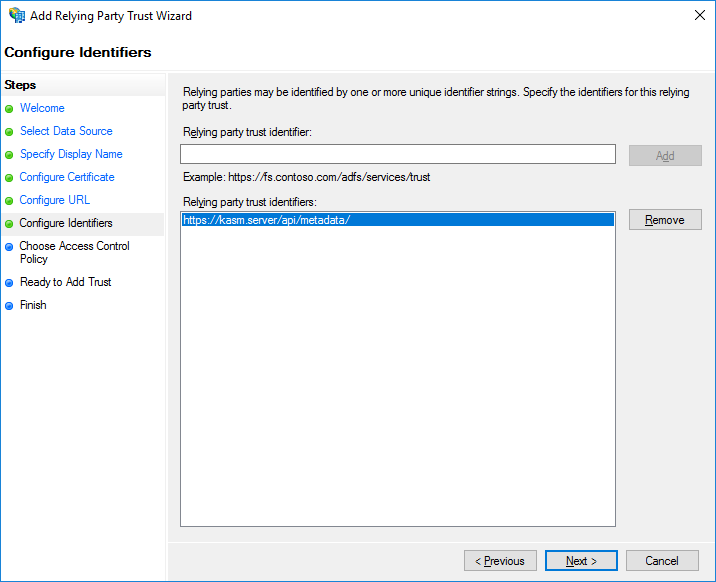
In the Relay party trust identifier, enter the Entity ID from the Service Provider section from the Kasm SAML configuration page started in the previous section. Click Add, then Click Next.
Add Service Provider
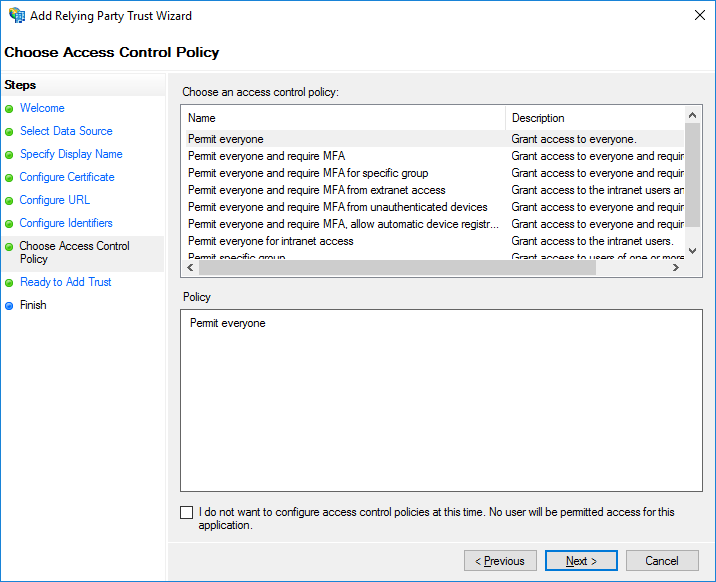
Select Permit Everyone, then click Next.
Permit Access
No changes are needed for the Ready to Add Trust section. Click Next.
At the Finish screen, Uncheck Configure claims issuance policy for this application, then click Close.
Right click the new trust (e.g Kasm ADFS) and select Properties.
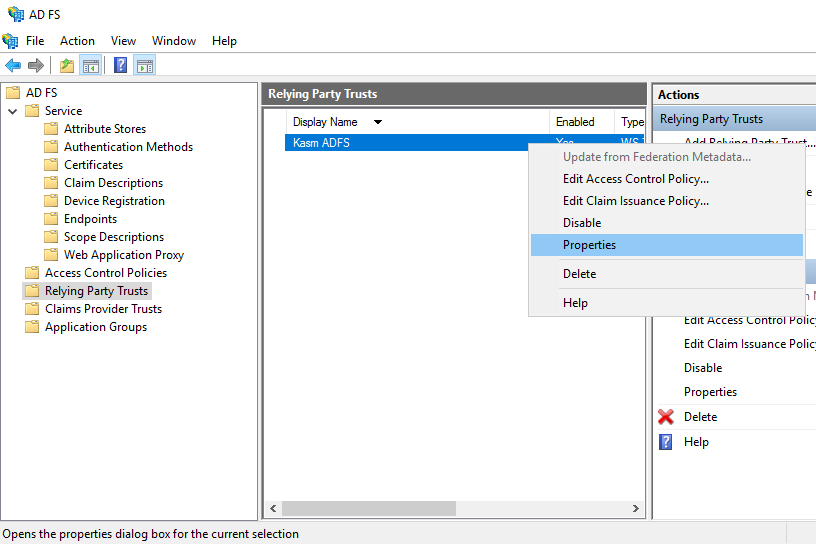
ADFS Properties
Select the Endpoints tab, then click Add SAML.
Select SAML Logout as the Endpoint type and select POST as the Binding.
Enter https://<adfs.server>/adfs/ls/?wa=wsignout1.0 in the Trusted URL. Click OK, then OK again.
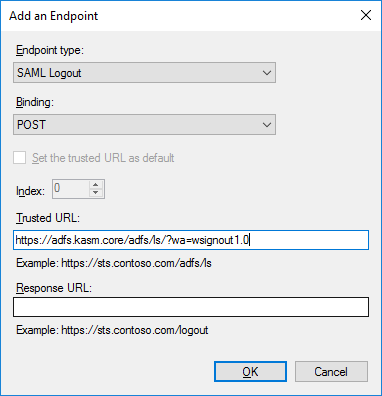
Logout Configuration
ADFS Edit Claim Issuance Policy
From the ADFS management console, select Relying Party Trusts, right click trust previously configured (.e.g Kasm ADFS) and select Edit Claim Issuance Policy.

Edit Issuance Policy
Click Add Rule.

Modify Issuance Policy
In the Claim rule template field, select Send LDAP Attributes as Claims. Click Next.
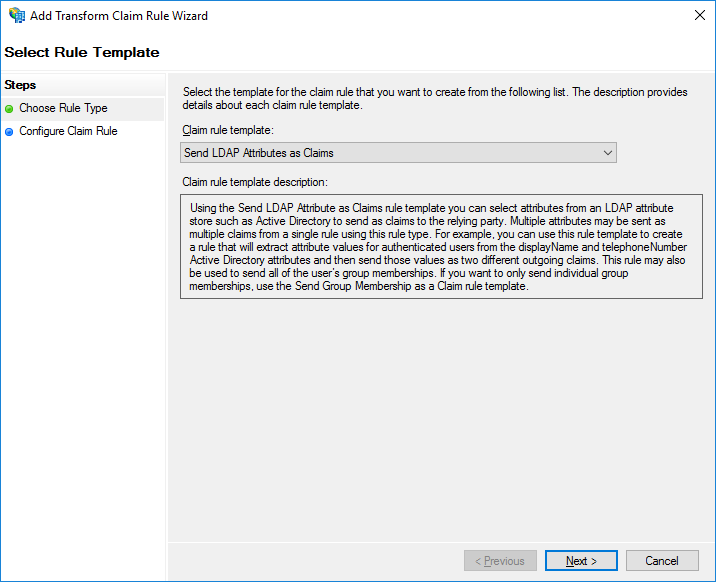
Select Template
Enter a name in Claim rule name, then select Active Directory in the Attribute store drop down.
Select E-Mail-Addresses as the LDAP Attribute. Select E-Mail-Address as the Outgoing Claim Type.
In another entry, select Is-Member-Of-DL in LDAP Attribute and select Group in the Outgoing Claim Type. Click Finish.
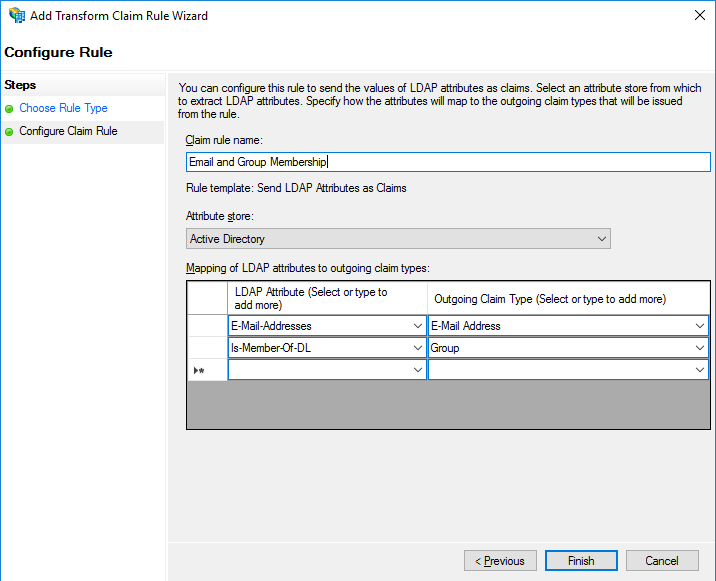
Email Claim
Create another rule to expose the email address as the NameID. Click Add Rule.
Select Transform an Incoming Claim from the Claim rule template dropdown. Click Next.
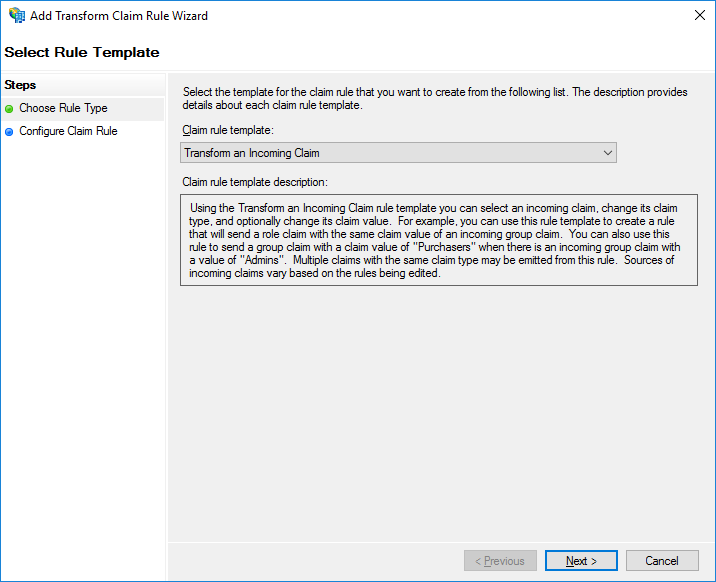
Claim Rule Template
Enter a name in Claim rule name.
Select E-Mail Address for Incoming claim type.
Select Name ID for Outgoing claim type.
Select Email for Outgoing name ID format and click Finish.
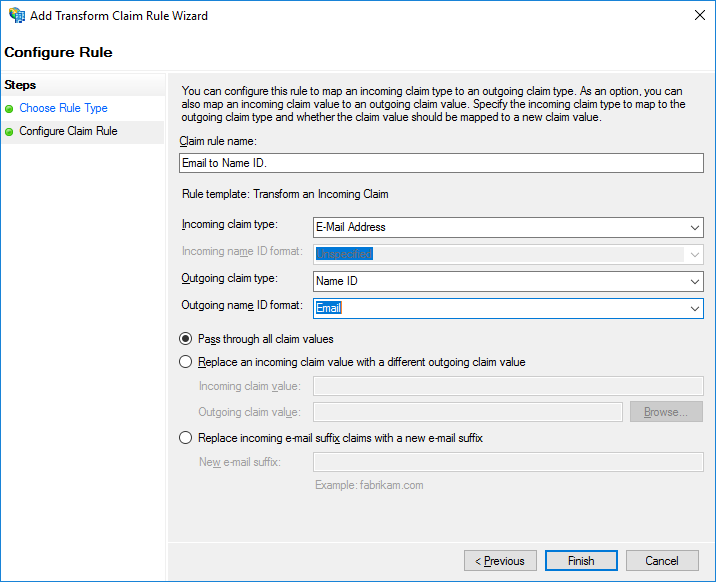
Save Email Claim Rule
Back in the Edit Claim Issuance Policy window, click OK
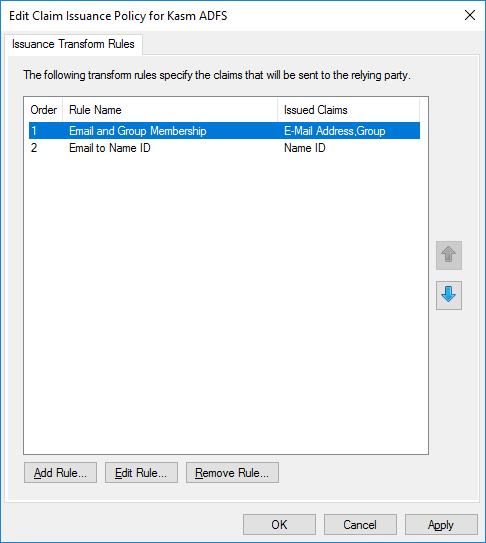
Edit Issuance Policy
Verifying Access
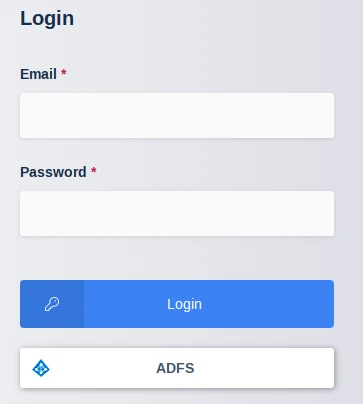
Navigate to the Kasm UI Login screen. An “ADFS” button is visible representing the SAML config.
Click ADFS
Kasm Login
The user is navigated to the ADFS login portal. Enter the username/password of the desired user.
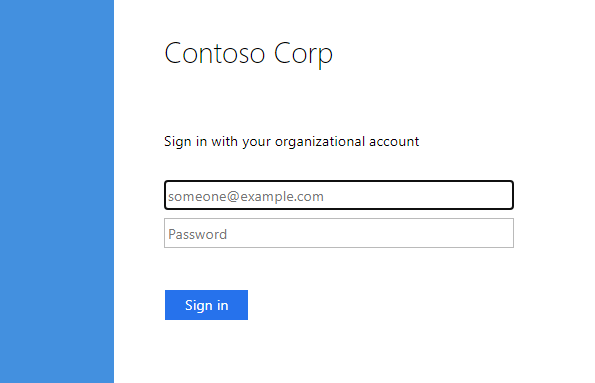
ADFS Login
The user is redirected and logged into Kasm.
From the Kasm UI select Logout. The user is logged out and redirected to the ADFS logout page.
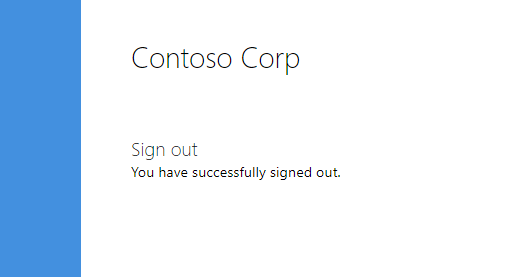
ADFS Logout
ADFS Group Mapping
In the previous configuration ADFS was configured to pass along the user’s Active Directory group membership in the SAML assertions. Administrators can leverage this to automatically map users to groups defined in Kasm based off their group membership in Active Directory.
Log into the Kasm UI as an administrator.
Select Access Management -> Groups then click Add Group.
Enter a Name and Priority.
Save the new group by clicking Save.

New Group
On the groups screen, using the arrow menu select Edit on the group that was just created.
Navigate to the SSO Group Mappings tab and select Add SSO Mapping.
Select the SAML IDP that was created above “SAML - ADFS” for the SSO Provider.
Enter the group DN in Group Attributes (e.g CN=MyGroup,OU=MyOrg,DC=kasm,DC=core).
Click Submit.
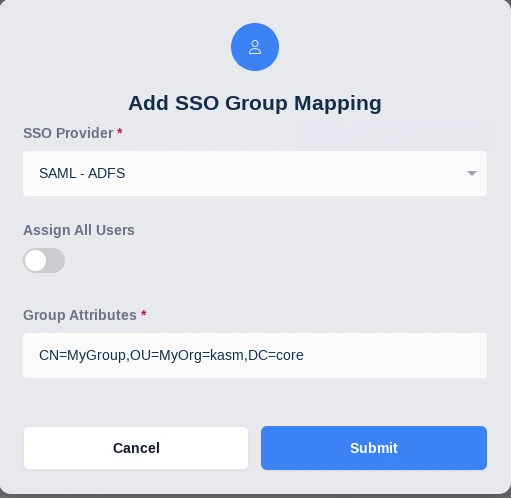
SAML SSO Group Mapping
Login via SAML as a user that is a member of the group. Notice the users is automatically placed in the Kasm group.