Azure Active Directory SAML Setup
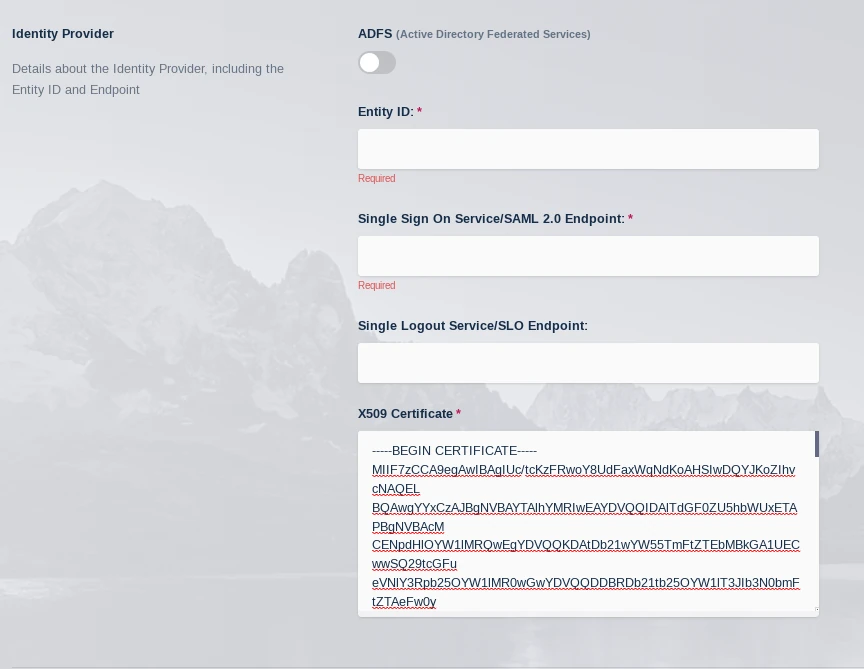
Create a new SAML configuration in Kasm
Log into the Kasm UI as an administrator.
Select Access Management -> Authentication -> SAML -> Add Configuration
The SAML 2.0 Configuration page will auto-generate the Entity ID, Single Sign On Service, Single Logout Server, and Relay State values.
Check Enable and enter a Display Name. e.g (Azure AD)
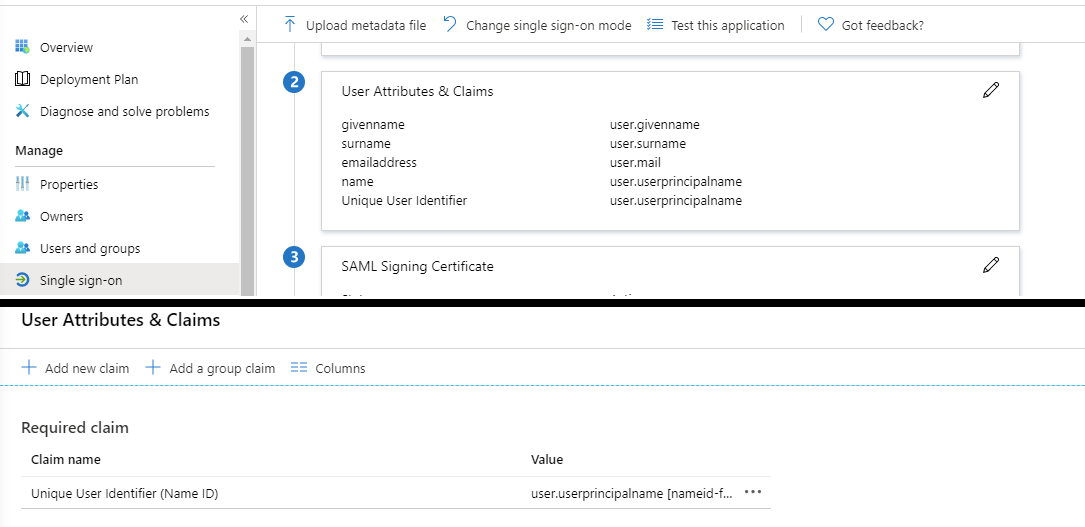
Enter
http://schemas.microsoft.com/ws/2008/06/identity/claims/groupsin Group Member AttributeEnter
emailAddressin NameID Attribute

Kasm SAML Configurations
Leave this page open and continue to the next steps.
Add a new application in Azure
Navigate to Azure Active Directory in the Portal.
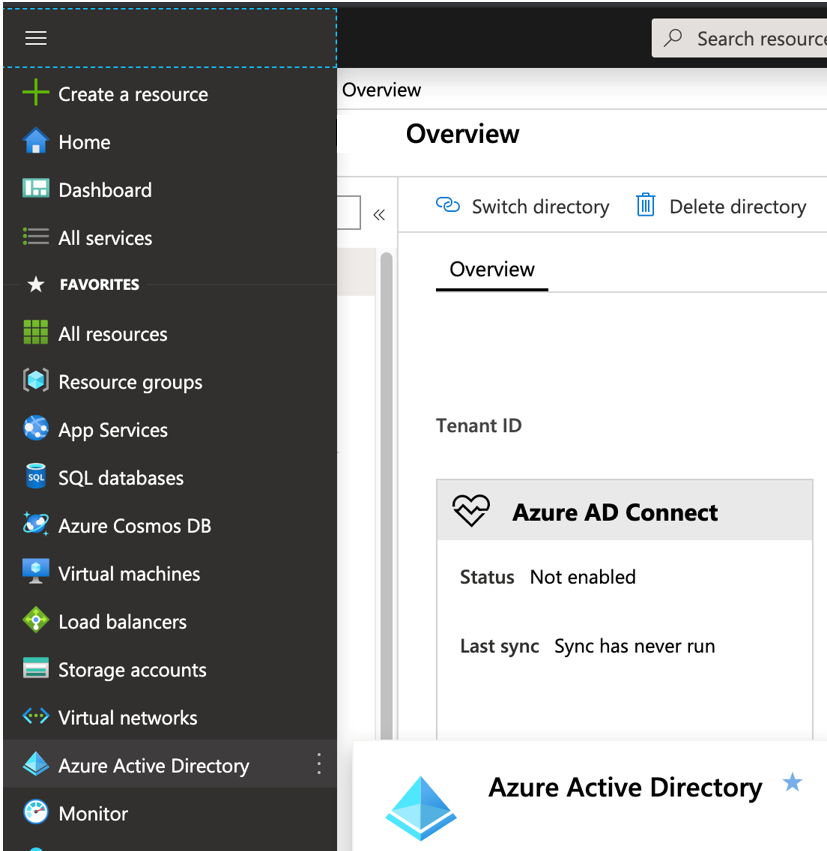
Azure Portal
Under the Manage section of the menu, select Enterprise applications.
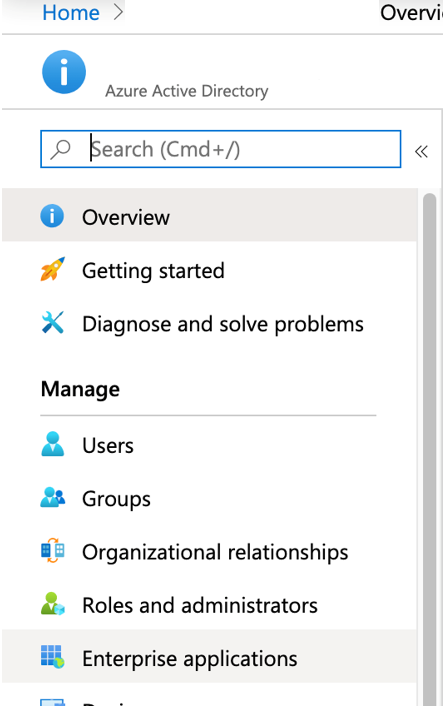
Enterprise Applications
Click the New Application button and select Non-Gallery application. Provide a name. e.g (Kasm) and click Add
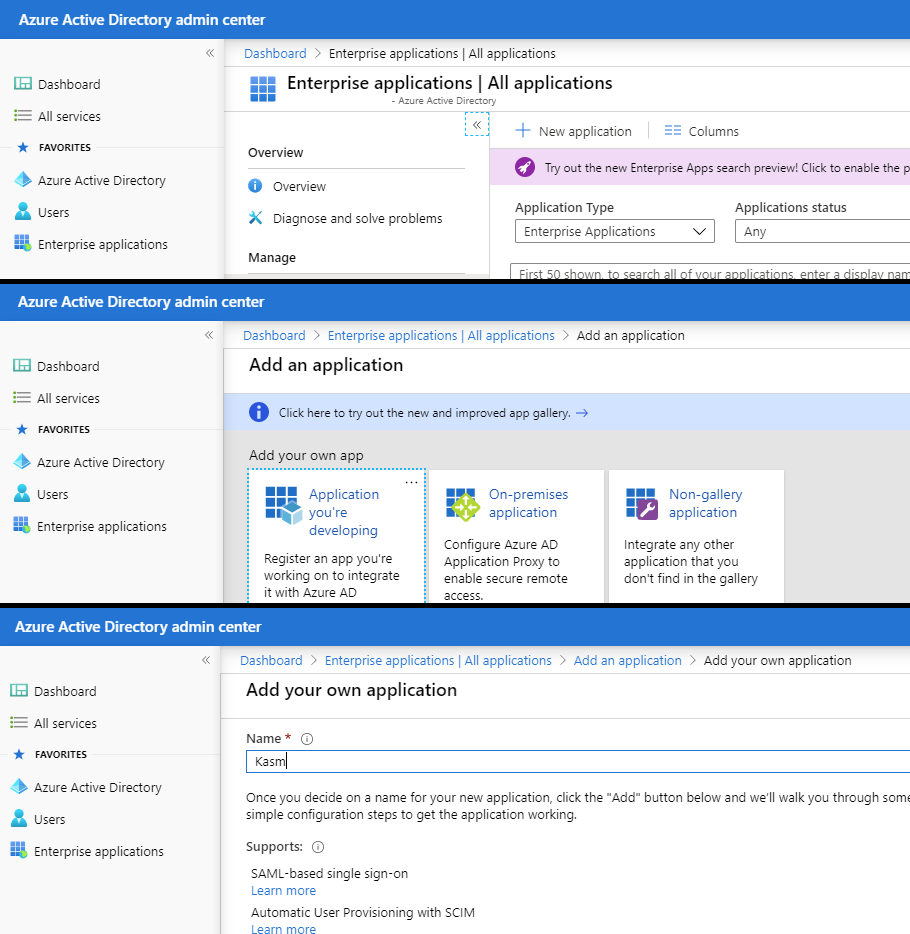
New Applications
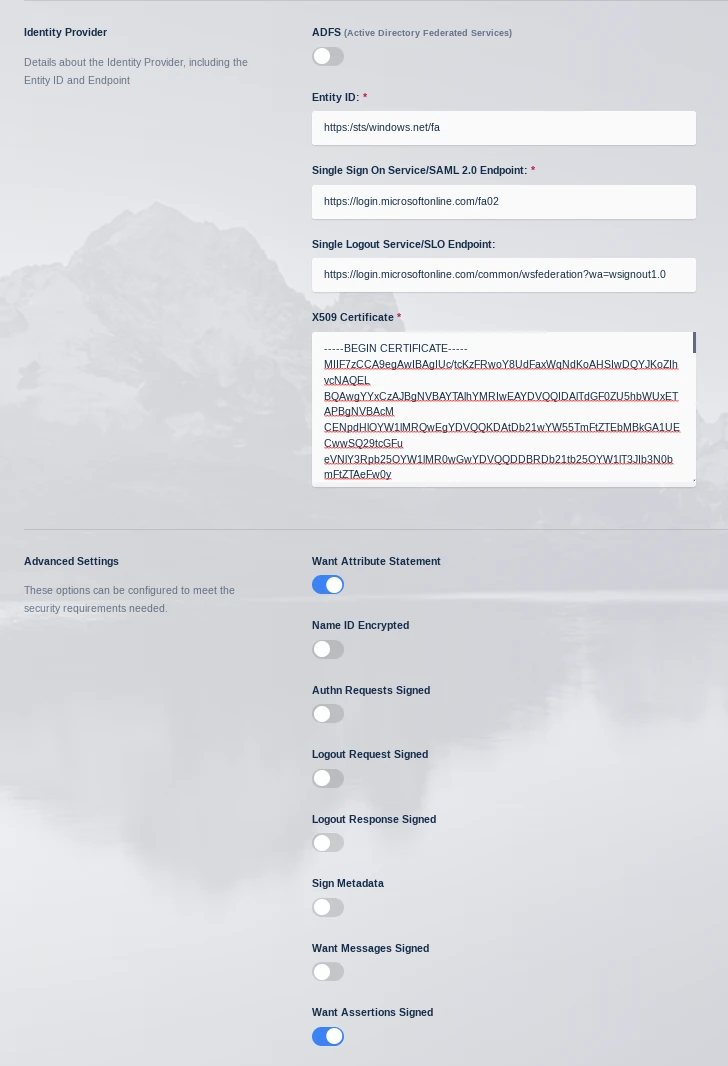
Basic SAML Configurations
Select Single Sign-On under the Manage Menu.
Select SAML.
Select Edit next to the Basic SAML Configuration
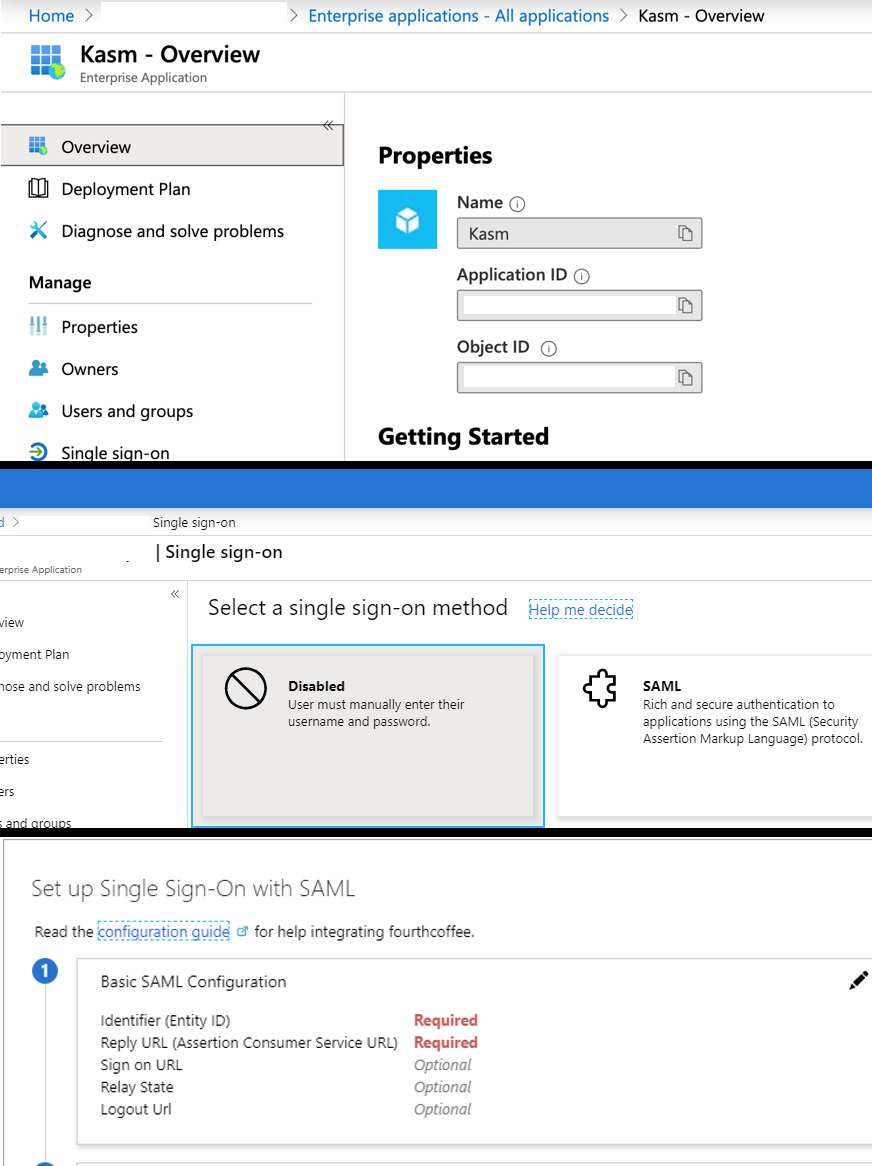
SAML Single Sign-On
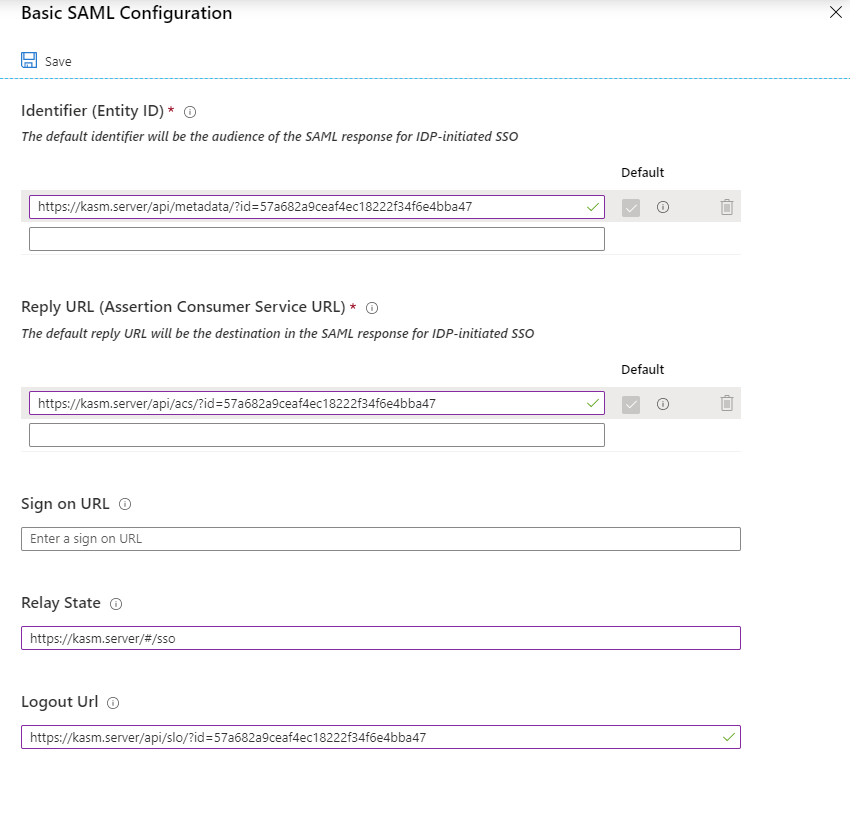
Copy the Service Provider entries from the Kasm SAML Configurations started in the previous section into the Basic SAML configurations and click Save , and close the section.
Kasm Property Name |
Azure Property Name |
Entity ID |
Identifier (Entity ID) |
Single Sign On Service |
Reply URL (Assertion Consumer Service URL) |
Single Logout Service |
Logout URL |
Relay State |
Relay State |
Basic SAML Configurations
User Attributes and Claims
Select Single Sign-On under the Manage Menu.
Select SAML.
Select Edit next to the User Attributes and Claims
Click Add a Group to Claim
Add a Group to Claim
Select Security Groups, leave the Source Attributes as Group ID and click Save then close the section.
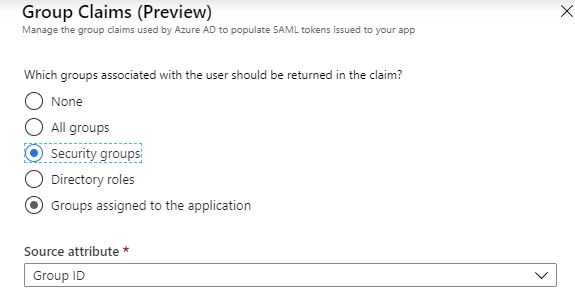
Group Claims
SAML Signing Certificate
Select Single Sign-On under the Manage Menu.
Select SAML.
Click Download next to Certificate (Base64) in the SAML Signing Certificate section . Save this file for later
Select Edit next to the SAML Signing Certificate
Change the Singing Algorithm to SHA-1 and click Save. Close the section.
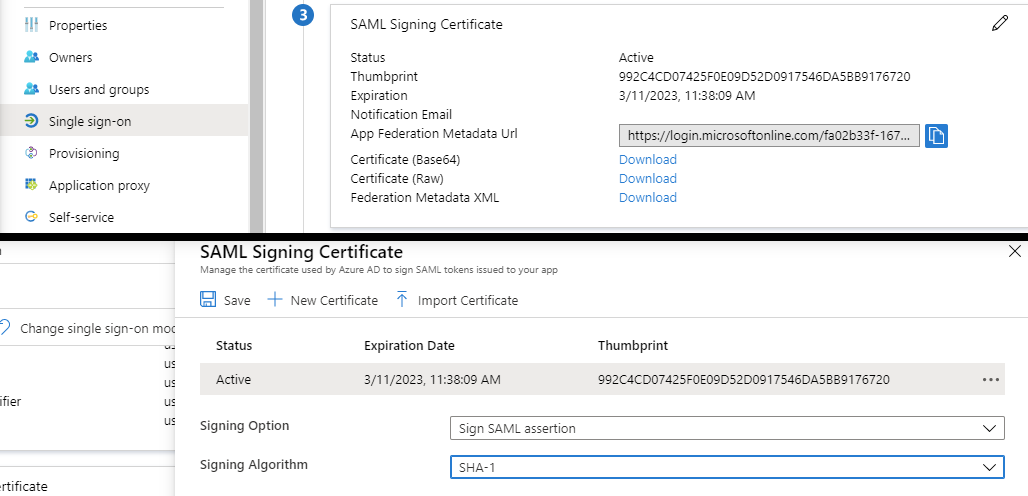
Singing Certificate
Open the Base64 certificate that was downloaded in the earlier step in a text editor. Copy the contents into the X509 Certificate setting in the Identity Provider section of the Kasm configuration
X509 Certificate
Set Up Kasm
Select Single Sign-On under the Manage Menu.
Select SAML.
Review Section 4 , Set Up Kasm. Copy the properties into the Identity Provider options in the Kasm Configuration.
Kasm Property Name |
Azure Property Name |
Single Sign On Service / SAML 2.0 Endpoint |
Login URL |
Entity ID |
Azure AD Identifier |
Single Logout Service / SLO Endpoint |
Logout URL |
Identity Provider
In the Advanced Settings of check Want Assertion Signed and click Submit
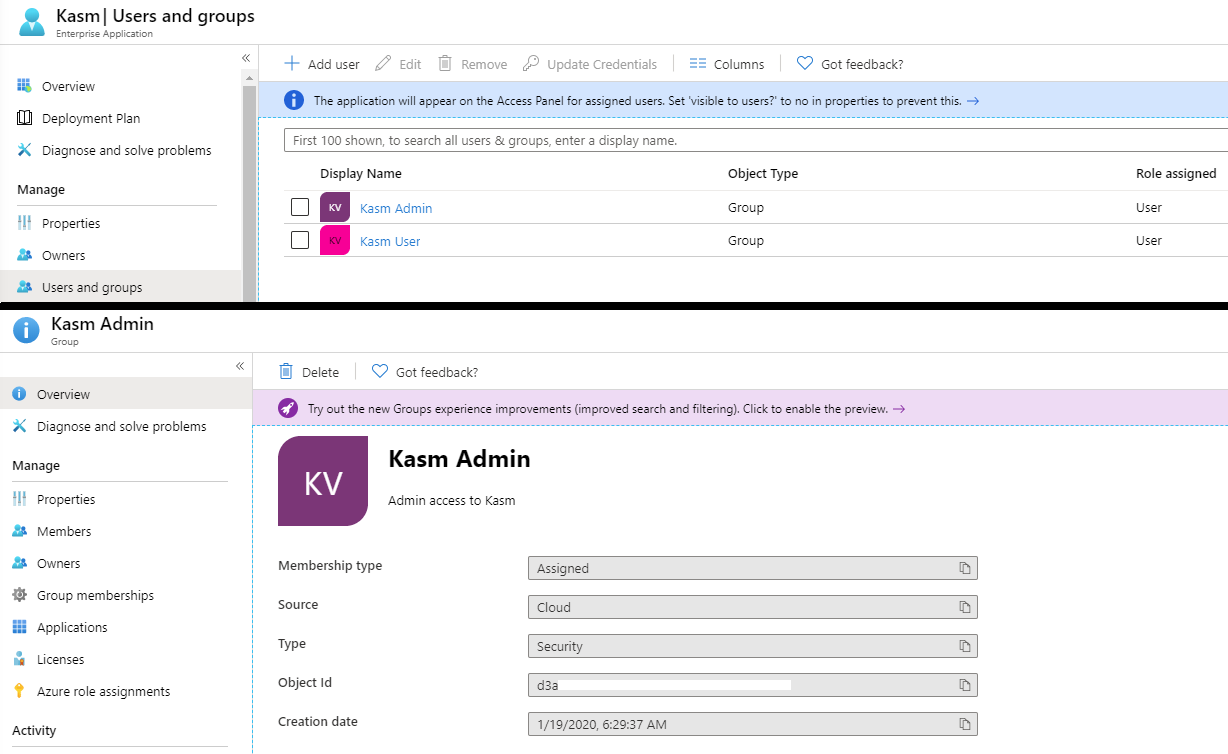
Mapping Users
You must assign users or groups to the Azure Kasm application. This will provide users access to login. Azure will then pass all user group memberships during login so that Kasm can determine Authorization (e.g mapping AD groups to Kasm groups)
In this example, a Kasm Users and Kasm Admin groups were defined.
Navigate to Azure Active Directory in the Portal.
Under the Manage section of the menu, select Enterprise applications.
Search for Kasm and select it.
Click Users and Groups under the Manage menu.
Click Add Users and add the desired users and group assignments.
Inspect the desired groups and note the Object ID. This will be used to map to Kasm groups.
Group Assignments
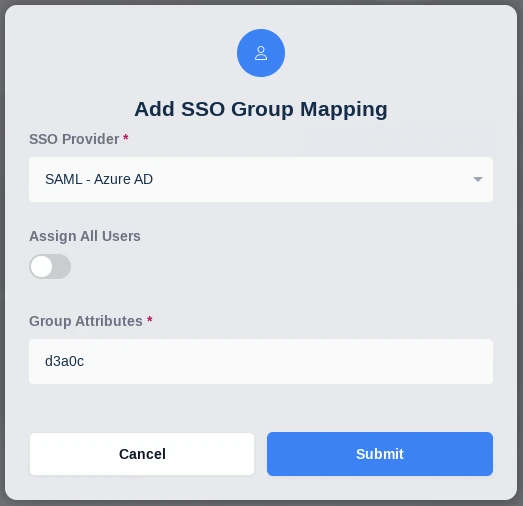
Log into the Kasm UI as an administrator.
Select Access Management -> Groups, then using the arrow menu click Edit next to the Administrators Group.
Navigate to the SSO Group Mappings tab and select Add SSO Mapping.
Select “SAML - Azure AD” as the SSO Provider and enter the Object Id for the desired Azure AD Security group previously configured into the Group Attributes field.
Add SSO Mapping
Testing Access
Log out of the Kasm UI if already logged in.
Navigate to the Kasm UI login page.
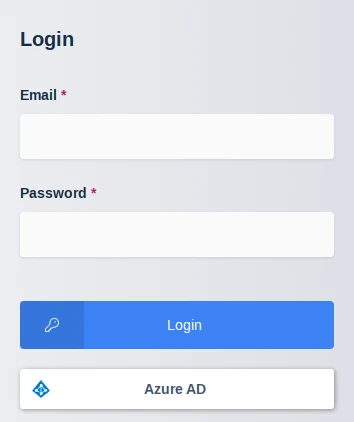
Kasm Login
Click Azure AD to initiate the SAML SSO process.
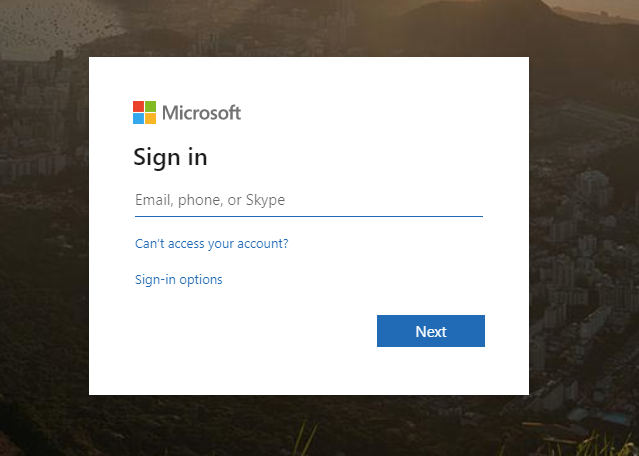
Azure Login
Known Issues
SLO Error AADSTS75005
Azure AD may present the following error when a user logs out the application:
AADSTS75005: The request is not a valid SAML 2.0 protocol message.
In some Azure AD deployments, Microsoft will generate a SLO URL similar to https://login.microsoftonline.com/<id>/saml2
This endpoint requires an encoding that is not currently supported by Kasm. The workaround is to utilize the older federated SLO endpoint https://login.microsoftonline.com/common/wsfederation?wa=wsignout1.0
for the Single Logout Service/SLO Endpoint in the Kasm SAML Configuration.