PingOne SAML Setup
Create a new SAML configuration in Kasm
Log into the Kasm UI as an administrator.
Select Access Management -> Authentication -> SAML -> Add Configuration
The SAML 2.0 Configuration page will auto-generate the Entity ID, Single Sign On Service, Single Logout Server, and Relay State values.
Check Enable and enter a Display Name. e.g (PingOne)
Enter
memberOfin Group Member AttributeEnter
emailAddressin NameID Attribute
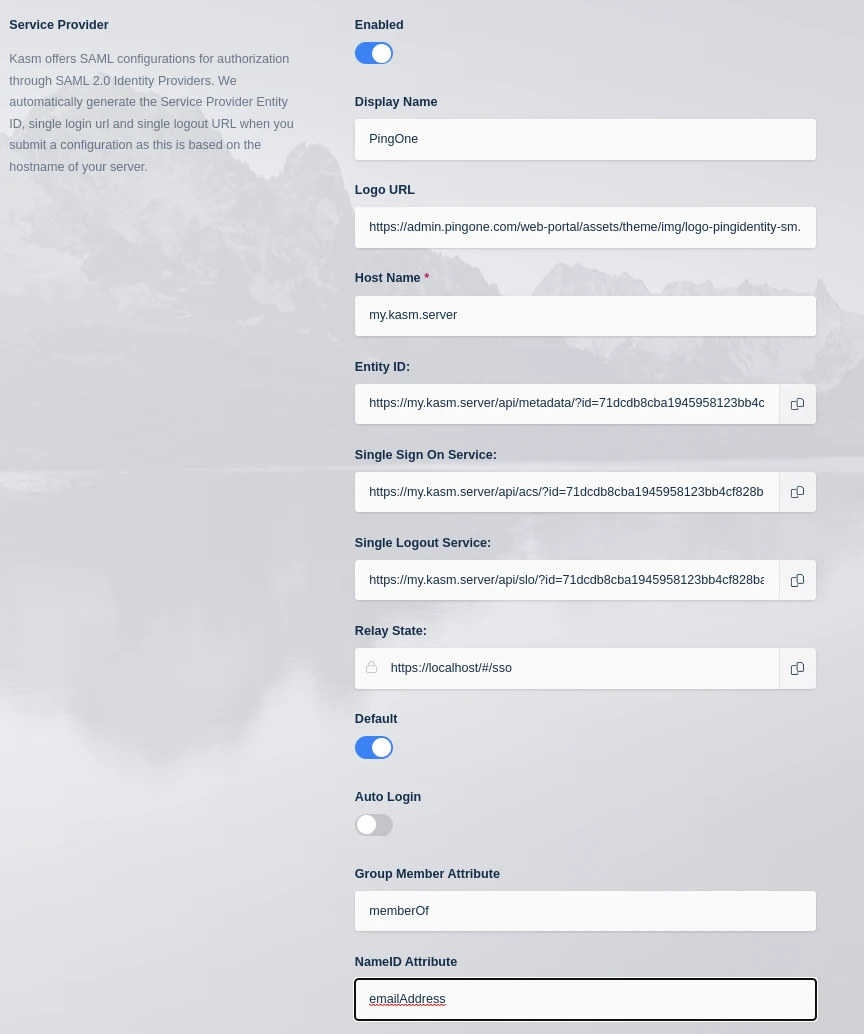
Kasm SAML Configurations
Leave this page open and continue to the next steps.
Create a new SAML Application in PingOne
In the PingOne Admin portal, click Applications -> My Applications -> Add Application -> New SAML Application
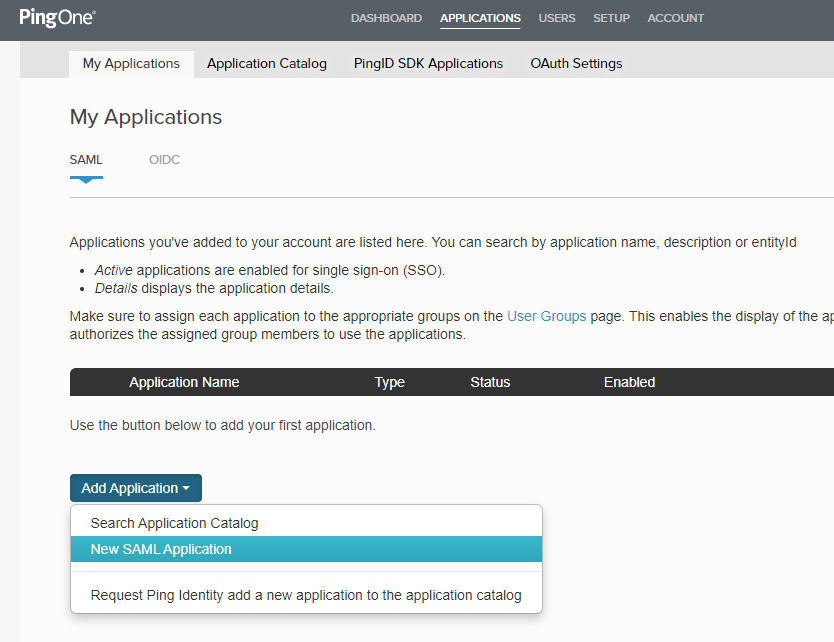
Add SAML Application
Give the application a Name, Description , Category and optionally an icon. Click Continue to Next Step
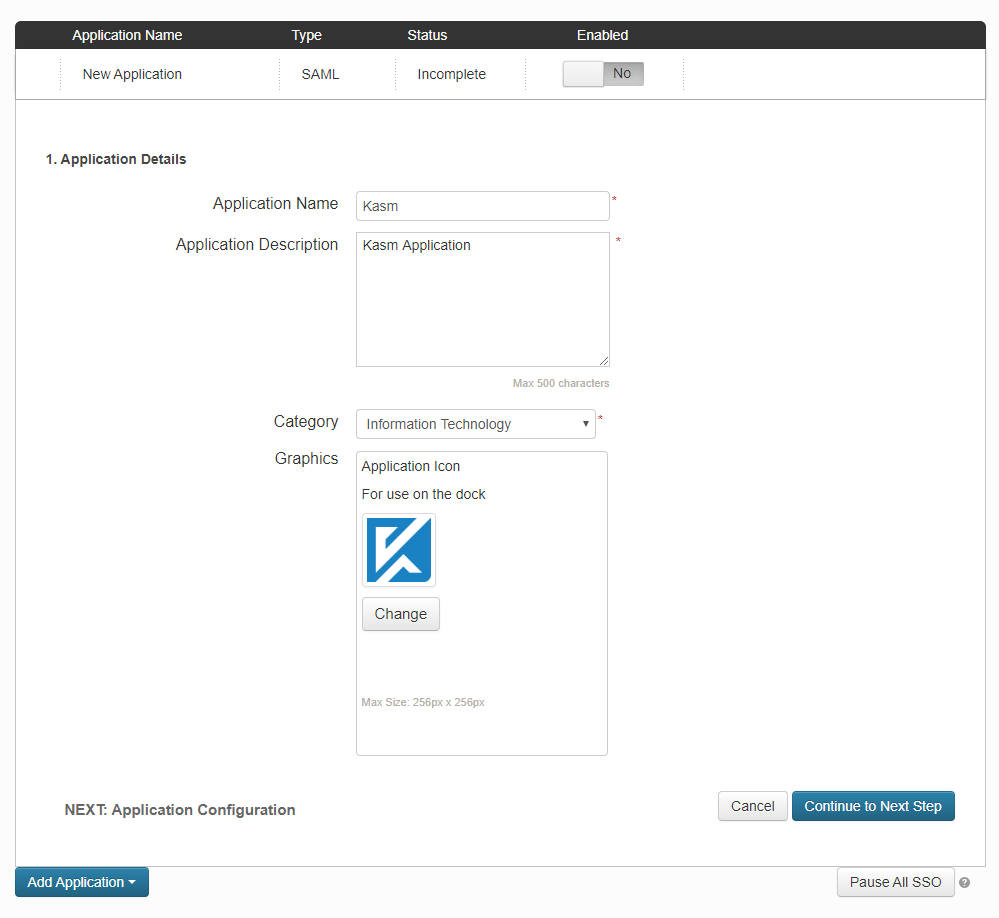
New SAML Application
Copy the Service Provider entries from the Kasm SAML Configurations started in the previous section into the Basic SAML configurations and click.
Kasm Property Name |
PingOne Property Name |
Entity ID |
Entity ID |
Single Sign On Service |
Assertion Consumer Service (ACS) |
Single Logout Service |
<Server URL> (e.g https://kasm.server) |
Relay State |
Application URL |
Select Redirect for Single Logout Binding Type
Select RSA_SHA1 for Signing Algorithm
Select Continue to Next Step
At the SSO Attribute Mapping page click Continue to Next Step
At the Group Access page enabled the groups desired. In this example we will add both the built in Domain Administrators@directory and Users@directory groups.
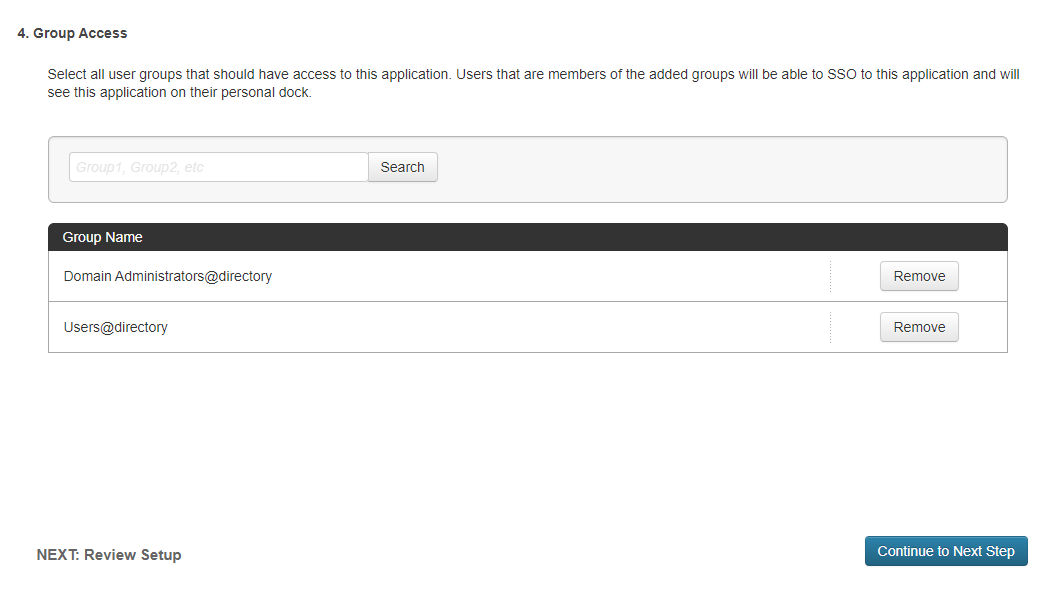
Group Access Selections
Select Continue to Next Step. The Review Setup page is shown.
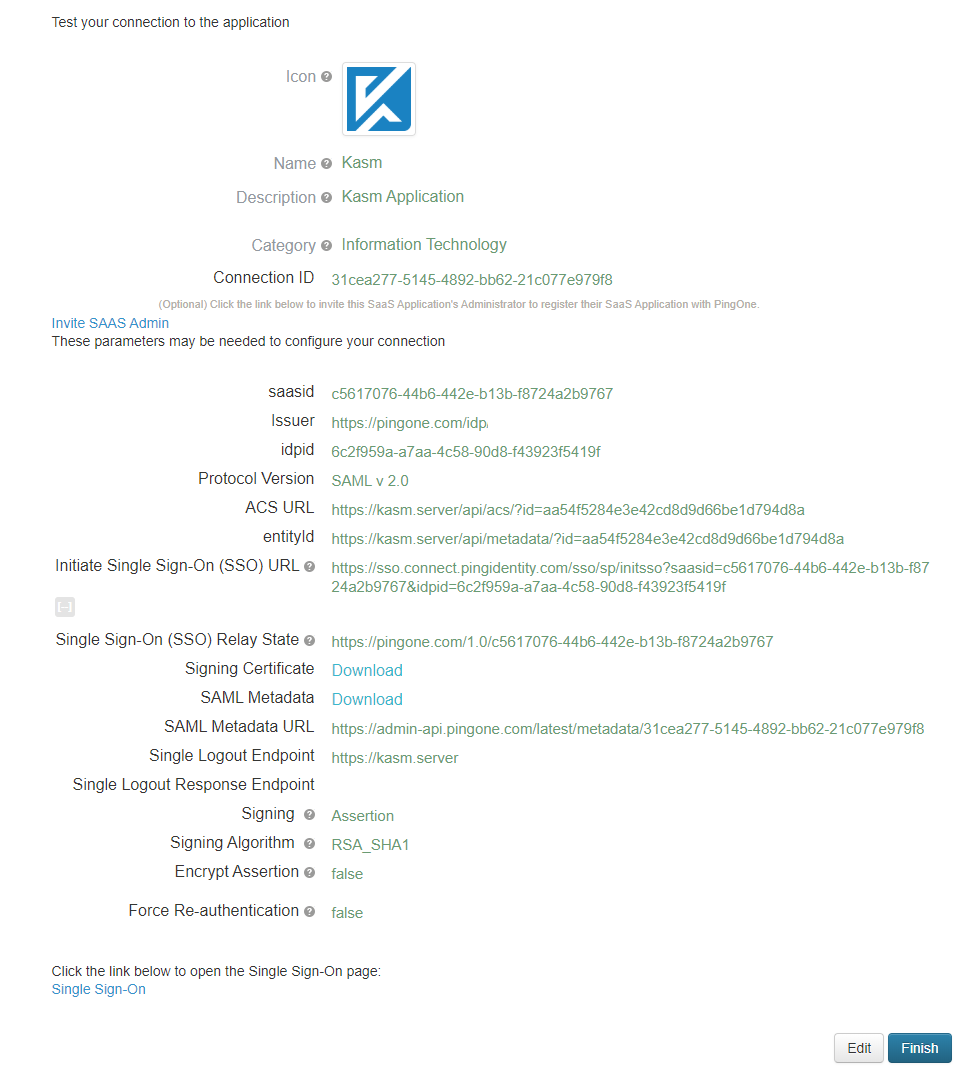
Review Setup
Click Download next to Signing Certificate. Open this file with a text editor. This will be used as the Singing Certificate in the next section.
Click Download next to SAML Metadata. Open the file with a text editor.
Identify the Location for the
md:SingleLogoutService Binding="urn:oasis:names:tc:SAML:2.0:bindings:HTTP-Redirectproperty. This will be used as the Single Logout Service property in the next section.Identify the Location for the
md:SingleSignOnService Binding="urn:oasis:names:tc:SAML:2.0:bindings:HTTP-Redirectproperty. This will be used as the Single Sign On Service property in the next section.

Group Access Selections
Complete SAML configuration in Kasm
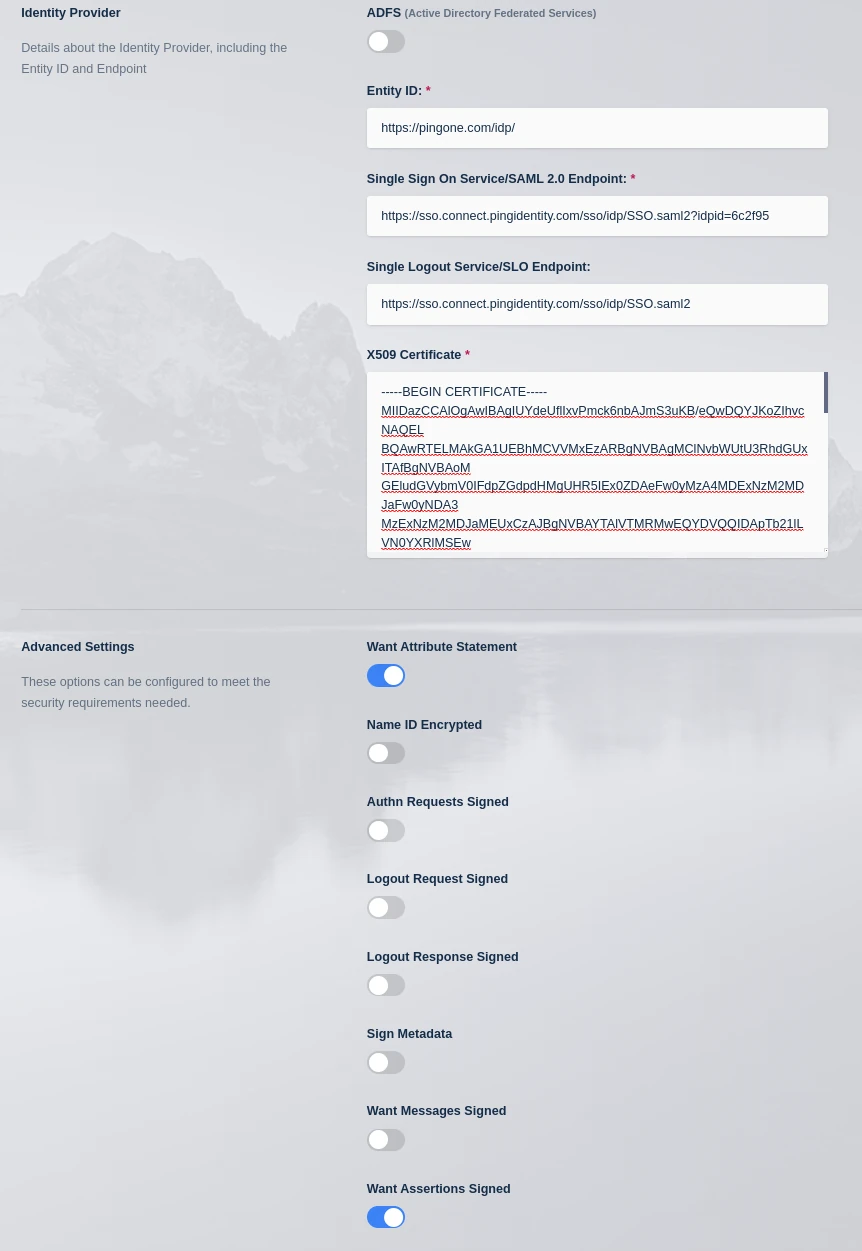
Back in the Kasm UI SAML configuration page update the Identity Provider selections
Kasm Property Name |
Azure Property Name |
Entity ID |
Issuer |
Single Sign On Service |
Single Sign On Service |
Single Logout Service / SLO Endpoint |
Single Logout Service |
X509 Certificate |
Signing Certificate |
In the Advanced Settings of check Want Assertion Signed and click Save
Group Access Selections
Mapping Users
PingOne is not set up to pass along the user’s group membership during the SAML assertion. These groups can be mapped to groups within the Kasm Application. In the previous step we gave application login permissions to both the Domain Administrators@directory and Users@directory groups in PingOne. The following steps will now map the PingOne Domain Administrators@directory group to the Administrators group in Kasm.
In the PingOne Admin portal, click Users -> User Groups
Inspect the Domain Administrators@directory group.

PingOne User Groups
Log into the Kasm UI as an administrator.
Select Access Management -> Groups, then using the arrow menu click Edit next to the Administrators Group
Navigate to the SSO Group Mappings tab and select Add SSO Mapping.
Select the SAML IDP that was created above “SAML - PingOne” for the SSO Provider.
Enter Domain Administrators@directory into the Group Attributes field.
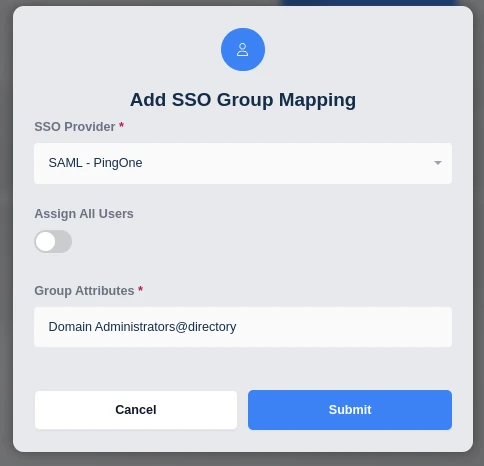
Add SSO Group Mapping
Testing Access
Log out of the Kasm UI if already logged in.
Navigate to the Kasm UI login page.
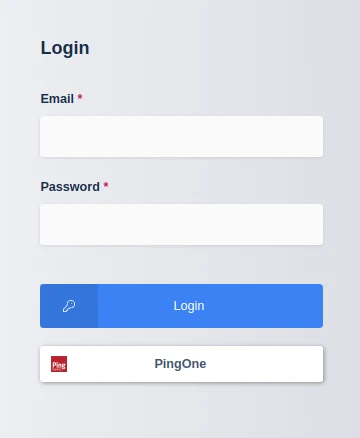
Kasm Login
Click PingOne to initiate the SAML SSO process.
PingOne Login
Login as a member of the Domain Administrators@directory group.