Keycloak OpenID Setup
Warning
Be mindful when configuring OpenID providers that are public. Any user that can successfully authenticate with the provider will have access to your deployment of Kasm Workspaces. While access to Kasm Workspace apps and desktops can be resitricted with Kasm group permissions, any user of the public authentication provider would still be able to login to your deployment of Kasm. It is recommended to use a private OpenID provider unless your intention is to allow authentictioned access to all users of the OpenID platform provider.
This guide walks through a basic setup allowing Keycloak users to authenticate with your Kasm deployment.
Reference Docs:
Creating a Keycloak OAuth App
Login to the Keycloak portal as an Admin.
Under the the desired realm (e.g Master) , select Realm Settings.
Click OpenID Endpoint Configuration next to Endpoints.
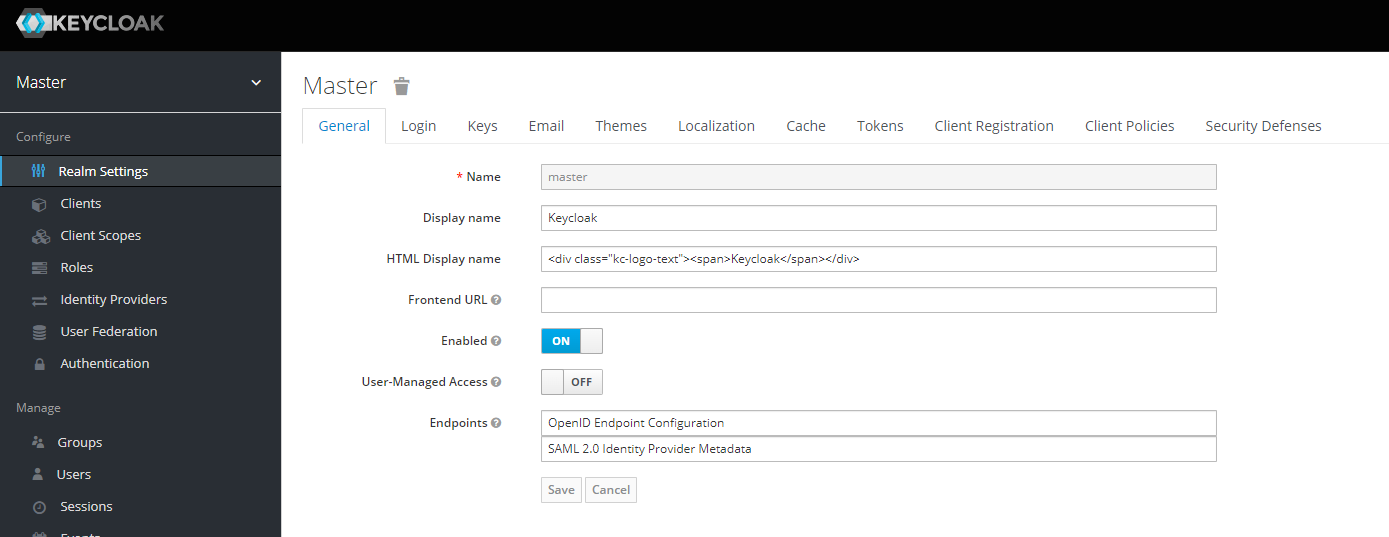
Realm Settings
Save off the urls for
issuer,authorization_endpoint,token_endpoint, anduserinfo_endpoint. These will be used in future steps.

Keycloak Endpoints
Back in the console, select Clients under the Realm.
Select Create.
Define a Client ID , e.g
kasm-12345. Selectopenid-connectfor Client Protocol and enter the URL for the Kasm deployment under Root URL (e.ghttps://kasm.example.com).
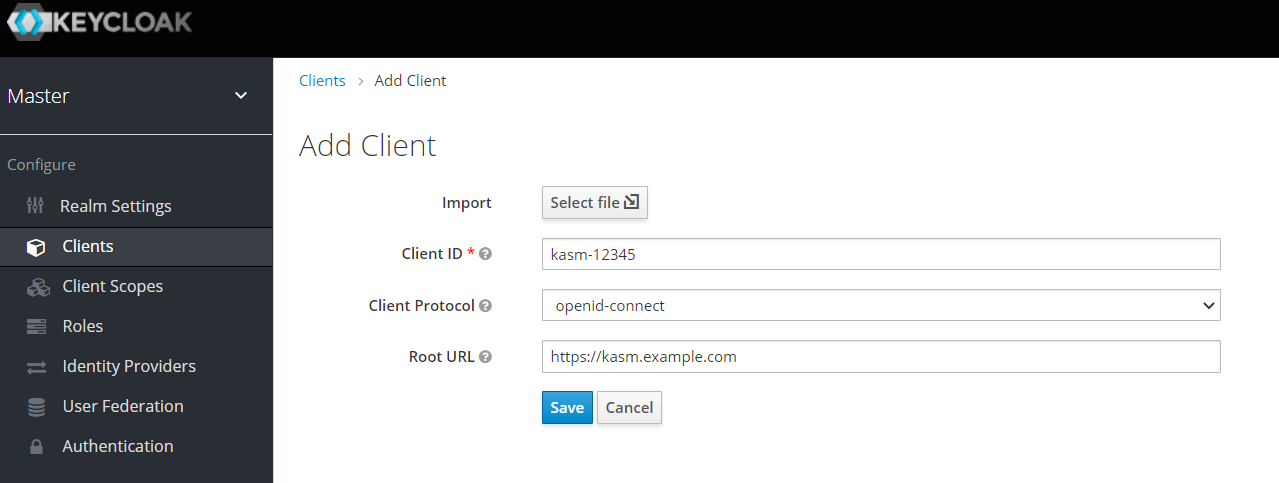
Add Client
In the client settings, change Access Type to
confidential, then slick Save.In the Settings section, at the bottom, under Logout, choose one of the following:
Warning
Backchannel Logout is recommended as it is more stable and secure than front-channel. Choose front-channel if backchannel is not possible, e.g. keycloak is unable to make a direct HTTPS request to Kasm.
Front-channel Logout
Set Front-channel logout to On
Fill out Front-channel logout URL with the endpoint URL for the kasm deployment (e.g.
https://kasm.example.com/api/oidc_frontchannel_logout)Click Save
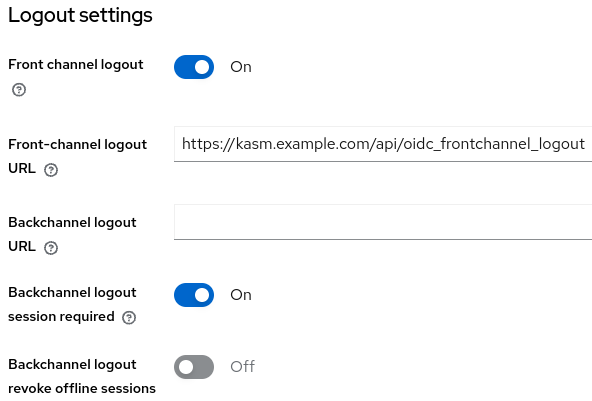
Front-channel SLO
Backchannel Logout
Set Front channel logout to Off
Fill out Backchannel logout with the endpoint URL for the kasm deployment (e.g.
https://kasm.example.com/api/oidc_backchannel_logout)Set Backchannel logout session required to On
Click Save
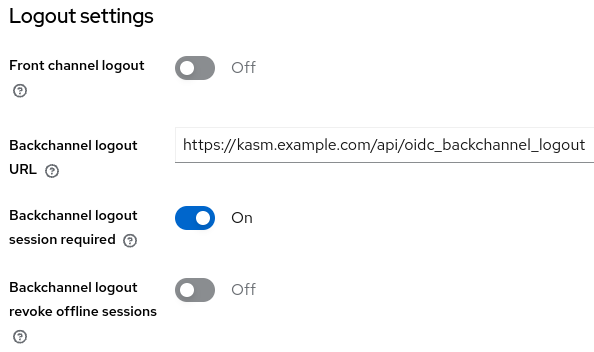
Backchannel SLO
Select Credentials. Save off the Secret. It will be used in future steps.

Client Secret
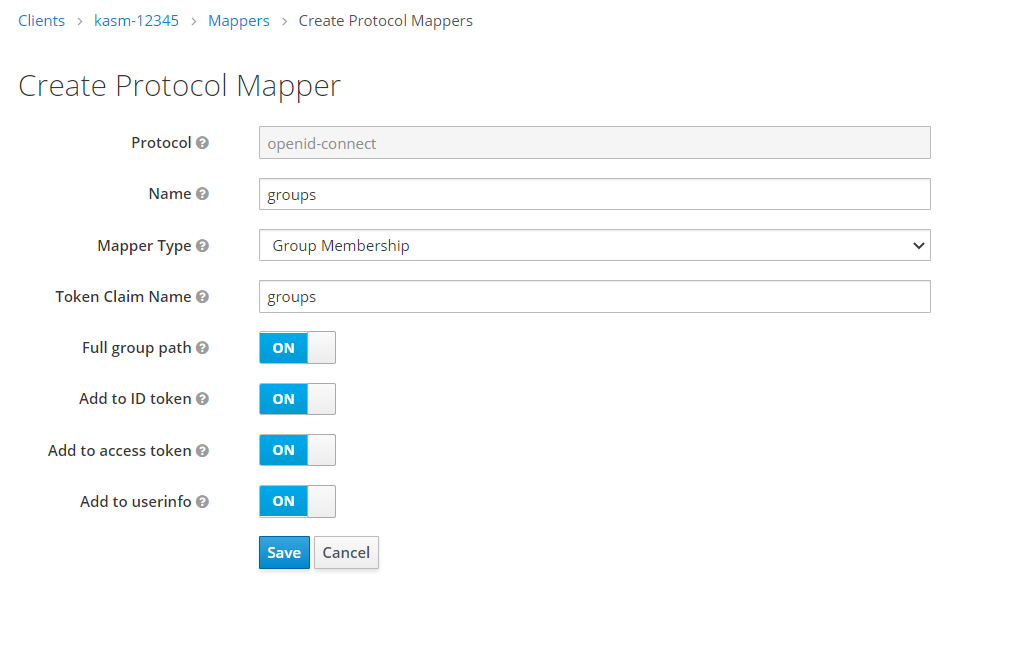
In the client settings, select Mappers, then click Create.
Enter
groupsfor Name, and select Group Membership from the Mapper Type. Entergroupsfor Token Claim Name, then select Save.
Mappers
Kasm OpenID Config
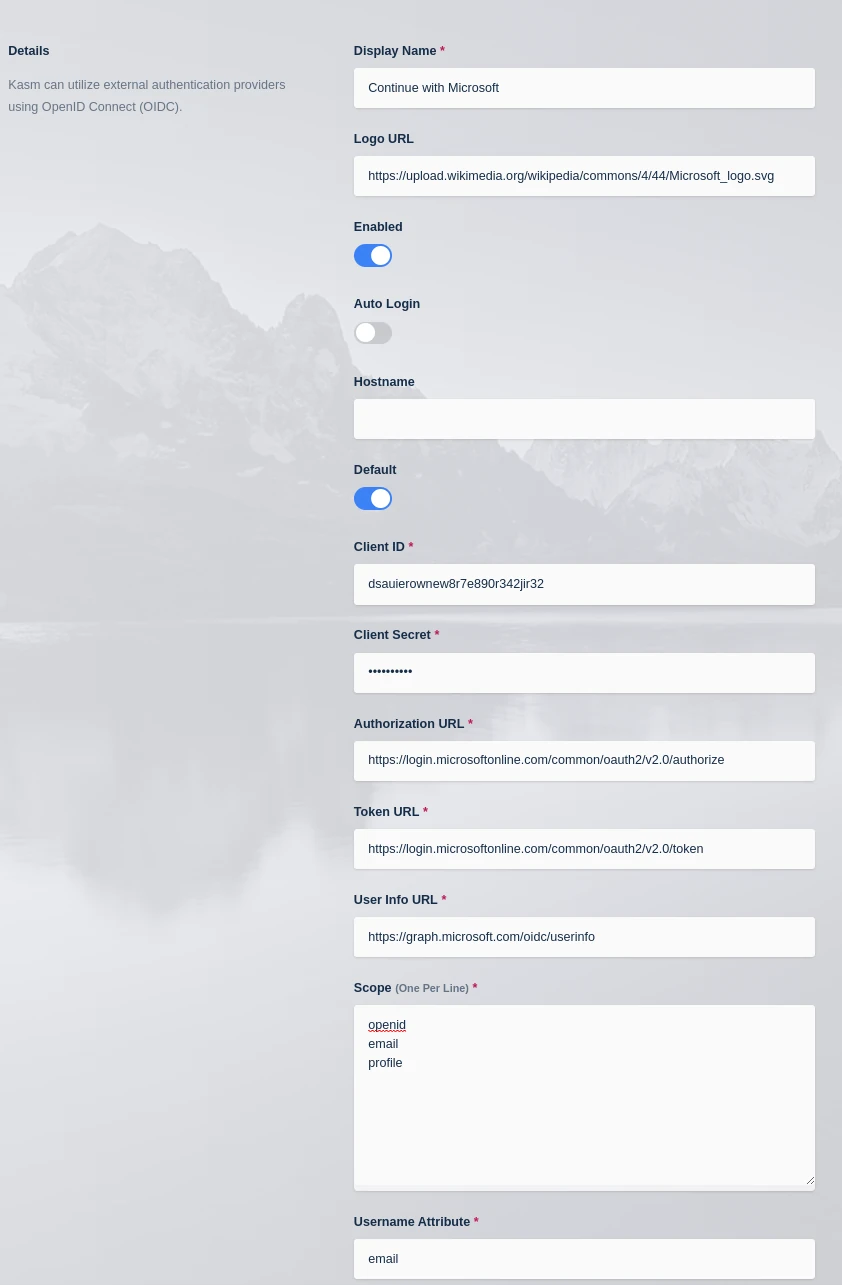
Log into the Kasm UI as an administrator.
Select Access Management -> Authentication -> OpenID -> Add Config.
Update the form with the following entries, using the Client ID and Client Secret gathered in the previous section.
Property |
Value |
Enabled |
Checked |
Display Name |
Continue with Keycloak |
Logo URL |
|
Auto Login |
Unchecked |
Hostname |
<Empty> |
Default |
Checked |
Client ID |
<Client ID from Keycloak> |
Client Secret |
<Client Secret from Keycloak> |
Authorization URL |
<authorization_endpoint from the Keycloak configuration> |
Token URL |
<token_endpoint from the Keycloak configuration> |
User Info URL |
<userinfo_endpoint from the Keycloak configuration> |
Scope |
|
Username Attribute |
|
Groups Attribute |
|
Debug |
Unchecked |
Redirect URL |
|
OpenID Connect Issuer |
<issuer from the Keycloak configuration> |
Logout with OIDC Provider |
Checked |
Enable OIDC SLO Frontchannel Endpoint |
Checked if Frontchannel Logout was chosen in the previous section |
Kasm OIDC Configurations
Click Save to save the changes.
Keycloak Login Test
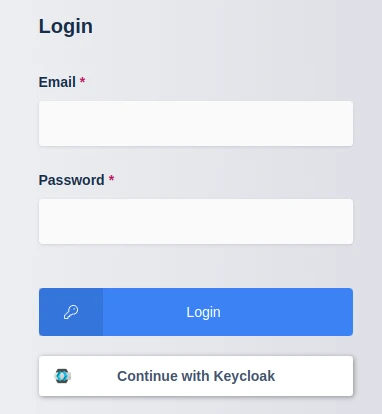
Logout of the Kasm to display the login screen. The OpenID configuration should be shown.
Login Screen
Click Continue with Keycloak
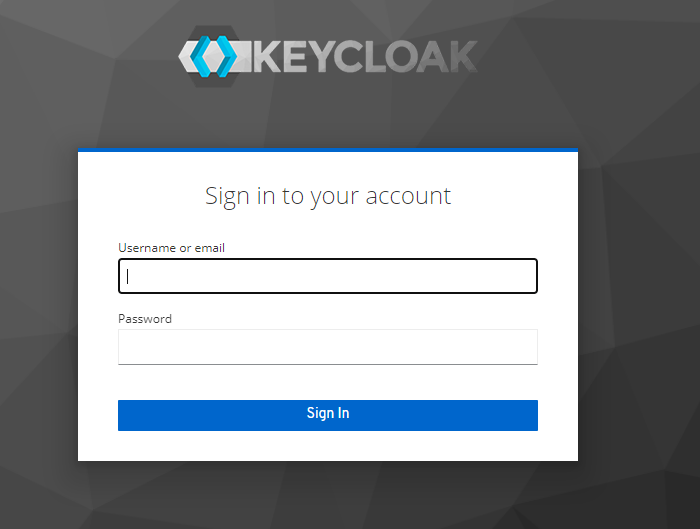
The user is redirected to Keycloak for auth.
Keycloak Auth
Upon completion, the user is logged into the Kasm app.
Group Mapping
The previous configurations will instruct the identity provider to send a list of Security Group ID the user belongs to during the OpenID auth workflow. We can configure Kasm Groups with the Security Group IDs from Azure AD so that users are automatically added/removed based on their Azure AD group Membership.
Log into the Kasm UI as an administrator.
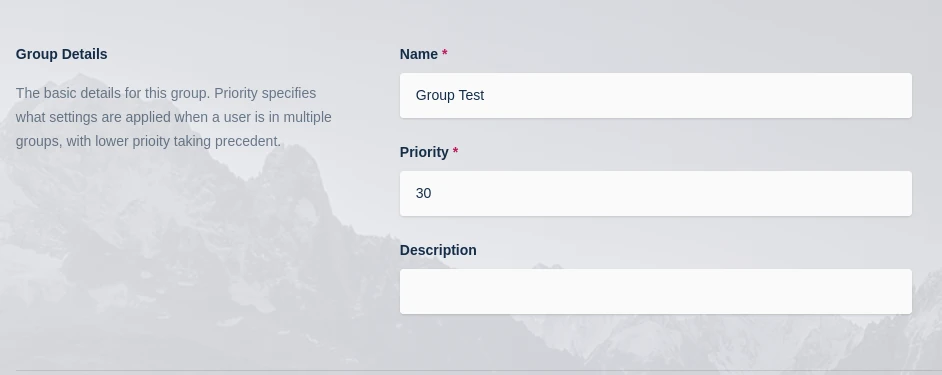
Select Access Management -> Groups -> Add Group.
Name the Group Group Test, and define a priority.
Click Save to create the group.
Group Configuration
On the groups screen, using the arrow menu select Edit on the group that was just created.
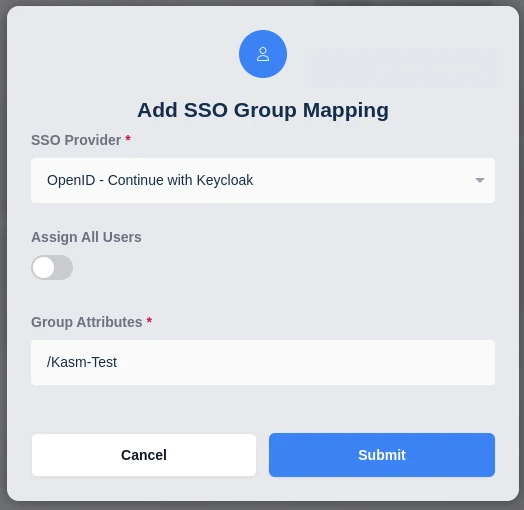
Navigate to the SSO Group Mappings tab and select Add SSO Mapping.
Select the OpenID IDP that was created above “OpenID - Continue with Keycloak” for the SSO Provider.
Then enter the Keycloak group name desired in the Group Attributes field, e.g
/Kasm-Test. Note the slash. This is needed when Full group path is set in the Keycloak Client Mapper which is the default.Click Submit
Add SSO Group Mapping
Logout, then login via the Keycloak Open ID login with a user that is a member of the specified group.
View the users group membership to ensure they are added to the newly created group.