DigitalOcean AutoScale
Table of Contents
This guide will walk you through configuring autoscaling for Kasm Workspaces on DigitalOcean. Autoscaling in Kasm Workspaces automatically provisions and destroys agents based on user demand, ensuring optimized resource utilization and cost efficiency.
Overview
Prerequisites
Access to Digital Ocean: Ensure you have the appropriate access to your Digital Ocean environment
Kasm Workspaces Installed: A basic setup of Kasm Workspaces must already exist
Understand Key Concepts:
Zones: Logical groupings of Kasm services for geographical or organizational segmentation
Pools: Logical groupings of Kasm Docker Agents and Server Pools for load balancing
Plan Your Configuration:
Understand your deployment zone requirements
Configure your Digital Ocean environment
Setup your Digital Ocean Environment
Create an API Token: Go to your Digital Ocean dashboard -> “API” -> “Personal Access Tokens” -> “Generate New Token”
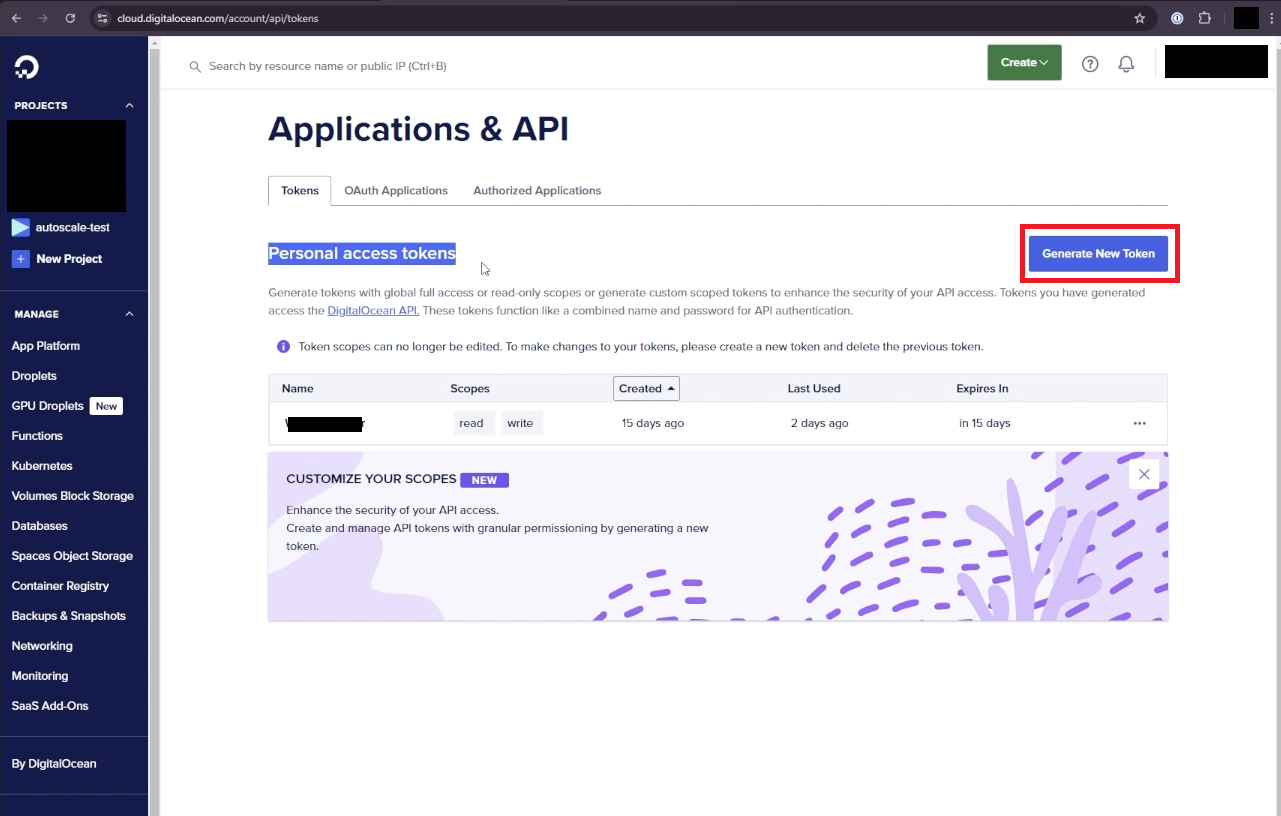
Create Personal Access Token in Digital Ocean
Token Name: Give a name (e.g Kasm AutoScale)
Expiration: Set an expiration for your token (e.g 30 days)
Scopes: Choose “Custom Scopes” and give access to the following resources:
certificate
database
firewall
load_balancer
project
regions
sizes
ssh_key
tag
vpc
image
droplet
domain
action
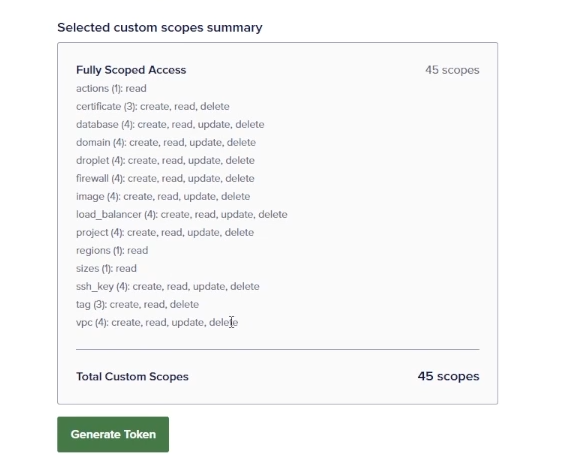
Custom Scopes in Digital Ocean
Generate Token
Save your token securely as you won’t be able to see it again.
Add SSH Key: You need to assign an SSH key to your newly provisioned droplets.
Go to your Digital Ocean dashboard -> “Settings” -> “Security” -> “Add SSH Key”
Follow the on-screen instructions from Digital Ocean to generate an SSH key pair and paste your Public Key and choose a Key Name.
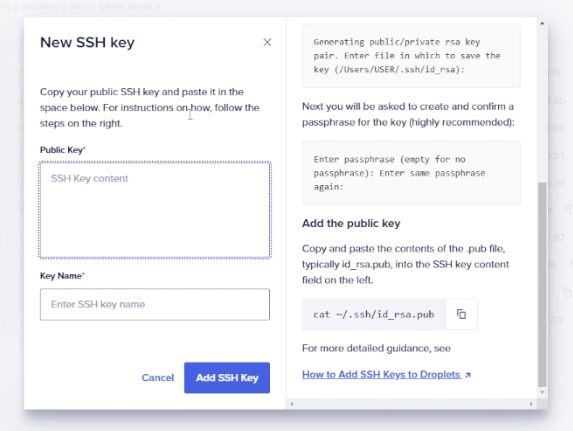
Add SSH Key to DigitalOcean
Configure Digital Ocean Details on Kasm
Follow AutoScale Settings for Agent Pool or AutoScale Settings for Server Pool to create to create a new AutoScale config, or select Create New in VM Provider Configs if you already have one.
Set Provider to Digital Ocean
Configure the following settings:
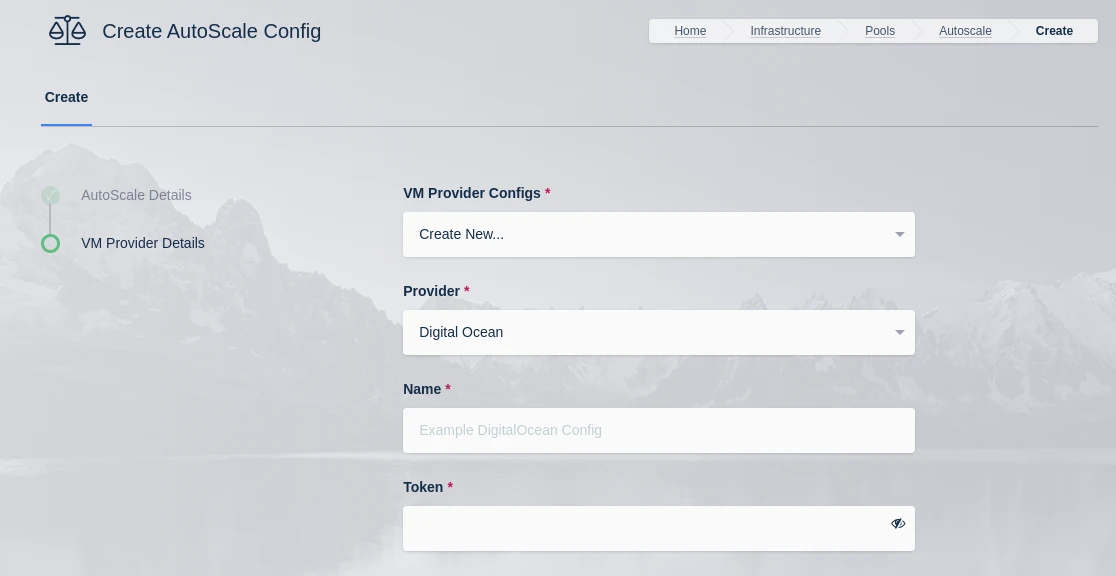
Digital Ocean VM Provider
Name |
Description |
|---|---|
Name |
A name to use to identify the config. |
Token |
The token to use to connect to this VM |
Max Droplets |
The maximum number of Digital Ocean droplets to provision , regardless of whether more are needed to fulfill user demand. |
Region |
The Digital Ocean Region where droplets should be provisioned. (e.g nyc3) |
Image |
The Image to use when creating droplets. (e.g docker-24-04). See Digital Ocean documentation for more details. |
Droplet Size |
The droplet size configuration (e.g c-2). See https://slugs.do-api.dev for more details |
Tags |
A tag(s) to assign the droplet when it is created. This should be a comma separated list of tags. |
SSH Key Name |
The SSH Key to assign to the newly created droplets. The SSH Key must already exist in the Digital Ocean Account. |
Firewall Name |
The name of the Firewall to apply to the newly created droplets. This Firewall must already exist in the Digital Ocean Account. Go to your Digital Ocean dashboard -> “Networking” -> “Firewalls” to view existing firewalls or create a new firewall |
Startup Script |
When droplets are provisioned this script is executed. The script is responsible for installing and configuring the Kasm Agent. Example scripts can be found on our GitHub repository |
Submit the Provider Config
“Tag Does Not Exist” Error
Upon first testing AutoScaling with Digital Ocean, an error similar to the following may be presented:
Future generated an exception: tag zone:abc123 does not exist
 traceback:
 ..
 File "digitalocean/Firewall.py", line 225, in add_tags
 File "digitalocean/baseapi.py", line 196, in get_data
 digitalocean.DataReadError: tag zone:abc123 does not exist
 process: manager_api_server
This error occurs when Kasm Workspaces tries to assign a unique tag based on the Zone Id to the Digital Ocean Firewall. If that tag does not already exist in Digital Ocean, the operation will fail and present the error. To workaround the issue, manually create a tag matching the one specified in the error (e.g zone:abc123) via the Digital Ocean console. This can be done via API, or simply creating the tag on a temporary Droplet.
Test your Digital Ocean Autoscaling setup
If you have configured non-zero Standby/Minimum Available Session values agents should start provisioning immediately. Otherwise, try launching multiple workspaces to increase resource utilization, prompting Kasm to autoscale new agents.
Provision a Workspace
Go to Workspaces > Registry
Make multiple workspaces available
Go to the Workspaces dashboard and launch sufficient workspace sessions to exceed your resource standby thresholds
Monitor the provisioning of new agents by going to “Infrastructure” -> “Agents”
Verify new VM instances in Proxmox
Check Downscaling
Terminate sessions to reduce resource usage
Confirm that Kasm removes agents after the back-off period