Bring Your Own VPN Containers (BYOVPN)
This guide will cover how to use the Kasm Workspaces images that come pre-built to simplify using VPNs within the containers. The images support allowing the end-user or admin to specify the configuration details for the following VPN Services.
The following images are available to install via the Kasm Workspaces Registry
Docker Image |
Dockerhub Path |
AMD64 |
ARM64 |
GPU |
|

|
kasmweb/ubuntu-focal-desktop-vpn:1.17.0 |
X |
X |
X |
End-User provided VPN Configuration
By default, the BYOVPN images utilize a custom Workspace Launch Forms to present options for the end-user to configuring their VPN details, such as a Tailscale authentication key. When the user selects the VPN Workspace from the dashboard, the form will be rendered to capture the VPN details. When the workspace is launched, the user will be presented with notifications regarding the state of the VPN Connection. With a number of consumer VPN services offering OpenVPN and/or WireGuard based connection options, this provides substantial flexibility for user’s to leverage their own VPN accounts within Kasm.
If this is the desired use-case, no futher action is needed other than to install the Workspace and publish it to users.
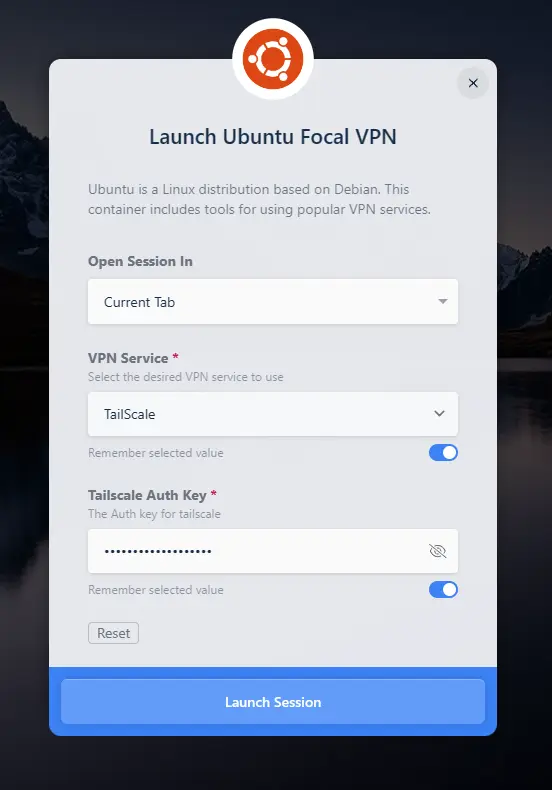
Tailscale Workspace Launch Form
OpenVPN Example
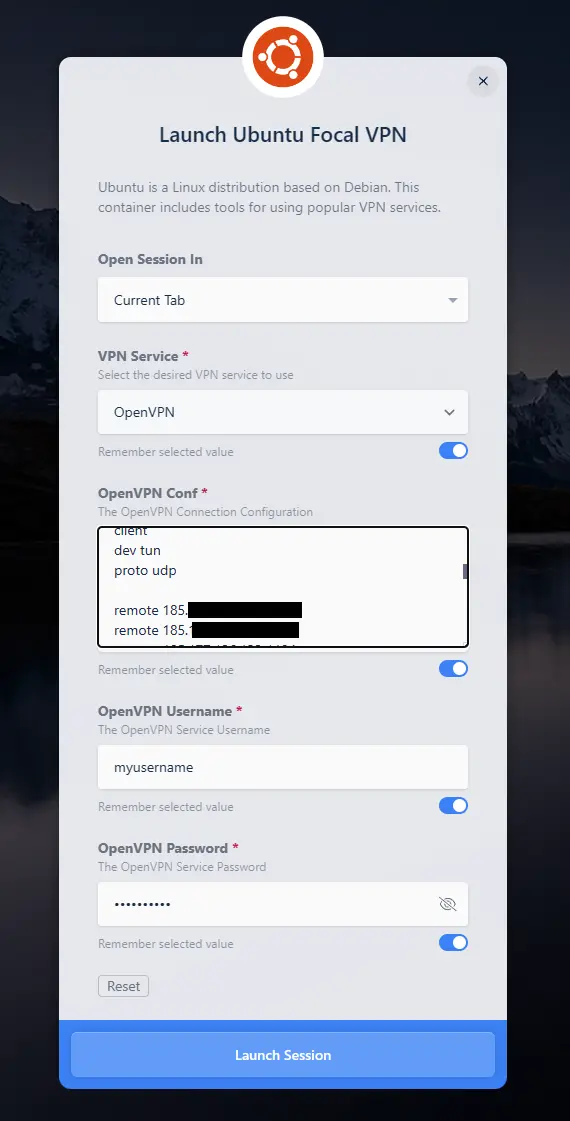
OpenVPN Workspace Launch Form
Wireguard Example

Wireguard Workspace Launch Form
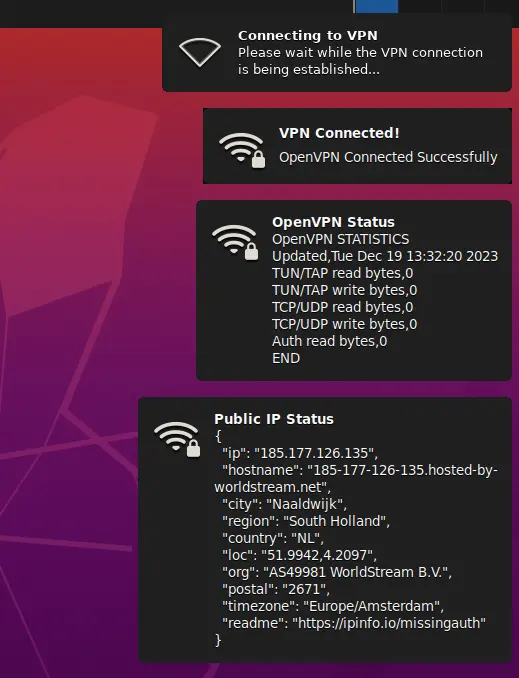
VPN Connection Status
Admin-Provided VPN Configurations
The BYOVPN Images can also be used to pre-configure the VPN Connection requiring no end-user intervention. In order to use the admin-provided configurations, remove the Launch Config configurations from the Workspace entry. This will remove the custom launch form when launching the Workspace, and allow the container to use the admin-provided options.
Warning
VPN configurations or credentials supplied by the admin may be visible to the end-user when running the container. If this is not acceptable, consider using a VPN Sidecar.
Tailscale Configuration
Note
Tailscale is not a full VPN isolation solution out of the box, it allows you to connect to the shared machines also connected to the account. All other Internet traffic will still go out over the local network by default.
In order to use Tailscale an auth key will need to be generated from the Tailscale admin dashboard, please reference Getting the Tailscale auth key to generate one.
By default, Tailscale does not require manual device approval for machines that seek to automatically join the network, even when joining with pre-generated keys. However, if this setting is enabled, the Tailscale connection will not succeed for new Kasm sessions until the Tailscale admin approves them. See Device Approval for more information.
With an auth key the Docker Run Config Override for the Workspace will need to be modified to upldate the TAILSCALE_KEY IE:
{
  "environment": {
    "TAILSCALE_KEY": "tskey-auth-XXXXXXXXXXXX-XXXXXXXXXXXXXXXXXXXXXXXXXXXXXXXXX",
    "SHOW_VPN_STATUS": "1",
    "SHOW_IP_STATUS": "1"
  },
  "sysctls": {
    "net.ipv4.conf.all.src_valid_mark": 1
  },
  "dns": [
    "8.8.8.8",
    "8.8.4.4"
  ]
}
Wireguard Configurations
After installing the Workspace from the Kasm Workspace Registry, navigate to the Administrator Dashboard -> Workspaces -> Workspaces -> click the arrow next to the Workspace -> Click Edit (pencil icon) -> File Mapping tab -> Add File Mapping.
Select Text for Type
Customize the Name (here we use
VPN Config)Customize the Description (here we use
VPN Configuration File)Set the destination path as
/dockerstartup/wireguard.confPaste the contents of your Wireguard configuration file in the Text area
Click Save
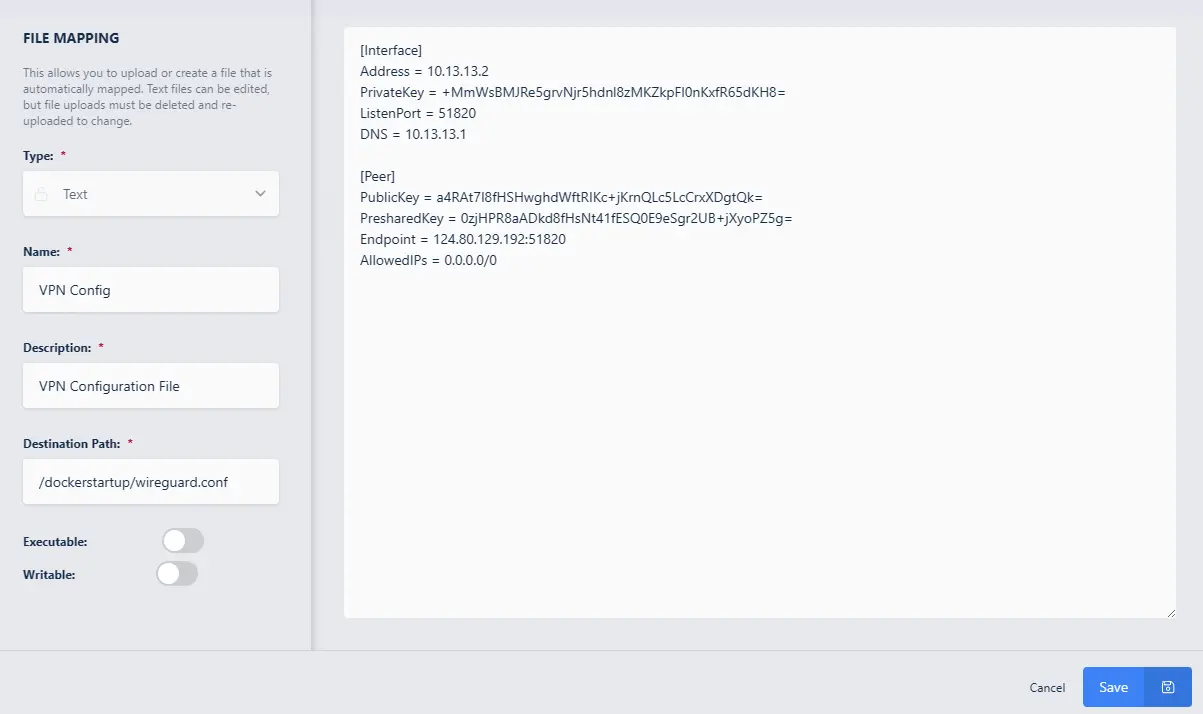
Setting the File Mapping for Wireguard
Wireguard DNS
Wireguard uses configuration information from it’s own conf file to setup DNS in the Workspace so the default Google DNS servers can be left in the Docker Run Config Override or removed it will not matter once connected on init.
OpenVPN Configurations
After installing the Workspace from the Kasm Workspace Registry, navigate to the Administrator Dashboard -> Workspaces -> Workspaces -> click the arrow next to the Workspace -> Click Edit (pencil icon) -> File Mapping tab -> Add File Mapping.
Select Text for Type
Customize the Name (here we use
VPN Config)Customize the Description (here we use
VPN Configuration File)Set the destination path as
/dockerstartup/openvpn.confPaste the contents of your OpenVPN configuration file in the Text area
Click Save
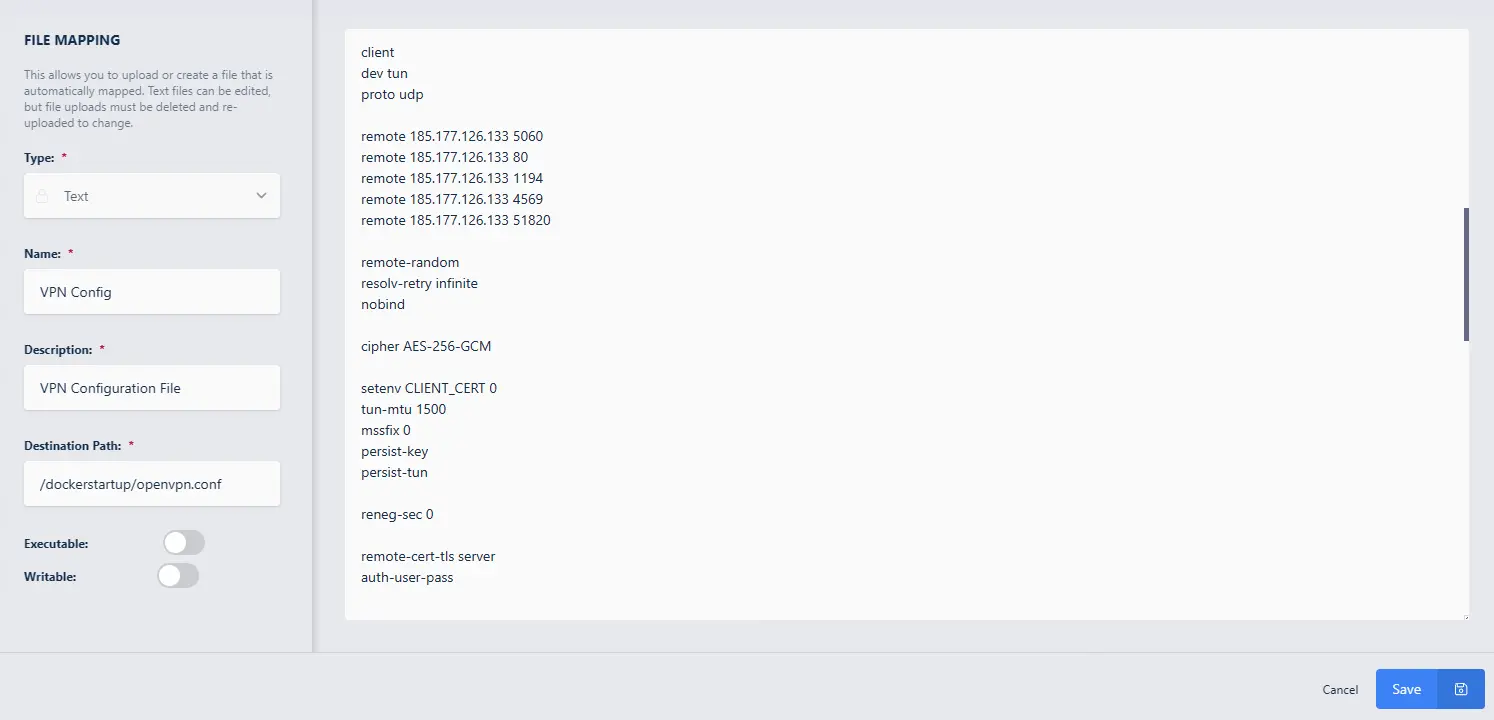
Setting the File Mapping for OpenVPN
OpenVPN DNS
The default settings are pointed to Google’s public DNS servers. It is important to keep in mind that private DNS servers that only the client can access will not function over an OpenVPN tunnel. It is necessary to use either public DNS servers or DNS servers that can be accessed on the server side of the tunnel.
OpenVPN authentication
OpenVPN might also require a username and password as well as the config file being mapped into the Workspace. This depends entirely on the Server side configuration.
This is automatically detected by the VPN enabled Workspace and will prompt the user to enter their username and password when the container is launched.
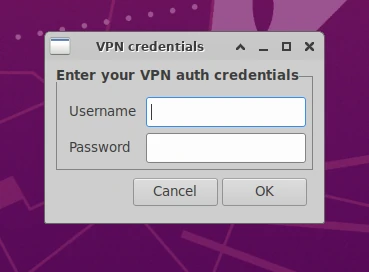
In container login prompt
After entering the authentication information the user will be notified when the VPN is connected or if there was an error.
OpenVPN Automating user/pass Authentication
If the OpenVPN server requires user/pass authentication, and the workflow desired is automatically log in, an additional file will need to be mapped into the container referencing this login information.
Navigate to the Administrator Dashboard -> Workspaces -> Workspaces -> click the arrow next to the Workspace -> Click Edit (pencil icon) -> File Mapping tab -> Add File Mapping
Select Text for Type
Customize the Name (here we use
Auth)Customize the Description (here we use
OpenVPN Authentication file)Set the destination path as
/dockerstartup/openvpn-authIn the text area enter the username on the first line and the password as the second line.
Click Save
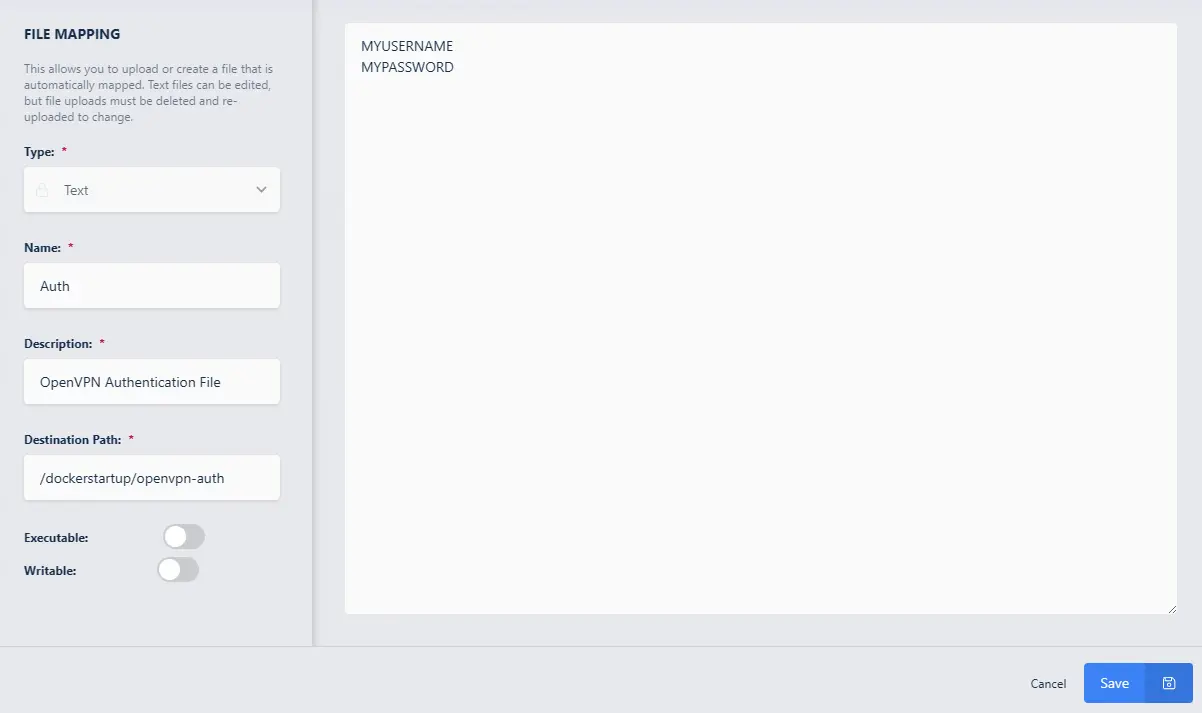
Mapping in an auth file
It is also necessary to reference this file in the main OpenVPN configuration by modifying the line auth-user-pass to:
auth-user-pass /dockerstartup/openvpn-auth
VPN and Public IP Status Notifications
By default, the VPN containers will display VPN Status, and Public IP Status messages when the VPN connection is established. This can be helpful
to end users to verify connectivity. These notifications can be removed by adjusting the SHOW_VPN_STATUS and SHOW_IP_STATUS environment variables to 0
using the Docker Run Config.
VPN Connection Status
{
  "environment": {
    "TAILSCALE_KEY": "",
    "SHOW_VPN_STATUS": "0",
    "SHOW_IP_STATUS": "0"
  },
  "sysctls": {
    "net.ipv4.conf.all.src_valid_mark": 1
  },
  "dns": [
    "8.8.8.8",
    "8.8.4.4"
  ]
}
Troubleshooting
On any connection errors the user will be notified via a pop up and logs of the logic flow are stored inside the Workspace under the path /dockerstartup/vpn_start.log.
This file can be read by the user in a terminal using:
cat /dockerstartup/vpn_start.log
Or any other GUI text editor in the Workspace.