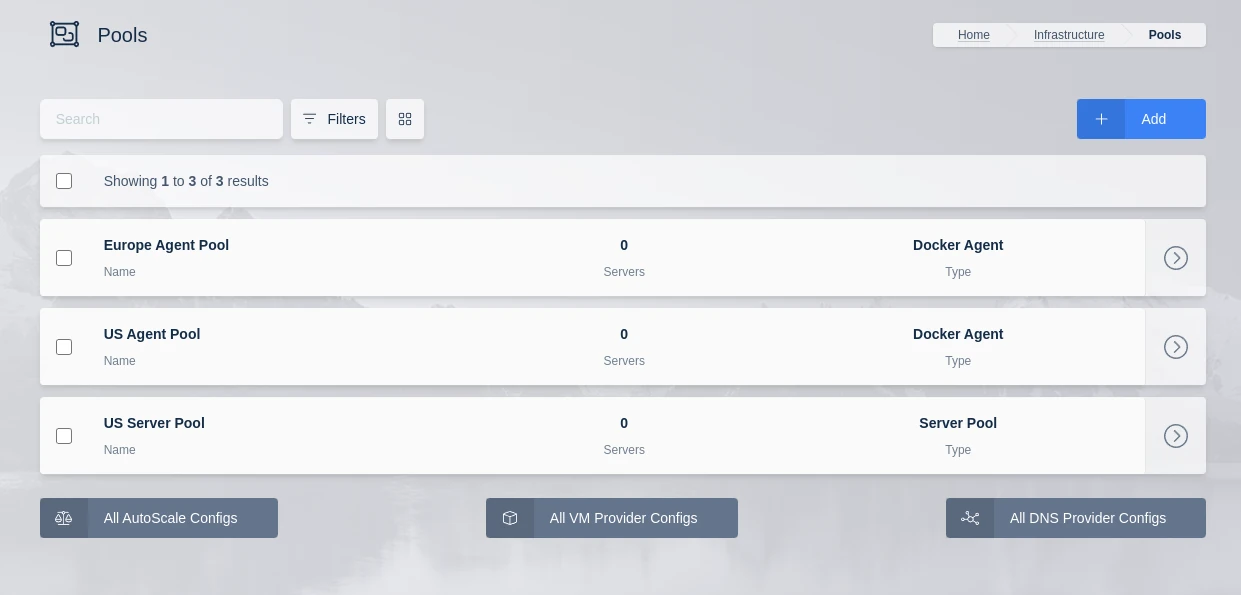
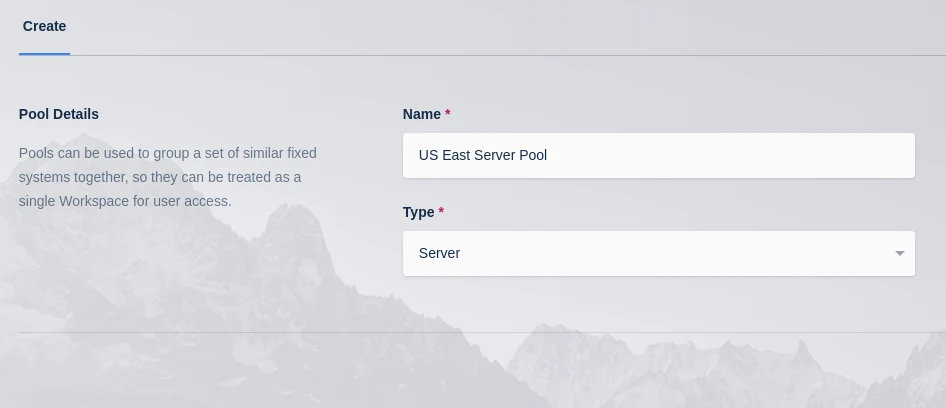
Pools can be used to group a set of similar fixed systems together, so they can be treated as a single Workspace for user access.
Users will see a single Workspace icon on their dashboard, but their session will get distributed to an available server in the pool.
Each server in the pool can be set to support 1 or more concurrent sessions. Kasm automatically distributes the sessions
evenly over the servers.
Pools can also be used to auto scale servers using a supported VM provider. Auto scaling can be used to
automatically provision Servers or Docker Agents.
Note
AutoScaling is available in the Community and Enterprise editions only. If applicable, the adminsitrator will have 3 links underneath the table for All AutoScale Configs, All VM Provider Configs and All DNS Provider Configs.
These allow the administrator to see all of the configs available and make changes, but the recommended approach is to use the Edit option on a specific pool.
This list is almost identical to the Servers list with the exception that only servers that are assigned to this pool are shown.
Use the assign button to assign existing servers to this pool.
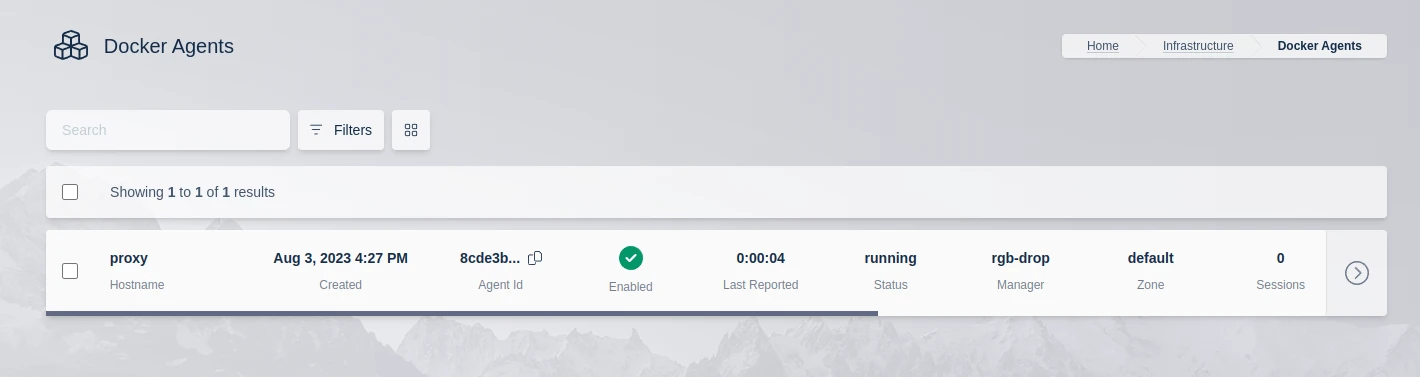
This list is only shown for Pools of type Docker Agent
This list is almost identical to the Agents list with the exception that only servers that are assigned to this
pool. Use the assign button to assign existing agents to this pool.
This feature is available in the Community and Enterprise editions only. Please contact a Kasm Technologies representative for details.
Kasm has the ability to automatically provision and destroy Servers and Docker Agents based on user demand.
The AutoScale configuration differs slightly between Servers and Agents.
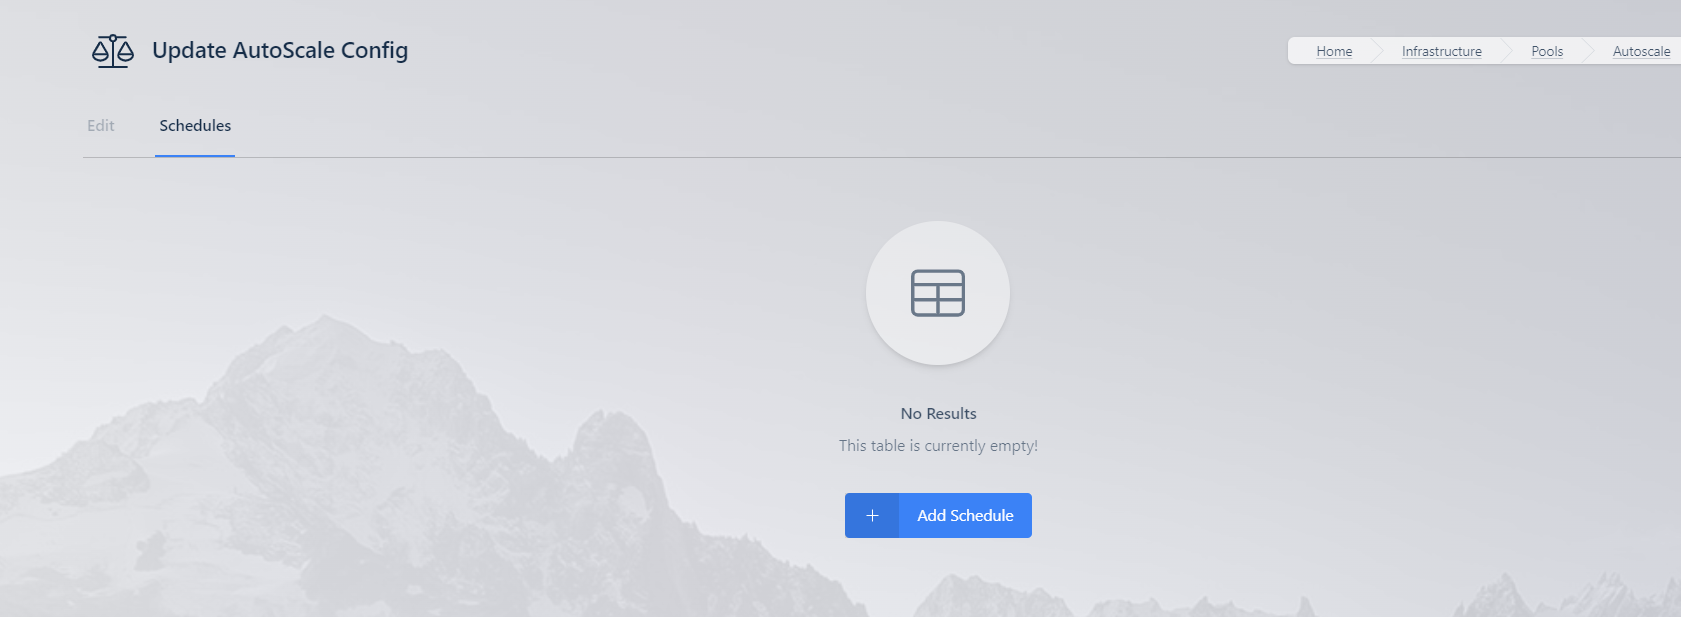
In this section the administrator can Assign or Add AutoScale configurations, if the administrator adds an AutoScale configuration it will automatically be assigned to this pool with the AutoScale Type and Pool both set and prevented from being changed.
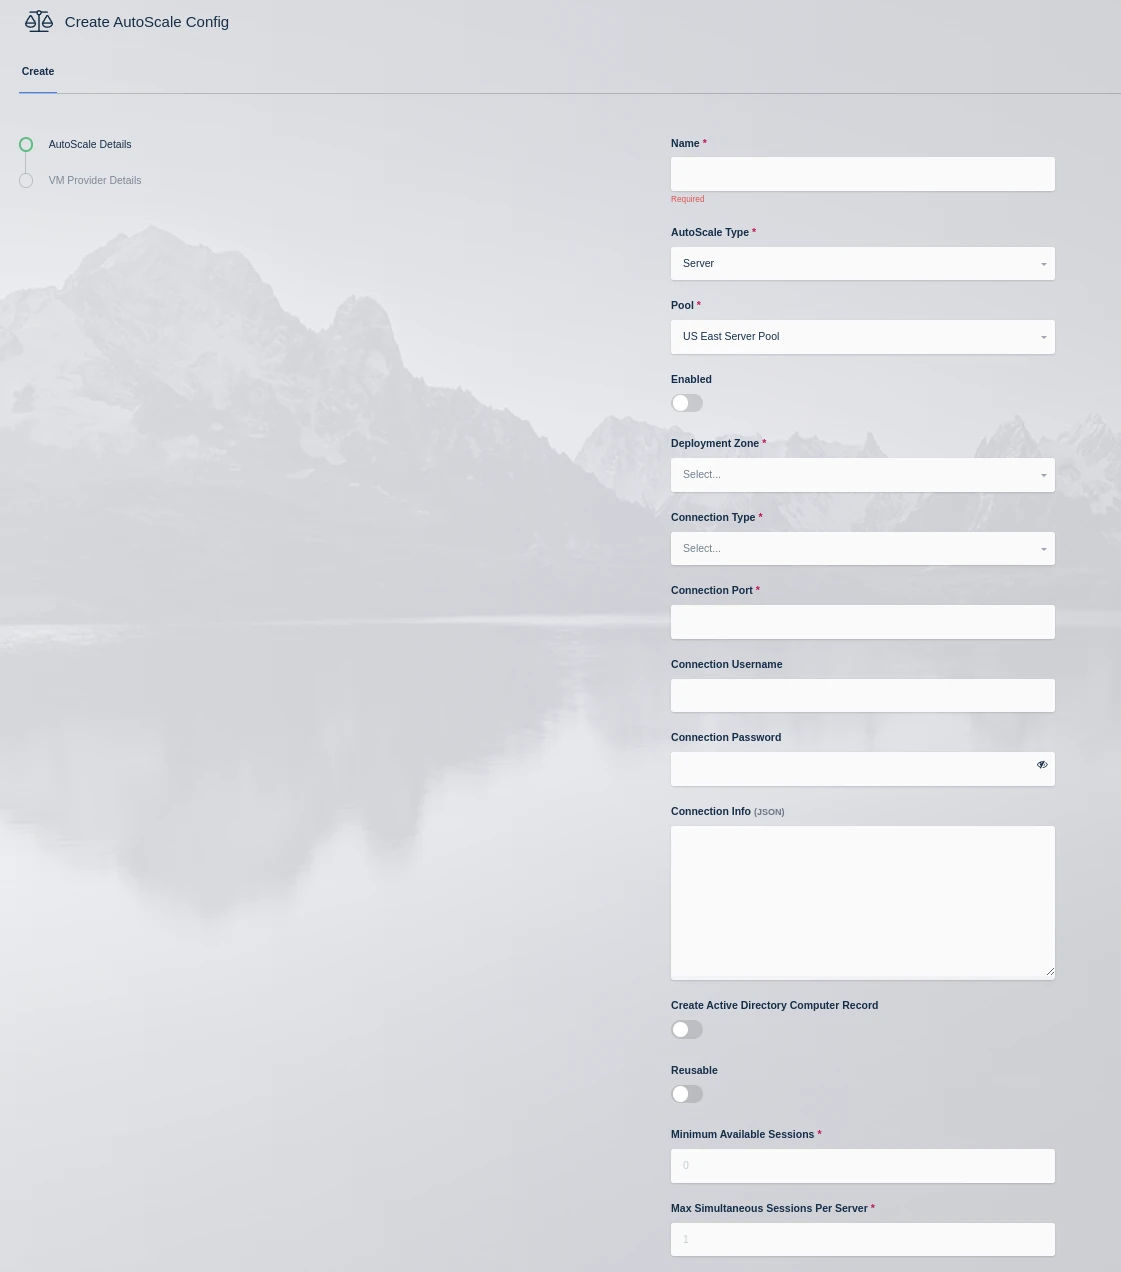
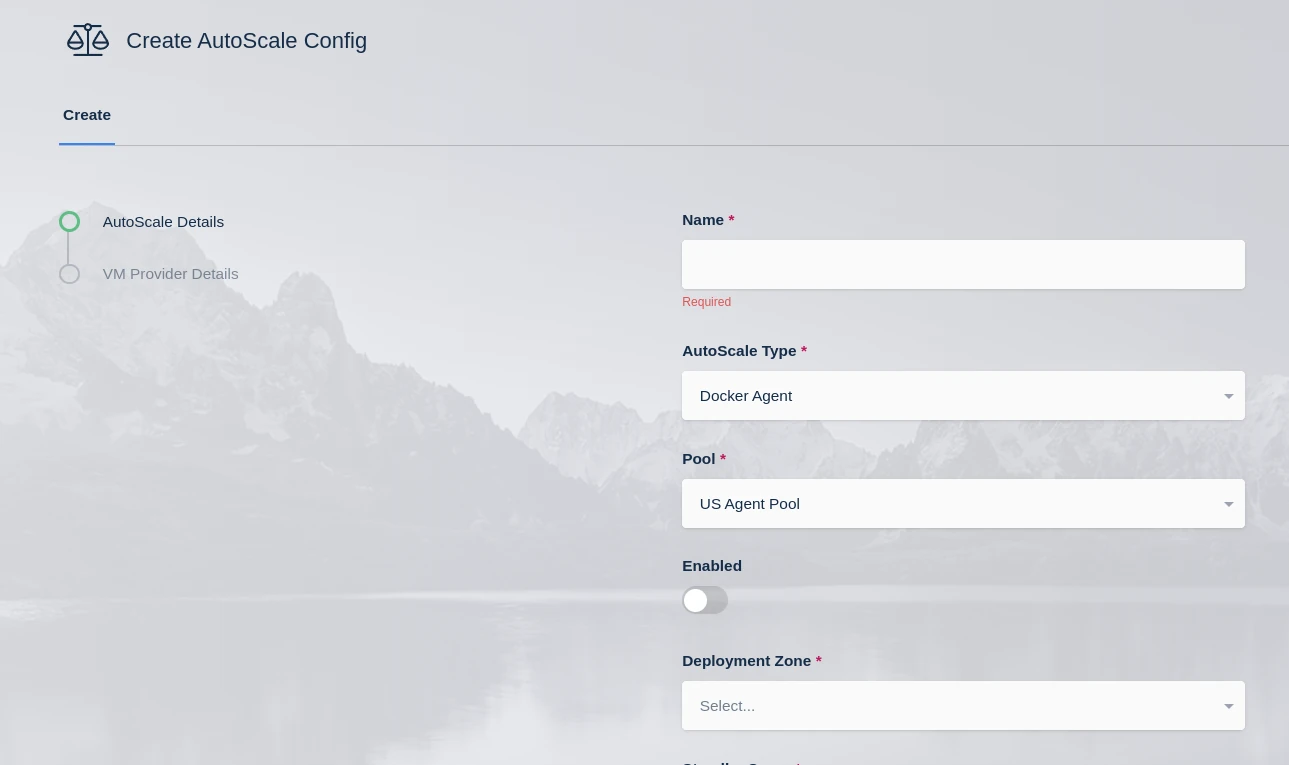
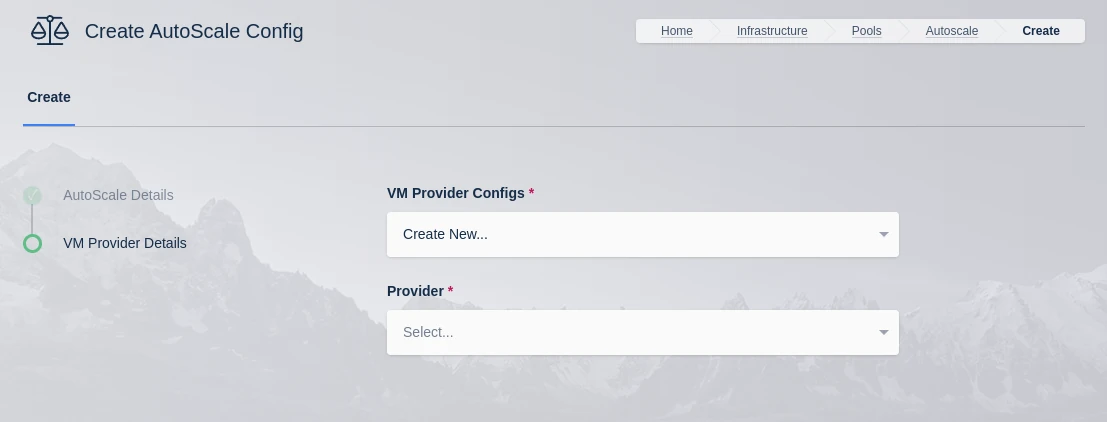
Clicking Add button on the AutoScale Configuration table will walk the administrator through a Wizard. The first step is the AutoScale
configuration, which is slightly different between a Server pool and a Docker Agent pool.
Kasm AutoScaling configurations have the capability of being scheduled for active times. This capability allows customers to save compute costs by turning off Kasm AutoScaling when that extra compute is not needed.
AutoScale schedules are available as a tab when editing an AutoScale configuration. If no schedule is defined then the AutoScale configuration is considered active unless disabled. Kasm will not scale down a server that has active sessions on it, so the administrator can be assured they will not disrupt any existing Kasm sessions when the schedule becomes inactive.
When an AutoScale configuration for Docker Agents is inactive any unused staged sessions will be removed and no new sessions (staged or user created) will be assigned to any Docker Agents that are part of the inactive AutoScale configuration.
Since an AutoScale configuration with an inactive schedule will not provision any compute resources, the administrator may want two AutoScale configurations: one that has minimal standby compute available to minimize compute costs and one that has more substantial resources configured. This will allow users to always get a session even if it takes extra time on off hours.
The administrator can even configure 0 for the standby cpu/memory/gpu during the off hours and allow session resource provisioning to be fulfilled fully on demand.
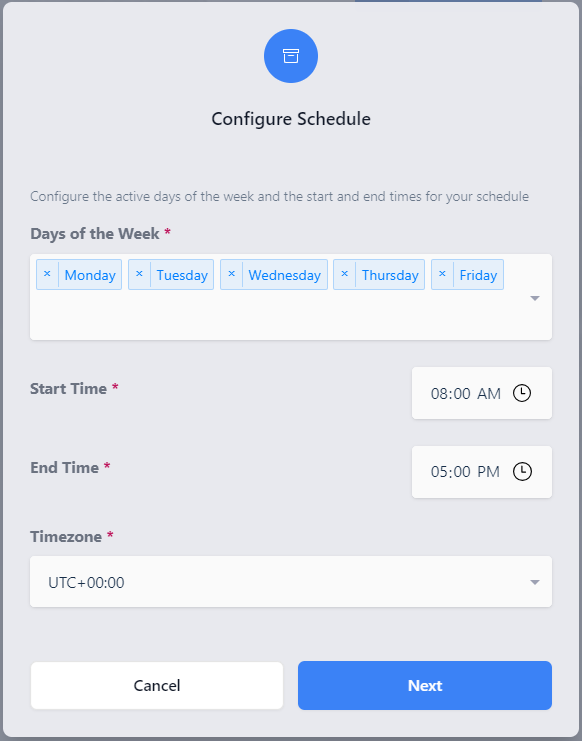
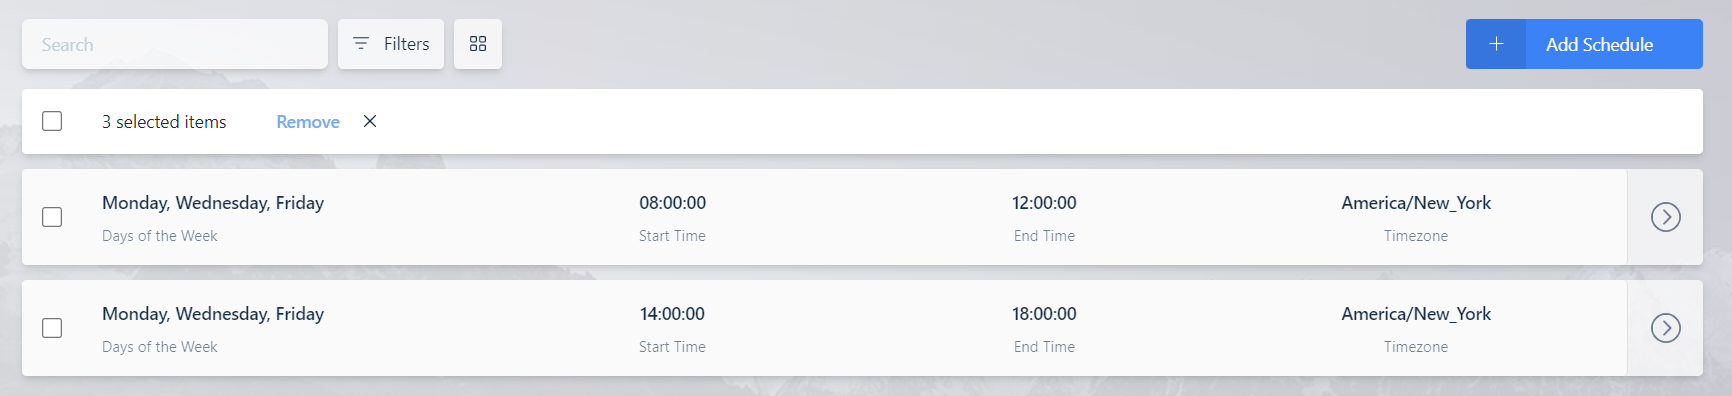
Click on Add Schedule to create a new schedule for the AutoScaling configuration. On the Add Schedule screen there are fields for what days of the week this schedule should be active as well as both a start time, end time, and a timezone. Kasm will convert the time from the Kasm database to match the timezone specified when determining if a schedule is active or not.
Multiple schedules can be defined for each AutoScale configuration.
Here are a few examples of how AutoScale schedules can be leveraged.
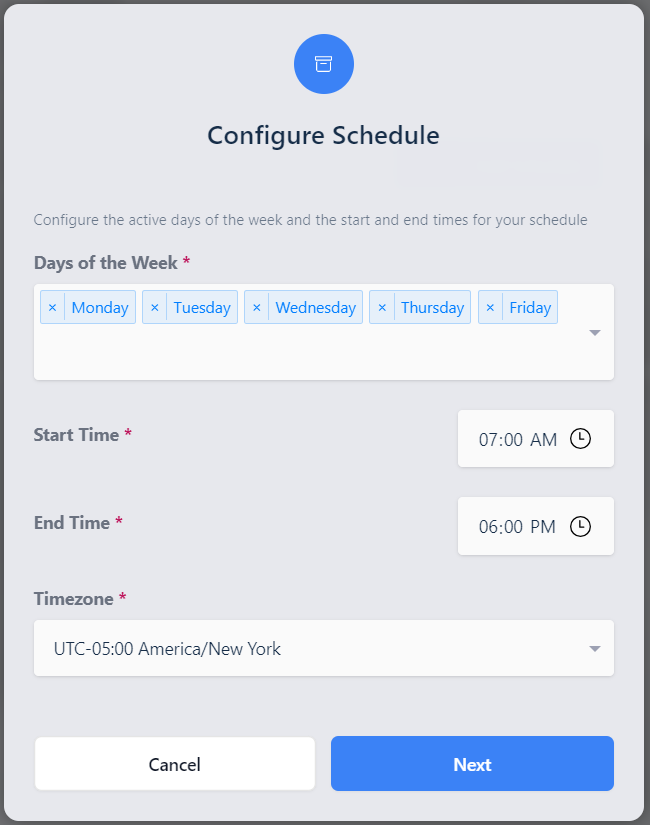
Basic Example (Traditional Business Schedule)
This example is for a business whose core hours are 8 a.m. to 5 p.m., Monday through Friday. Each weekday, this configuration turns on autoscaling at 7 a.m. and turns it off at 6 p.m. This way, all compute is available well before the 8 a.m. start time and costs are reduced overnight and over the weekend, when there is no business need for the compute.
The Add Schedule screen would look similar to this:
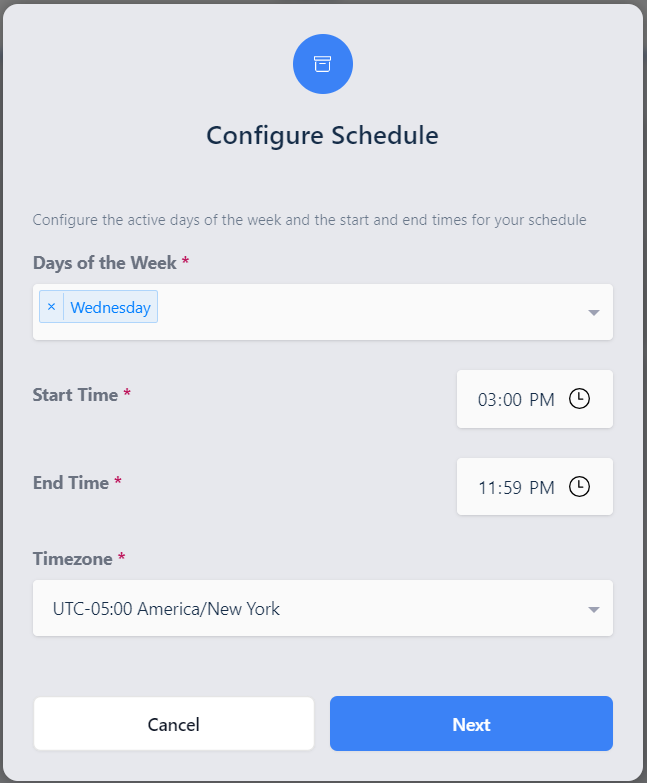
A more complicated example would be if an Administrator wanted compute resources to come online at 3 p.m. Wednesday, and stay on until 11 a.m. Friday. For this the administrator would create three separate schedules on the autoscale config which would provide the desired functionality.
The first schedule the administrator would select only wednesday, start time 3:00 p.m., and end time 11:59 p.m.
Set of Schedules For Multi-Day AutoScale Scheduling
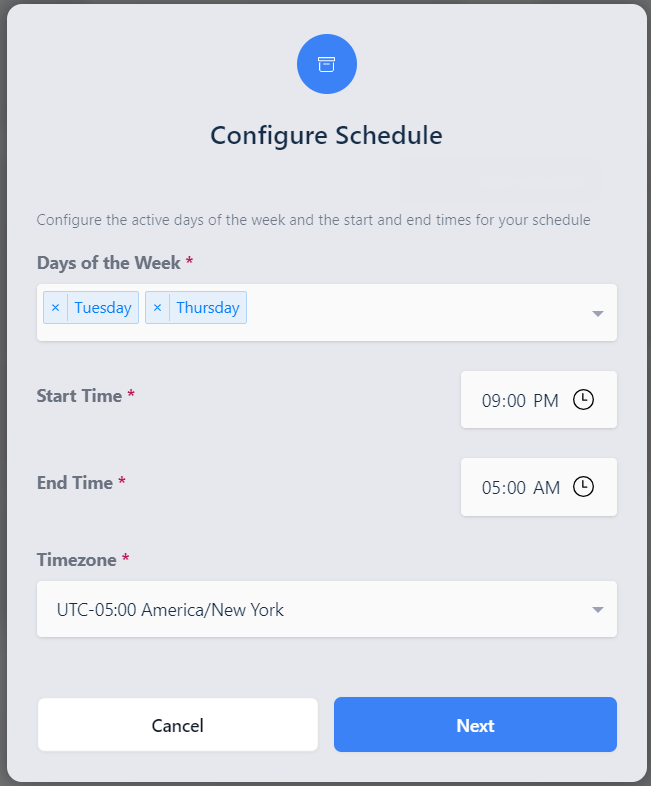
Overnight schedule
Here is an example of an overnight schedule where the start time is later than the end time. This will result in an overnight schedule. It will become active on the start time on the day(s) of the week selected, and will become inactive at the end time of the following day. In the following example the Autoscale configuration will become active on Tuesday and Thursday at 9:00 p.m. and will deactivate on Wednesday and Friday at 5:00 a.m.
By using multiple schedules it is possible to configure multiple active times within a single day. Here morning shift is configured from 8:00 a.m. until 12:00 p.m. on Monday, Wednesday and Friday.
The type of AutoScale confog this is, either a Docker Agent or a Server.
Pool
Which pool this AutoScale config is attached to.
Aggressive Scaling
When enabled, the system may take more expedient measures to provision raw compute resources for on-demand session requests. See Aggressive Scaling
for more details.
Deployment Zone
Which zone this AutoScale config applies to.
Downscale Backoff (Seconds)
This setting prevents prevents the system from downscaling (deleting Servers) for this amount of time (in seconds) when needed. This is useful for preventing the
system from thrashing up and down if the available resource hover around an interval that would typically trigger autoscaling.
Require Checkin
When enabled, the system will wait to receive a callback from the newly created server to set its status to Running. The callback may come from the Kasm Windows
Service or by calling the set_server_status API. See Require Checkin for more details.
Kasm Desktop Service Installed
When enabled, the sytem will assume the Kasm Desktop Service is installed, enabling workflows that require the agent.
Connection Type
Whether to use KasmVNC or RDP, VNC, or SSH.
Connection Port
Which port to connect on.
Connection Credential Type
Which type of credentials are used for this server. Options are Static Credentials, Dynamic User Accounts, SSO User Accounts, and Authenticate with Smartcard.
SSO Domain
The domain to use for SSO User Accounts Connection Credential Type. A blank entry will pass the username to Windows exactly as it is in Kasm. A value of
localhost will instruct Kasm to drop any domain part from the Kasm username i.e. john_smith@example.com becomes john_smith when passed to Windows.
Connection Username
Which username to connect to the server with. Only visible with Static Credentials Connection Credential Type.
Connection Password
Which password to connect to the server with. Only visible with Static Credentials Connection Credential Type.
Use User SSH Key
Whether to use the SSH keys assigned to a Kasm user. (Only applicable to SSH connection type)
Connection Private Key
The private key to authenticate against the SSH server with. (Only applicable to SSH connection type)
Connection Private Key Passphrase
The passphrase encrypting the specified private key. (Only applicable to SSH connection type)
Connection Info (JSON)
Any extra connection info.
Create Active Directory Computer Record
Whether to create an active directory record or not.
Reusable
Whether the connection reusable.
Minimum Available Sessions
The minimum available sessions that should be free. Auto scale more resources if under this threshold.
Max Simultaneous Sessions Per Server
Max sessions per server allowed
Max Simultaneous Users
For RDP/SSH servers, the number of concurrently connected users per server.
For RDP and SSH servers, the MaxSimultaneousSessionPerServer and MaxSimultaneousUsers work together. SSH and RDP
support multiple sessions per user per server. For RDP this is typically found in RemoteApp use cases. For SSH and RemoteApp servers
you may want 1 server to handle just 2 concurrent users but up to 10 concurrent sessions each. These settings are used for two
purposes, auto-scaling and deciding where to assign new sessions to.
For auto scaling, Kasm periodically checks to see that it has resource availability to create MinimumAvailableSessions on
the existing servers in the pool. It checks how many sessions and how many new users each server can handle, it uses the
lower of those two values to determine how many new sessions each existing server can likely handle. If the total from all
servers is less than the MinimumAvailableSessions, new servers are created until it reaches the desired capacity.
Kasm will not allow a single user to provision multiple RDP desktops per server. Only RemoteApps are allowed to be assigned to the
same server for a single user. Kasm will allow one desktop and multiple RemoteApps on the same server for a user.
The Require Checkin flag can be used to ensure the system waits until a newly created server is fully ready before
allowing a users session to connect. Administrators may use the autoscale startup script to ensure the desired configurations
and services are properly initialized (e.g RDP is enabled and running).
If using Windows sessions, administrators may use the Kasm Desktop Service.
All systems may use the set_server_status API.
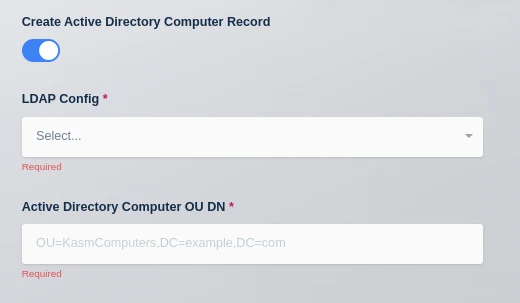
As covered in the above table, the AutoScaling configuration for a Server Pool allows the administrator to automatically join new VMs to an active directory domain. If the checkbox for Create Active Directory Computer Record is checked two additional fields will be shown, LDAP Config and Active Directory Computer OU DN.
Kasm Workspaces creates the AD Computer record, but it does not join the computer to the domain, this needs to be done on the system itself. When Kasm creates the AD record, a temporary randomly generated password is created which can be used on the target VM to join it to Active Directory. Kasm can inject this password in a PowerShell script on the VM. That PowerShell script needs to be executed when the VM starts up, in order to complete the process of adding the VM to Active Directory. Below is an example PowerShell script, the special tags {ad_join_credential} and {domain} will be replaced by Kasm with the randomly generated password and domain name respectively. This script is placed in the VM Provider configuration in the Startup Script field.
Some cloud providers will automatically execute this startup script when the VM boots, making it easy to get auto AD joining working end-to-end. Other cloud providers, such as Azure, do not automatically execute this script. See the details of each VM Config Provider.
LDAP Config
The LDAP Config drop down allows the administrator to select which LDAP configuration to use to add the computer record to Active Directory. The LDAP Configuration does not have to be enabled, this allows the administrator to use one LDAP configuration for Authentication and another for AD Computer record creation. If using LDAP for end-user authentication to Kasm Workspaces, the administrator can also configure single-sign on to the Windows systems.
Active Directory Computer OU DN
This is the DN of the Active Directory Computer OU that the administrator would like the computer records placed in.
Note
The LDAP config must be using an SSL secured LDAPS connection or the LDAP server will not permit Kasm to create the AD Computer record.
When users login to Kasm via LDAP Authentication, they are able to create sessions to Windows systems that are joined to the same Active Directory domain and are configured for SSO credential pass-through. In the above table covering the Auto Scale configuration fields for Server Pools is the Connection Credential Type field. Select the value SSO User Accounts in the Auto Scale configuration for the Server Pool. This requires that all users accessing servers in this Server Pool are authenticated to Kasm using LDAP authentication. See our Windows Deployment Guide video for a walk through of this topic and more.
Authentication Options When Connecting to an SSH Server
Kasm Workspaces has the ability to connect to arbitrary SSH servers. It can use SSH key or password authentication. There are a few combinations of options on the Autoscale Config edit screen that can be selected.
The Autoscale Config can be configured to use:
Username/password authentication
Username and select the UseUserSSHKey to send the username and private key stored with the Kasm user.
Username and a pasted in private key, optionally you can include a passphrase if the key has one.
Select the value SSO User Accounts in the Connection Credential Type field and check the Use User SSH Key checkbox and Kasm Workspaces will send the user’s Kasm Workspaces username along with the user’s Kasm Workspaces SSH key allowing easy multiple user support on SSH servers.
There are some restrictions on the ssh keys supported that are enforced by the connection proxy library used for the ssh server connections:
The SSH key must be an ssh-rsa key in PKCS1 format (i.e. the header of the key starts with -----BEGINRSAPRIVATEKEY-----) with a key size of 2048.
In addition, some newer Linux distributions such as Ubuntu 22.04 LTS will not accept ssh-rsa keys by default. To work around this edit the /etc/ssh/sshd_config file on the target server using the startup script of the vm provider and add these two lines to the config.
The type of AutoScale confog this is, either a Docker Agent or a Server.
Pool
Which pool this AutoScale config is attached to.
Aggressive Scaling
When enabled, the system may take more expedient measures to provision raw compute resources for on-demand session requests. See Aggressive Scaling for more details
Deployment Zone
Which zone this AutoScale config applies to.
Downscale Backoff (Seconds)
This setting prevents prevents the system from downscaling (deleting Agents) for this amount of time (in seconds) when needed. This is useful for preventing the system from thrashing up and down if the available resource hover around an interval that would typically trigger autoscaling.
Standby Cores
The number of standby cores that the system should try to keep “always available” at any given time in addition to any that is needed to satisfy the Staging Config requirements. If the number of available cores falls below this number, more Agents are created. If the number of available cores rises above this number, Agents are deleted as long as it wont result in the number of available
cores falling below this number. A value of 0 indicates no additional standby compute is created. The AutoScaler will only provision enough compute according to the Staging Config requirements.
Standby GPUs
The number of standby GPUs that the system should try to keep “always available” at any given time in addition to any that is needed to satisfy the Staging Config requirements. If the number of available GPUs falls below this number, more Agents are created. If the number of available GPUs rises above this number, Agents are deleted as long as it wont result in the number of available
GPUs falling below this number. A value of 0 indicates no additional standby compute is created. The AutoScaler will only provision enough compute according to the Staging Config requirements.
Standby Memory (GiB)
The amount of memory (in GiB) that the system should try to keep “always available” at any given time in addition to any that is needed to satisfy the Staging Config requirements. If the amount of available memory falls below this number, more Agents are created. If the amount of available memory rises above this number, Agents are deleted as long as it wont result in available amount
falling below this number. A value of 0 indicates no additional standby compute is created. The AutoScaler will only provision enough compute according to the Staging Config requirements.
Agent Cores Override
When an Agent is created, the compute resource (e.g AWS EC2 / Digital Ocean Droplet) will have a set amount of CPU and Ram as defined by the cloud provider’s instance type. This setting should typically be set to match the instance type but can be set to a preferred value.
Agent GPUs Override
When an Agent is created, the compute resource (e.g AWS EC2 / Digital Ocean Droplet) will have a set number of GPUs as defined by the cloud provider’s instance type. This setting should typically be set to match the instance type but can be set to a higher number to allow oversubscribing.
Agent Memory Override (GiB)
When an Agent is created, the compute resource (e.g AWS EC2 / Digital Ocean Droplet) will have a set amount of CPU and Ram as defined by the cloud provider’s instance type. This setting should typically be set to match the instance type but can be set to a preferred value.
Register DNS
If enabled, the Agent’s IP will be registered in DNS.
Base Domain Name
Define a base name for the automatic DNS registration for the Agent. The system will create a full name using <ID>.<Base Domain Name>. If the Base Domain Name is “agents.kasm.example.com”, the full DNS name generated will be <ID>.agents.kasm.example.com (e.g 123abcd.agents.kasm.example.com). This Base Domain Name, must already be a registered DNS zone within the cloud provider’s DNS system.
Starting in Workspaces 1.14.0, administrators can choose to leverage fully on-demand compute resources for container
and server/server pool based sessions. When users requests a session, and no compute is available, the system will
queue the request, provision the resources according to the autoscale configs, then fulfill the request. This will
prevent the user from receiving a No Resources error. Instead, the user will be presented with a status indicator while
the request is fulfilled, which may take several minutes. This can be used alongside the existing standby and staging
mechanism to give the administrator more options to balance compute costs with session delivery times.
Enabling Aggressive Scaling in the Autoscale Config, instructs the system to make more opportunistic choices when
requesting resources, with the goal of reducing the users wait time. This mode may result in compute resources being
utilized in less cost-efficient ways, since users may end up on separate machines instead of pooled together depending
on the circumstance. This mode may also result in the system scaling slightly beyond the max instances defined on
the associated VM Provider due to the potential concurrent nature of resource provisioning.
Starting in Workspaces 1.17.0, the nginx_cert_in and nginx_key_in variables were removed from the AutoScale API. These values are no longer passed into startup scripts. Administrators need to ensure that any existing and / or new configurations that use startup scripts are updated to remove references to these two variables.
If the startup script is not updated, when the AutoScale API attempts to deploy a VM with that script it will result in the following error:
In order for clients to properly make connections to Kasm sessions when auto-scaling,
the Upstream Auth Address setting for the AutoScale Deployment Zone
must be updated. Update the Upstream Auth Address with the public IP or FQDN of the Kasm Workspaces server. See Update Zones for more information.
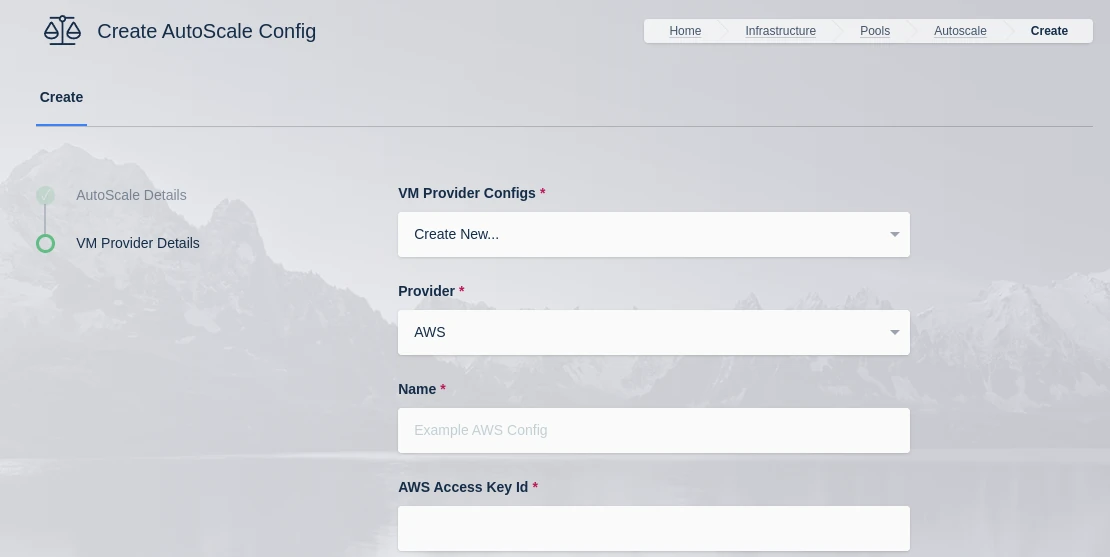
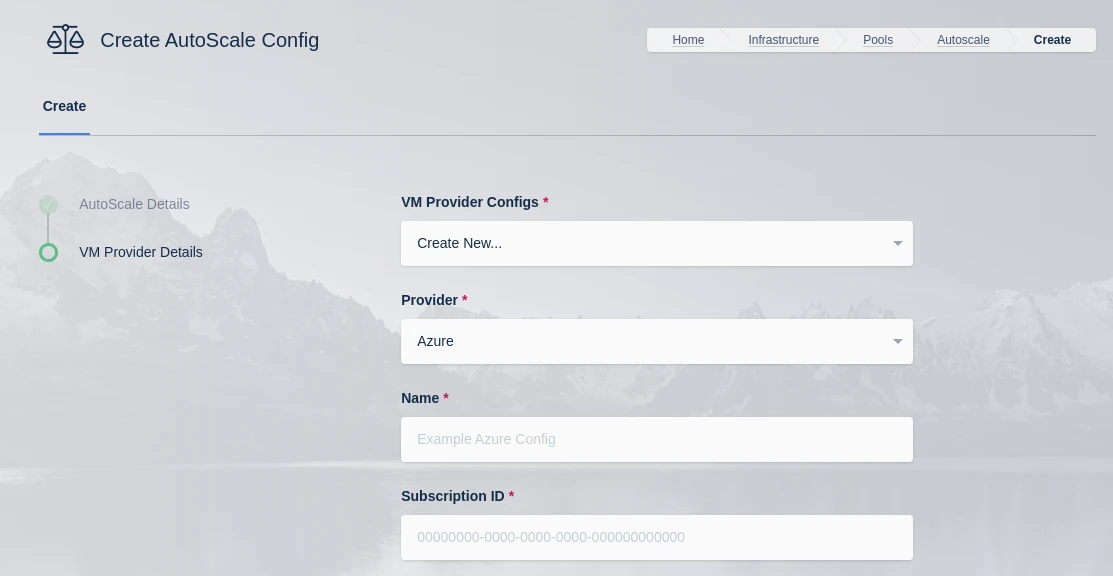
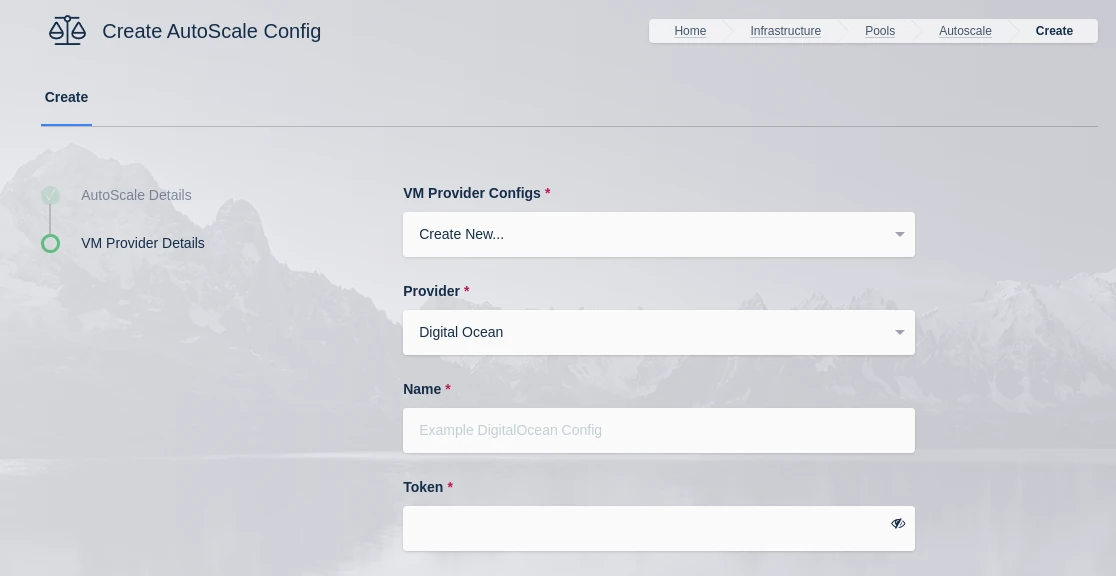
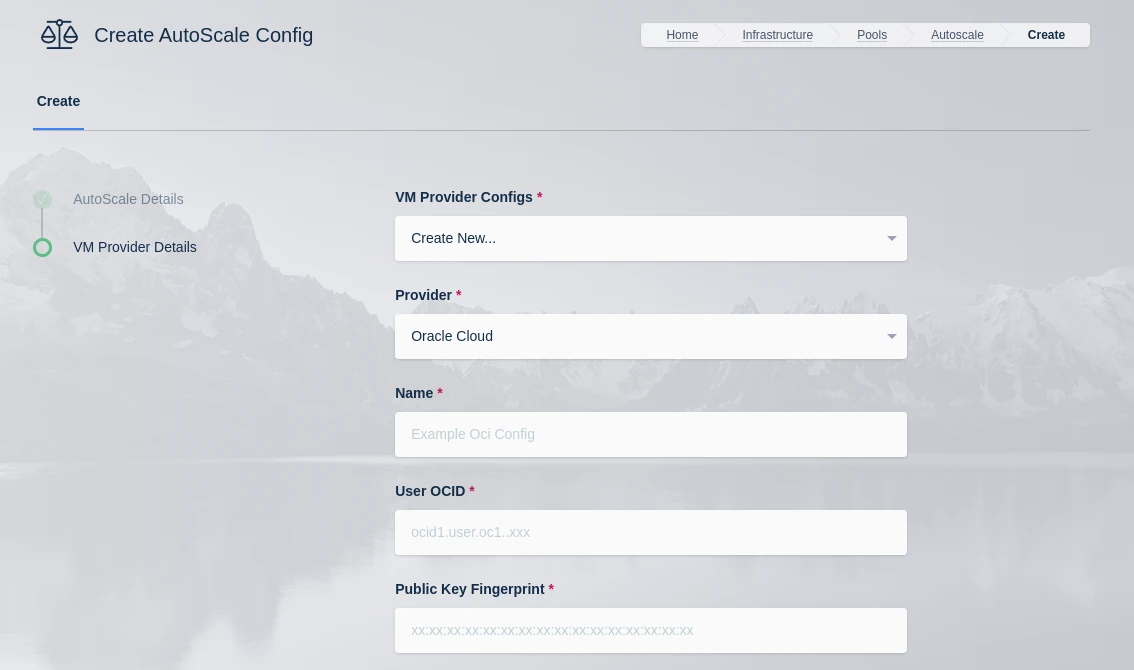
Select an existing config or create a new config. If selecting an existing config and changing any of the details, those details will be changed for anything using the same VM Provider config.
Provider
Select a provider from AWS, Azure, Digital Ocean, Google Cloud or Oracle Cloud. If selecting an existing provider this will be selected automatically.
The AWS Access Key used for the AWS API. If the value {IAM} is defined, the service will query the local metadata instance on the Webapp host to utilize a an instance attached IAM Role.
AWS Secret Access Key
The AWS Secret Access Key used for the AWS API. This value is ignored if {IAM} is defined for AWS Access Key ID
AWS: Region
The AWS Region the EC2 Nodes should be provisioned in. e.g (us-east-1)
AWS: EC2 AMI ID
The AMI ID to use for the provisioned EC2 nodes. This should be an OS that is supported by the Kasm installer.
AWS: EC2 Instance Type
The EC2 Instance Type (e.g t3.micro). Note the Cores and Memory override settings don’t necessarily have to match the instance configurations. This is to allow for over provisioning.
AWS: Max EC2 Nodes
The maximum number of EC2 nodes to provision regardless of the need for available free slots
AWS: EC2 Security Group IDs
A Json list containg security group IDs to assign the EC2 nodes. e.g ["sg-065ae66f2d","sg-02522kdkas"]
AWS: EC2 Subnet ID
The subnet ID to place the EC2 nodes in.
AWS: EC2 EBS Volume Size (GB)
The size of the root EBS Volume for the EC2 nodes.
AWS: EC2 EBS Volume Type
The EBS Volume Type (e.g gp2)
AWS: EC2 IAM
The IAM to assign the EC2 Nodes. Administrators may want to assign CloudWatch IAM access.
AWS: EC2 Custom Tags
A Json dictionary for custom tags to assigned on auto-scaled Agent EC2 Nodes. e.g {"foo":"bar","bin":"baz"}
AWS: EC2 Startup Script
When the EC2 Nodes are provision this script is executed. The script is responsible for installing and configuring the Kasm Agent.
Retrieve Windows VM Password from AWS
When provisioning an AWS Windows VM Kasm can retrieve the password generated by AWS and store it in the Server configuration record created during the autoscale provision.
This will only happen if the Connection Password field from the attached Autoscale config is blank. When populated Kasm will use the defined value instead of what is returned from AWS.
The Administrator may want to leave this field blank and disable retrieving the password from AWS if they wish the Kasm user to be presented with a login screen to manually enter credentials upon
connecting to the Windows Workspace. NOTE: This setting only affects Windows (RDP connection type) AWS instances.
SSH Keys
The SSH Key pair to assign the EC2 node
AWS Config Override (JSON)
Custom configuration may be added to the provision request for advanced use cases. Instance configuration is overridden in the ‘instance_config’ configuration block e.g.
{"instance_config":{"EbsOptimized":true}}See EC2 Documentation for available options.
A number of settings are required to be defined to use this functionality. The Azure settings appear in the
Deployment Zone configuration when the feature is licensed.
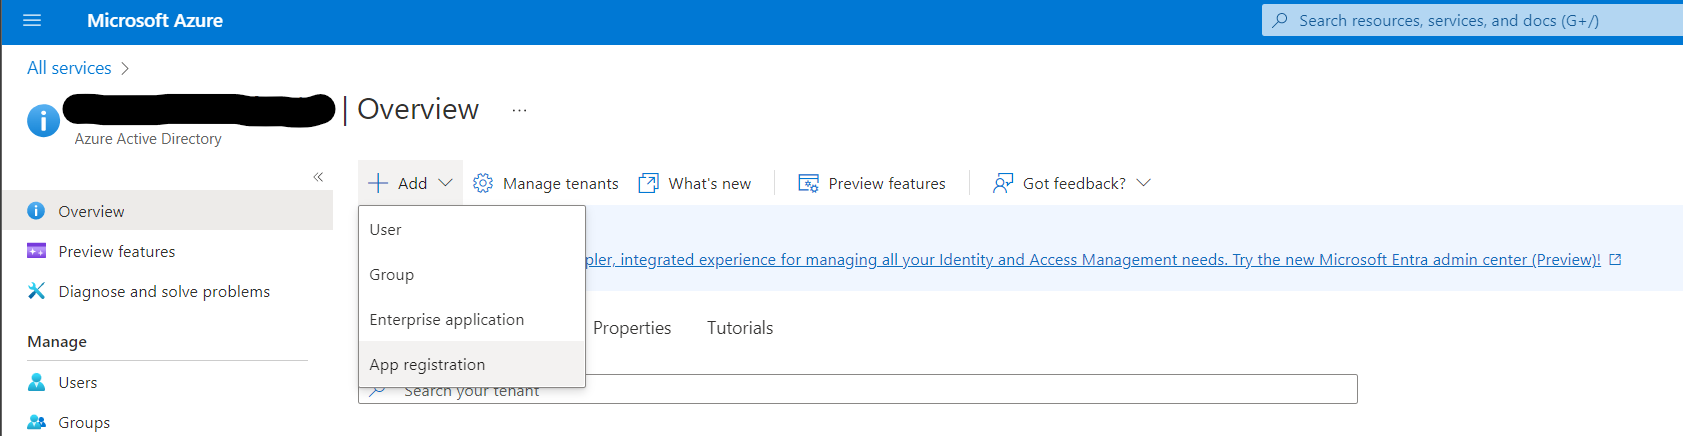
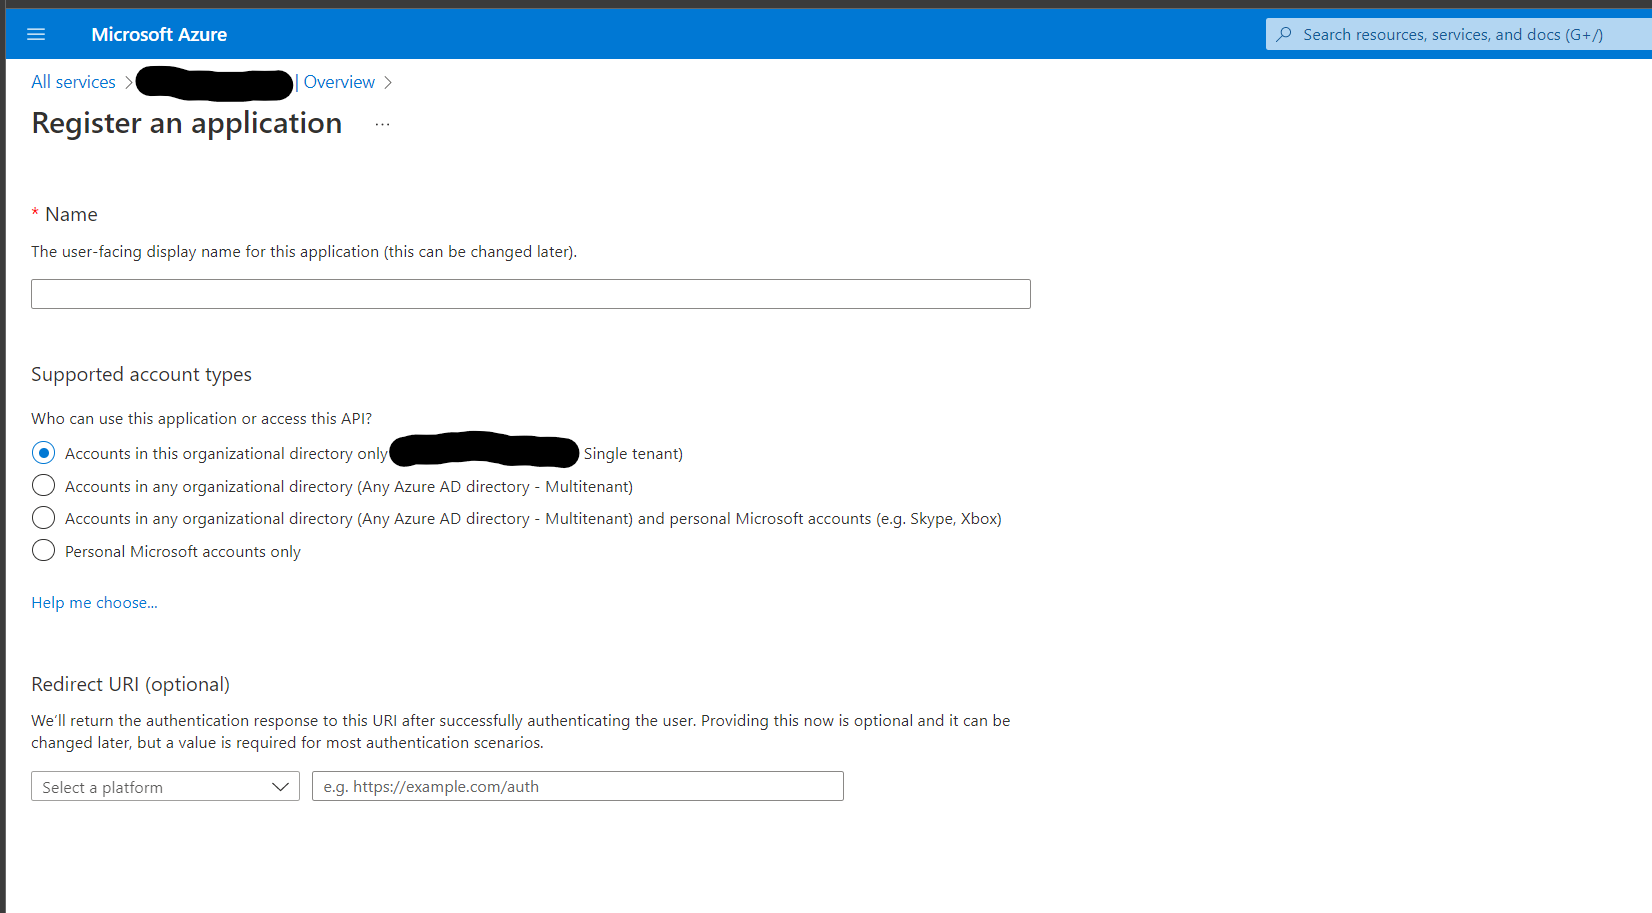
An API key for Kasm must be created to use to interface with Azure. Azure call these apps, and the example will walk through registering one along with the required permissions.
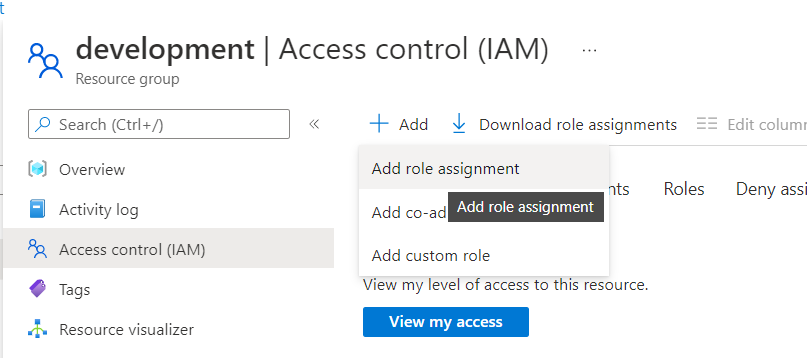
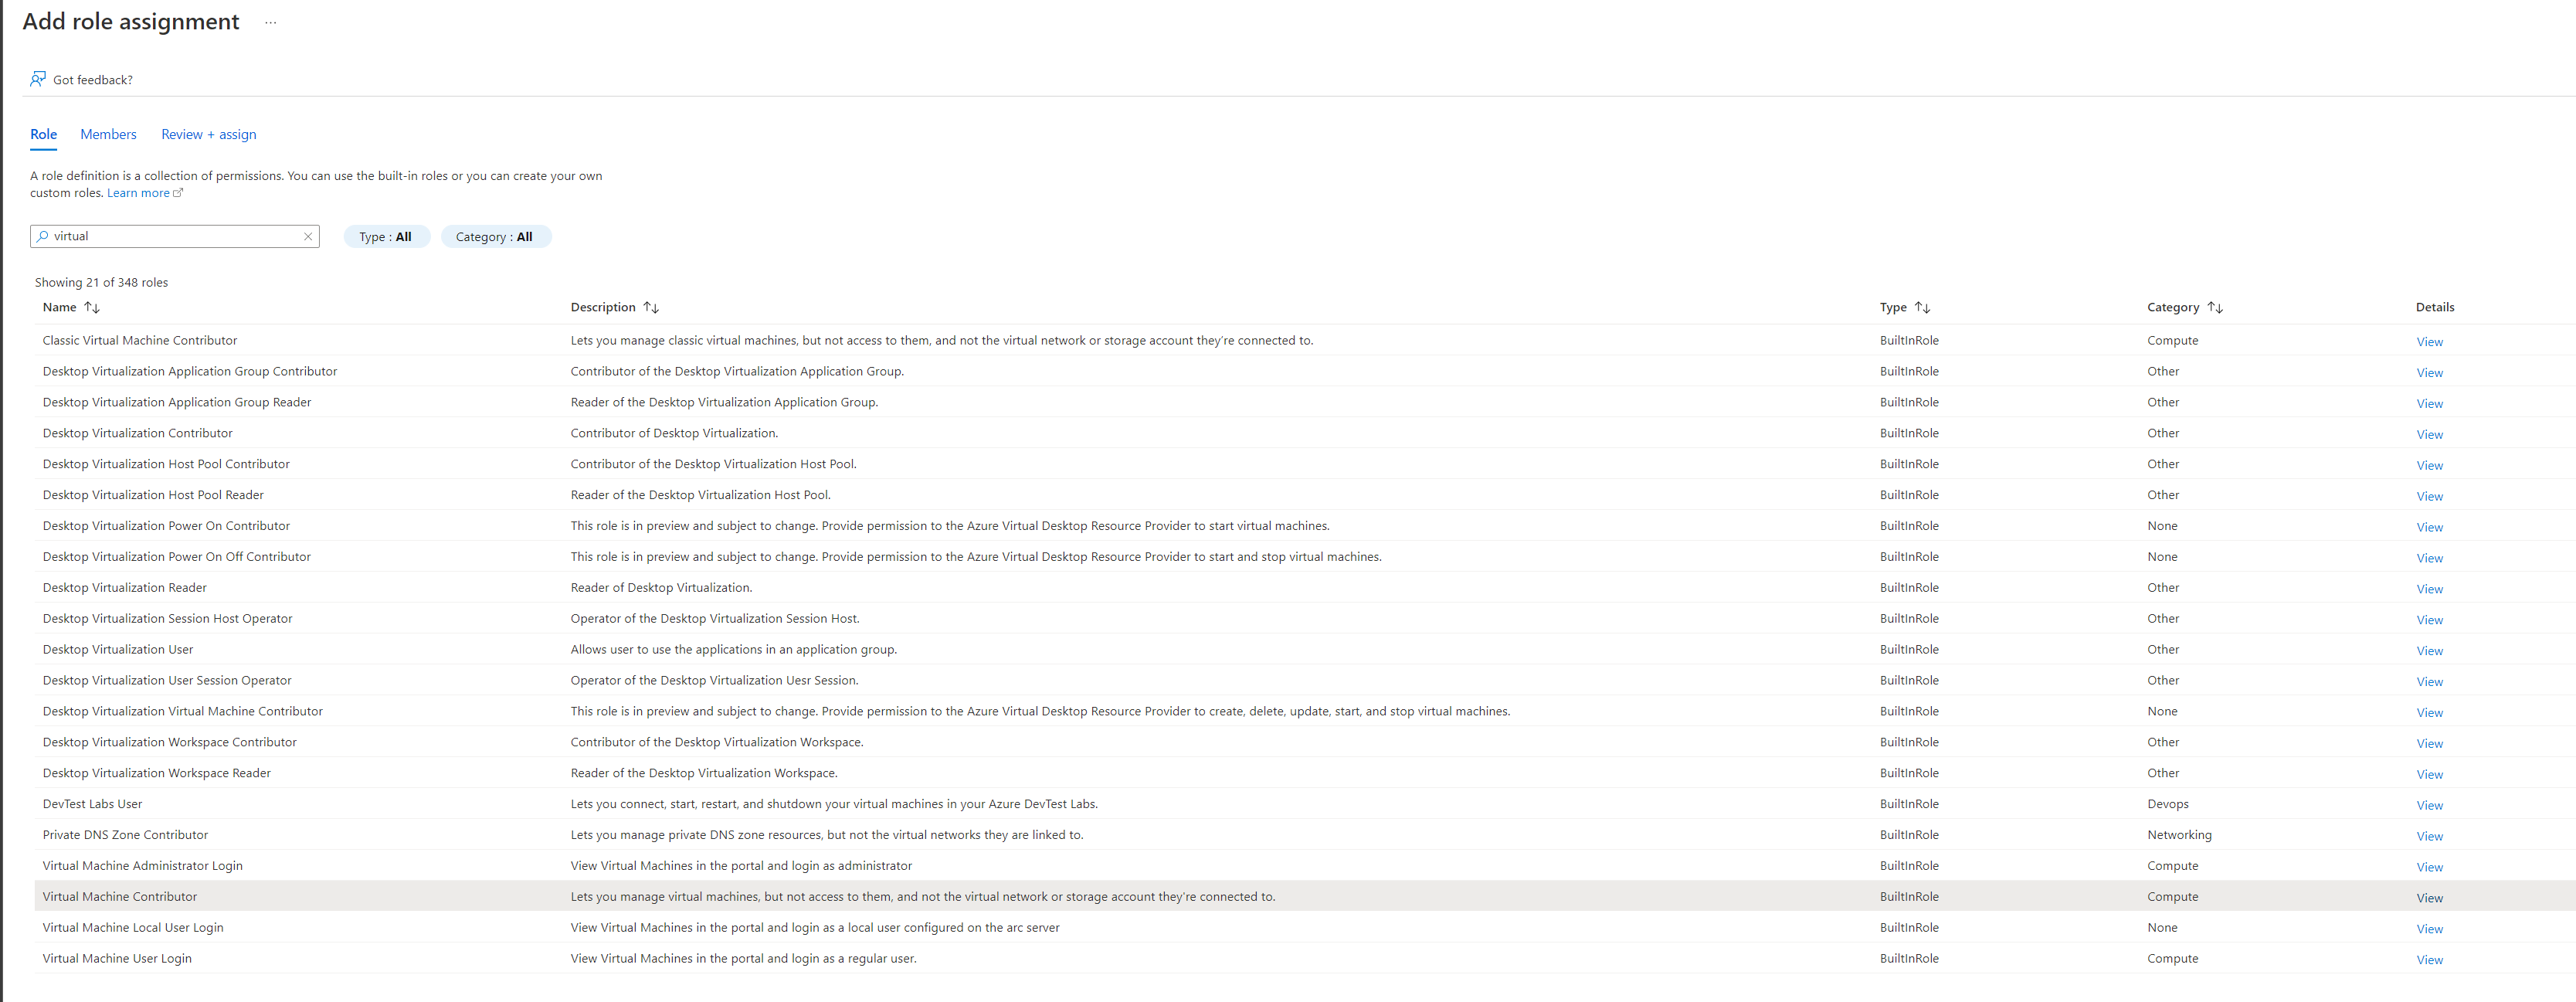
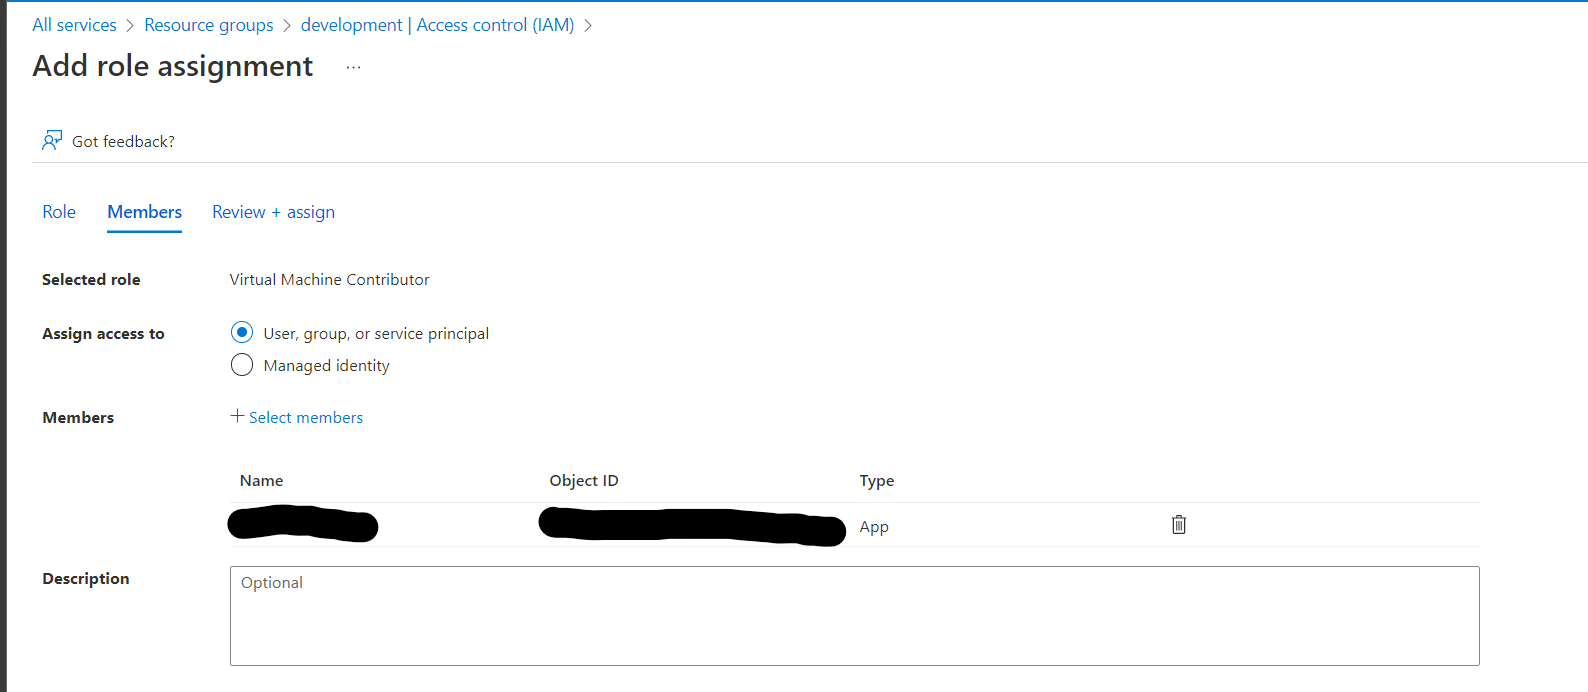
Register an app by going to the Azure Active Directory service in the Azure portal.
The app created in Azure will need two roles, first select the Virtual Machine Contributor role, then on the next page select the app by typing in the name e.g. Kasm Workspaces
A number of settings are required to be defined to use this functionality.
The Digital Ocean settings appear in the Pool configuration when the feature is licensed.
The Subscription ID for the Azure Account.
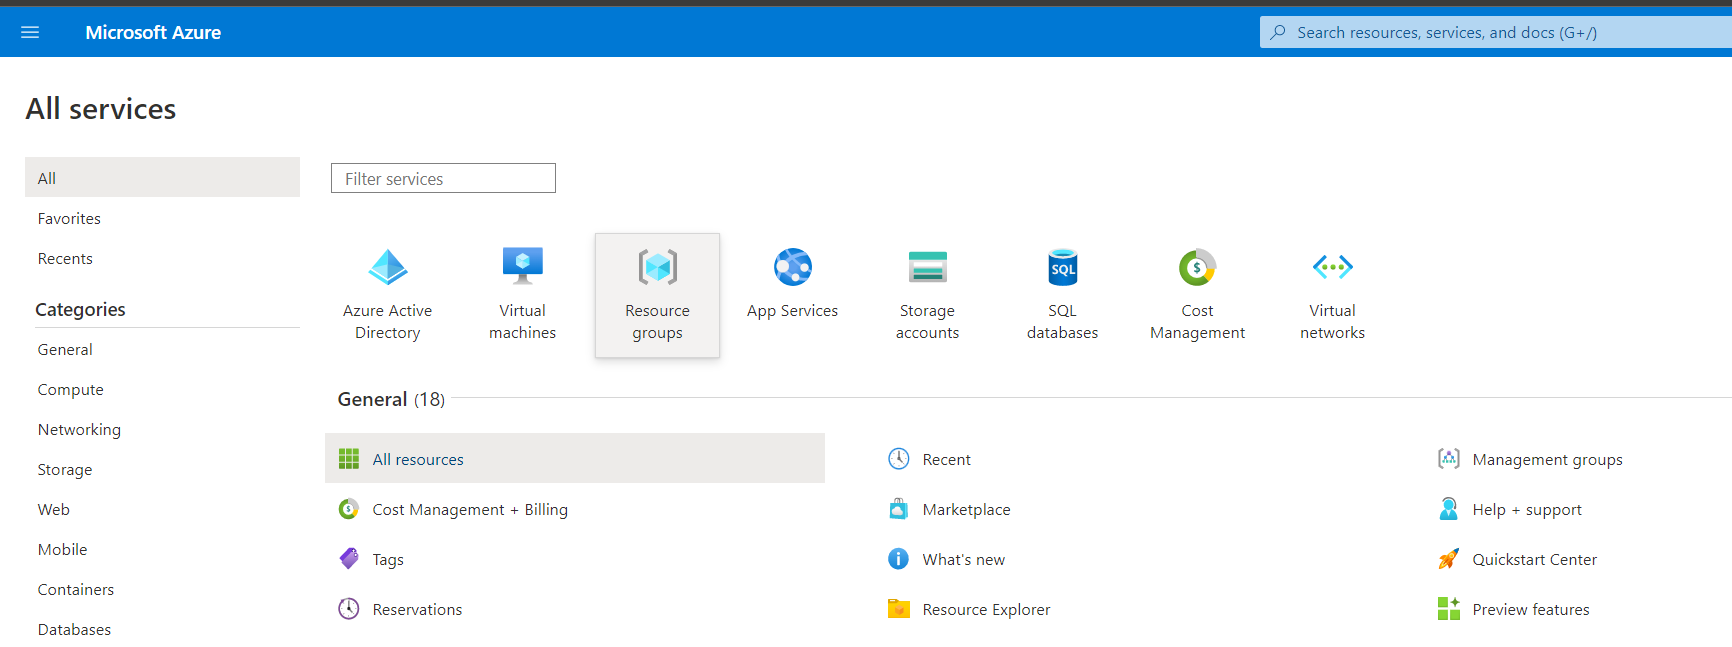
This can be found in the Azure portal by searching for Subscriptions in the search bar in Azure home then selecting the subscription to use.
(e.g 00000000-0000-0000-0000-000000000000)
Resource Group
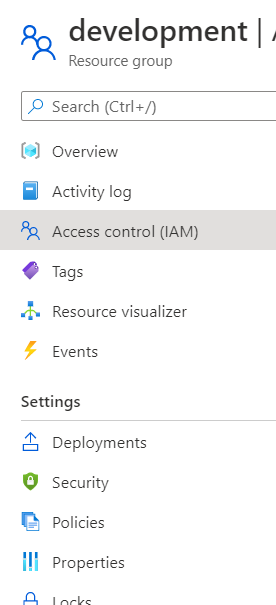
The Resource Group the DNS Zone and/or Virtual Machines belong to (e.g dev)
Tenant ID
The Tenant ID for the Azure Account.
This can be found in the Azure portal by going to Azure Active Directory using the search bar in Azure home.
(e.g 00000000-0000-0000-0000-000000000000)
Client ID
The Client ID credential used to auth to the Azure Account.
Client ID can be obtained by registering an application within Azure Active Directory.
(e.g 00000000-0000-0000-0000-000000000000)
Client Secret
The Client Secret credential created with the registered applicaiton in Azure Active Directory. (e.g abc123)
Azure Authority
Which Azure authority to use, there are four, Azure Public Cloud, Azure Government, Azure China and Azure Germany.
Region
The Azure region where the Agents will be provisioned. (e.g eastus)
Max Instances
The maximum number of Azure VMs to provision regardless of the need for additional resources.
VM Size
The size configuration of the Azure VM to provision (e.g Standard_D2s_v3)
OS Disk Type
The disk type to use for the Azure VM. (e.g Premium_LRS)
OS Disk Size (GB)
The size (in GB) of the boot volume to assign the compute instance.
OS Image Reference (JSON)
The OS Image Reference configuration for the Azure VMs
(e.g {"publisher":"canonical","offer":"0001-com-ubuntu-server-focal","sku":"20_04-lts-gen2","version":"latest"} or
If checked, the VM will be assigned a public IP. If no public ip IP is assigned the VM must ne attached to a standard load balancer of the subnet must have a NAT Gateway or user-defined route (UDR).
If a public IP is used, the subnet must not also include a NAT Gateway. Reference
Tags (JSON)
A JSON dictionary of custom tags to assign to the VMs (e.g {"foo":"bar","bin":"baz"} )
OS Username
The login username to assign to the new VM (e.g testuser)
OS Password
The login password to assign to the new VM. Note: Password authentication is disabled for SSH by default
SSH Public Key
The SSH public key to install on the VM for the defined user: (e.g ssh-rsaAAAAAAA....)
Agent Startup Script
When instances are provisioned, this script is executed and is responsible for installing and configuring the Kasm Agent.
Config Override (JSON)
Custom configuration may be added to the provision request for advanced use cases. The emitted json structure is visible by clicking JSON View when inspecting the VM in the Azure console.
The keys in this configuration can be used to update top level keys within the emitted json config (e.g {"location":"eastus"}).
Nested items can be updated by using dot notation in the key (e.g {"hardware_profile.vm_size":"Standard_D4s_v3"})
Exiting array elements can be updated by specifying the index in the dot notation (e.g {"os_profile.linux_configuration.ssh.public_keys.0.path":"/home/ubuntu/.ssh/authorized_keys"})
A tag(s) to assign the droplet when it is created. This should be a comma separated list of tags.
SSH Key Name
The SSH Key to assign to the newly created droplets. The SSH Key must already exist in the Digital Ocean Account.
Firewall Name
The name of the Firewall to apply to the newly created droplets. This Firewall must already exist in the Digital Ocean Account.
Go to your Digital Ocean dashboard -> “Networking” -> “Firewalls” to view existing firewalls or create a new firewall
Startup Script
When droplets are provisioned this script is executed. The script is responsible for installing and configuring the Kasm Agent.
Example scripts can be found on our GitHub repository
This error occurs when Kasm Workspaces tries to assign a unique tag based on the Zone Id to the Digital Ocean Firewall.
If that tag does not already exist in Digital Ocean, the operation will fail and present the error.
To workaround the issue, manually create a tag matching the one specified in the error (e.g zone:abc123) via
the Digital Ocean console. This can be done via API, or simply creating the tag on a temporary Droplet.
An identifying name for this provider configuration e.g. Google Cloud (GCP) Docker Agent Autoscale Provider
GCP Credentials
The JSON formatted credentials for the service account used to authenticate with GCP:
Ref
Max Instances
The maximum number of GCP compute instances to provision regardless of the need for additional resources.
Project ID
The Google Cloud Project ID (e.g pensive-voice-547511)
Region
The region to provision the new compute instances. (e.g us-east4)
Zone
The zone the new compute instance will be provisioned in (e.g us-east4-b)
Machine Type
The Machine type for the GCP compute instances. (e.g e2-standard-2)
Machine Image
The Machine Image to use for the new compute instance. (e.g projects/ubuntu-os-cloud/global/images/ubuntu-2004-focal-v20211212)
Boot Volume GB
The size (in GB) of the boot volume to assign the compute instance.
Disk Type
The disk type for the new instance. (e.g pd-ssd, pd-standard, etc.)
Customer Managed EncryptionKey (CMEK)
The optional path to the Customer Managaged Encryption Key (CMEK)
(e.g projects/pensive-voice-547511/locations/global/keyRings/my-keyring/cryptoKeys/my-key
Network
The path of the Network to attach the new instance. (e.g projects/pensive-voice-547511/global/networks/default)
Sub Network
The path of the Sub Network to attach the new instance.(e.g projects/pensive-voice-547511/regions/us-east4/subnetworks/default)
Public IP
If checked, a public IP will be assigned to the new instances
Network Tags (JSON)
A JSON list of the Network Tags to assign the new instance. (e.g ["https-server","foo","bar"])
Custom Labels (JSON)
A JSON dictionary of Custom Labels to assign the new instance (e.g {"foo":"bar","bin":"baz"})
Metadata (JSON)
A JSON list of metadata objects to add to the instance.
(e.g [{"key":"ssh-keys","value":"user1:ssh-rsa<keycontents>user1"}])
Reference
Service Account (JSON)
A JSON dictionary representing for a service account to attach to the instance.
(e.g {"email":"service-account@example.com","scopes":["https://www.googleapis.com/auth/cloud-platform"]})
Reference
Guest Accelerators (JSON)
A JSON list representing the guest accelerators (e. GPUs) to attach to the instance.
(e.g [{"acceleratorType":"projects/<project-id>/zones/<zone>/acceleratorTypes/nvidia-tesla-t4","acceleratorCount":1}])
Reference
GCP Config Override (JSON)
A JSON dictionary that can be used to customize attributes of the VM request. The only attributes that cannot be overridden
are name and labels
(e.g {"shieldedInstanceConfig":{"enableIntegrityMonitoring":true,"enableSecureBoot":true,"enableVtpm":true}}Reference
VM Installed OS Type
The family of the OS installed on the VM (e.g. linux or windows).
When instances are provisioned, this script is executed and is responsible for installing and configuring the Kasm Agent.
Bash is supported on Linux instances and Powershell for Windows instance.
Example scripts can be found on our Github repo
Note on Updating Existing Google Cloud Providers (GCP)
Please review the settings for all existing Google Cloud Providers (GCP). Two new fields were added; VMInstalledOSType
which defaults to Linux, and StartupScriptType which defaults to BashScript. If the existing provider is configured
with a Windows VM it will not successfully launch the startup script without changing these values.
The Harvester certificate as a base64 encoded string, from the KubeConfig file
API Token
The API token for authentication to Harvester, from the KubeConfig file
VM Namespace
The name of the Harvester namespace where the VMs will be provisioned
VM SSH Public Key
A public key to add to the autoscale agents, this is then provided as {ssh_key} for use in the startup script
Cores
The number of CPU cores to configure for the autoscale agents
Memory
The amount of memory in GiB for the autoscale agents
Disk Image
The name of the Harvester image to use for autoscale agents. See Disk Image for more details.
Disk Size
The size of the disk in GiB to use for autoscale agents
Network Type
The network type for the autoscale agents (pod or multus)
Interface Type
The interface type for the autoscale agents (masquerade or bridge)
Network Name
The name of the network to connect to the autoscale agents to (multus network type only)
Startup Script
cloud-init, Bash, or Powershell script to run after agent creation, typically to install the Kasm Agent and/or any other runtime dependencies you may have.
Example scripts can be found on our GitHub repository. Make sure to use the correct script based on the target OS (bash/cloud-init for Linux and Powershell for Windows).
Configuration Override
A optional config override that contains a complete YAML manifest file used when provisioning the autoscale agents
Enable TPM
Enable TPM for the autoscale agents
Enable EFI Boot
Enable the EFI bootloader for the autoscale agents
Enable Secure Boot
Enable Secure Boot for the autoscale agents (required EFI Boot to be enabled)
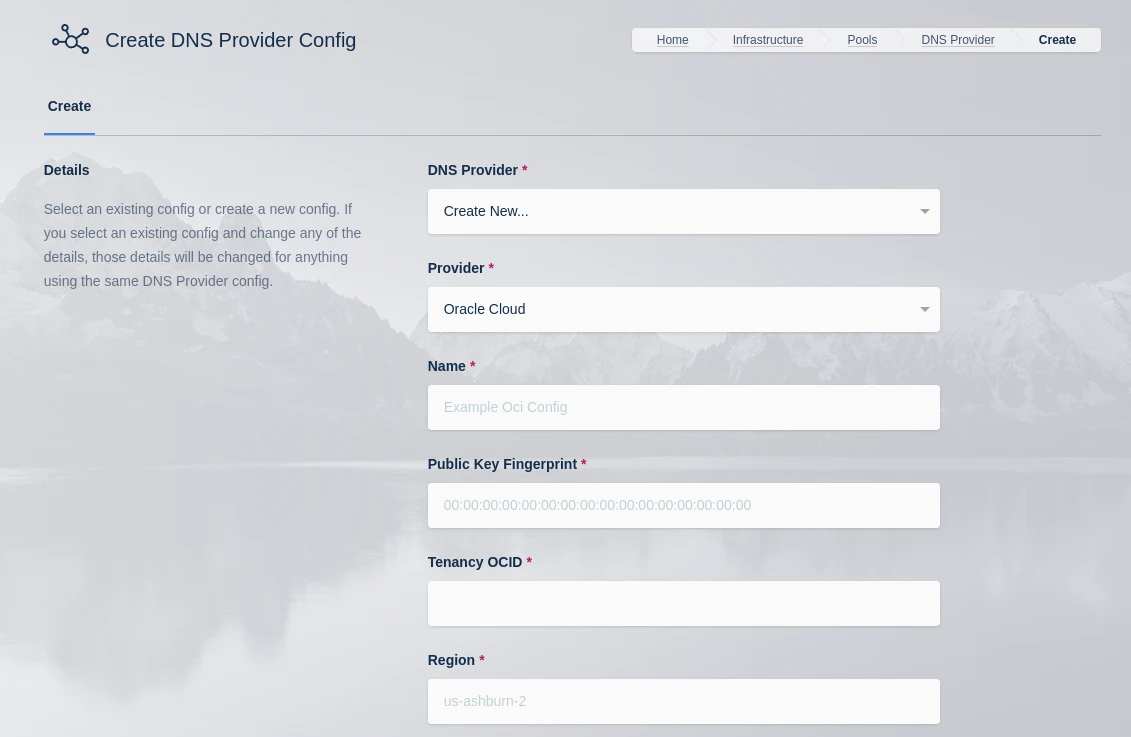
The OCID of the user to authenticate with the OCI API. (e.g ocid1.user.oc1..xyz).
You can find this by going to your OCI dashboard -> Click on your Profile -> You can find your user OCID here.
Public Key Fingerprint
The public key fingerprint of the authenticated API user created in OCI. (e.g xx:yy:zz:11:22:33)
Private Key
The private key (PEM format) of the authenticated API user created in OCI.
Region
The OCI Region name. (e.g us-ashburn-1).
See Regions for the list
Tenancy OCID
The Tenancy OCID for the OCI account. (e.g ocid1.tenancy.oc1..xyz)
Compartment OCID
The Compartment OCID where the auto-scaled agents will be placed. (e.g ocid1.compartment.oc1..xyx)
Network Security Group OCIDs(JSON)
A JSON list of Security Group OCIDs that will be assigned to the auto-scaled agents.
(e.g ["ocid1.networksecuritygroup.oc1.iad.xxx","ocid1.networksecuritygroup.oc1.iad.yyy"]).
To create or find existing Network Security Groups, go to your OCI dashboard -> “Network Security Groups”.
See Network Security Groups for more
details
Max Instances
The maximum number of OCI compute instances to provision regardless of the need for available free slots.
Availability Domains (JSON)
A JSON list of availability domains where the OCI compute instances may be placed.
(e.g ["BEol:US-ASHBURN-AD-1","BEol:US-ASHBURN-AD-2"]).
See Availability Domains for more details
Image OCID
The OCID of the Image to use when creating the compute instances. (e.g ocid1.image.oc1.iad.xyz)
See OCI Image Families for the list
Shape
The name of the shape used for the created compute instances. (e.g VM.Standard.E4.Flex)
See OCI Compute Shapes for the list
Flex CPUs
The number of OCPUs to assign the compute instance. This is only applicable when a Flex shape is used.
Burstable Base CPUUtilization
The baseline percentage of a CPU Core that can be use continuously on a burstable instance (Select 100% to use a non-burstable
instance). Reference.
Flex Memory GB
The amount of memory (in GB) to assign the compute instance. This is only applicable when a Flex shape is used.
Boot Volume GB
The size (in GB) of the boot volume to assign the compute instance.
Boot Volume VPUs Per GB
The Volume Performance Units (VPUs) to assign to the boot volume. Values between 10 and 120 in mulitples of 10 are acceptable.
10 is the default and represents the Balanced profile. The higher the VPUs, the higher the volume performance and cost.
Reference.
Custom Tags (JSON)
A Json dictionary of custom freeform tags to assigned the auto-scaled instances. e.g {"foo":"bar","bin":"baz"}
Subnet OCID
The OCID of the Subnet where the auto-scaled instances will be placed. (e.g ocid1.subnet.oc1.iad.xyz)
To create or find existing subnets, go to your OCI dashboard -> “Networking” -> “Virtual Cloud Networks” -> “Subnets”
SSH Public Key
The SSH public key to insert into the compute instances if you want to SSH into your instances. (e.g ssh-rsa XYABC)
Startup Script
When instances are provisioned, this script is executed and is responsible for installing and configuring the Kasm Agent.
Example scripts can be found on our GitHub repository
OCI Config Override
A JSON dictionary that can be used to customize attributes of the VM request. An OCI Model can be specified with the
“OCI_MODEL_NAME” key.
Reference: OCI Python Docs
and Kasm Examples.
You can find the OCI Image ID for the version of the desired operating system in the desired region by finding navigating the OCI Image page.
A list of available plugins can be retrieved by navigating to an existing instance’s “Oracle Cloud Agent” config page.
This example enables the “Vulnerability Scanning” plugin.
An identifying name for this provider configuration e.g. Nutanix Docker Agent Autoscale Provider
Max Instances
The maximum number of autoscale instances to be provisioned, regardless of other settings
Host
The IP or FQDN of the Nutanix Prism Central server (e.g. 192.168.100.40 or nutanix.example.com)
Port
The listening port to the Nutanix Prism Central server. This is usually 9440
Username
The name of the user that KASM will use to access the Nutanix Prism Central server
Password
The Password of the user that KASM will use to authenticate against the Nutanix Prism Central server
Verify SSL
Whether to validate SSL certificates. Set to False to enable self-signed certificates. Defaults to True
API Version
The API version used to communicate with Prism Central. v3 is recommended, v4 compatibility is currently in Preview
VM Candidate Name
The name of the VM used to clone new autoscaled VMs
VM Cores
The number of CPU cores to provision on the new autoscaled VMs
VM Memory
The amount of memory, in Gibibyte (GiB), to provision on the new autoscaled VMs
Startup Script
When VMs are provisioned, this script is executed and is responsible for installing and configuring the Kasm Agent for Docker Agent roles, or the Kasm Desktop Service for Windows VMs if desired. Bash scripts
and cloud-config yaml formats are supported on a Linux host and Powershell scripts on Windows hosts
Example scripts are available on our GitHub repository
An identifying name for this provider configuration e.g. Proxmox Docker Agent Autoscale Provider
Max Instances
The maximum number of autoscale instances to be provisioned, regardless of other settings
Host
The hostname or IP and port of your Proxmox instance (e.g. 192.168.100.40:8006)
Username
The name of the autoscale user in Proxmox, including the auth realm (e.g. KasmUser@pve)
Token Name
The name of the API token associated with the user (e.g. kasm_token and not KasmUser@pve!kasm_token)
Token Value
The secret value of the API token associated with the user
Verify SSL
Whether or not to verify the SSL certs in the Proxmox environment. Disable if you are using self-signed certs
VMID Range Lower
The start of the VMID range for Kasm to use for autoscale agents. Must not overlap with any other Proxmox autoscale providers configured in Kasm
VMID Range Upper
The end of the VMID range for Kasm to use for autoscale agents. Must not overlap with any other Proxmox autoscale providers configured in Kasm
Full Clone
If enabled performs a full clone rather than a linked clone. A linked clone is faster to provision but will have reduced performance compared to a full clone
Template Name
The name of the VM template to use when cloning new autoscale agents
Cluster Node Name
The name of the Proxmox node containing the VM template
Resource Pool Name
Specify the resource pool to use for cloning the new autoscale agents
Storage Pool Name
Optionally specify a storage pool to use for cloning the new autoscale agents. This requires Full Clone to be enabled
Target Node Name
Optionally specify a cluster node to provision new autoscale agents on (defaults to the Cluster Node Name)
VM Cores
The number of CPU cores to configure for the autoscale agents
VM Memory
The amount of memory in GiB for the autoscale agents
Installed OS Type
Linux or Windows
Startup Script Path
The absolute path to where the startup script will be uploaded and run from, typically /tmp for Linux or C:windowstemp for Windows. The path must exist on the template.
Startup Script
Bash (Linux) or Powershell (Windows) startup script to run after agent creation, typically to install the Kasm Agent and/or any other runtime dependencies.
Example scripts are available on our GitHub repository
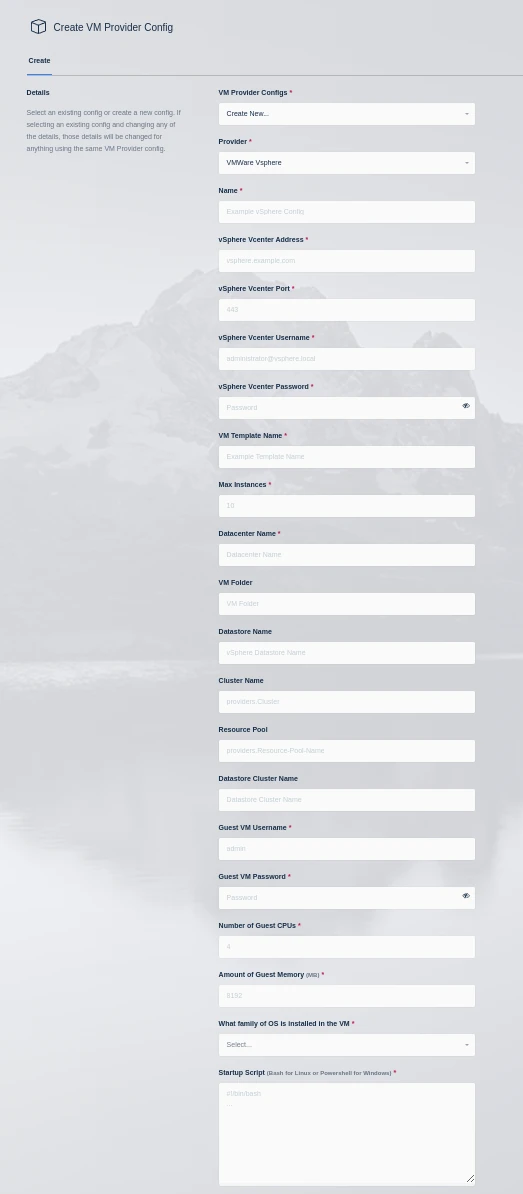
An identifying name for this provider configuration.
vSphere vCenter Address
The IP or FQDN of the VMware vSphere vCenter server to use.
vSphere vCenter Port
The management port of your Vcenter instance (typically 443)
vSphere vCenter Username
The username to use when authenticating with the vSphere vCenter server (e.g kasm-autoscale)
vSphere vCenter Password
The password to use when authenticating with the vSphere vCenter server.
VM Template Name
The name of the template VM to use when cloning new autoscaled VMs.
Max Instances
The maximum number of vSphere VM instances to provision regardless of the need for available free slots.
Datacenter Name
The datacenter to use for cloning the new vSphere VM instances.
VM Folder
The VM folder to use for cloning the new vSphere VM instances. This field is optional, if left blank the VM folder of the
template is used.
Datastore Name
The datastore to use for cloning the new vSphere VM instances. This field is optional, if left blank the datastore of the
template is used.
Cluster Name
The cluster to use for cloning the new vSphere VM instances. This field is optional, if left blank the cluster of the template
is used.
Resource Pool
The resource pool to use for cloning the new vSphere VM instances. This field is optional, if left blank the resource pool of
the template is used.
Datastore Cluster Name
The datastore cluster to use for cloning the new vSphere VM instances. This field is optional, if left blank the datastore
cluster of the template is used.
Guest VM Username
The username to use for running the startup script on the new vSphere VM instance. This account should have sufficient
privileges to execute all commands in the startup script.
Guest VM Password
The password for the Guest VM Username account.
Number of Guest CPUs
The number of CPUs to configure on new vSphere VM instances. This option is not dependent on the number of CPUs configured on
the template.
Amount of Guest Memory(GiB)
The amount of memory in GibiBytes to configure on new vSphere VM instances. This option is not dependent on the amount of memory
configured on the template.
What family of OS is installedin the VM
Whether the template OS is Linux or Windows. This is needed to ensure proper execution of the startup script.
Startup Script
When instances are provisioned, this script is executed and is responsible for installing and configuring the Kasm Agent.
Scripts are run as bash scripts on a Linux host and Powershell scripts on a Windows host. Example scripts are available on our
GitHub repository
Additional troublshooting steps can be found in the Creating Templates For Use With The VMware vSphere Provider section of the server documentation.
These are the minimum permissions that your service account requires in vCenter based on a default configuration. The account might require additional privileges depending on specific features and configurations you have in place. We advise creating a dedicated service account for Kasm Workspaces autoscaling with these permissions to enhance security and minimize potential risks.
The agent startup scripts utilize VMware’s guest script execution via VMware Tools. This functionality requires direct HTTPS connectivity between the Kasm Workspace Manager and the ESXi host(s) running the agent VMs.
When configuring VMware vSphere with Kasm Workspaces one important item to keep in mind is datastore storage. When clones are created VMware will attempt to satisfy the clone operation if the datastore runs out of space, any VMs that are running on that datastore will be paused until space is available. Kasm Workspaces recommends that critical management VMs such as the Vcenter server VM and cluster management VMs are on separate datastores that are not used for Kasm autoscaling.
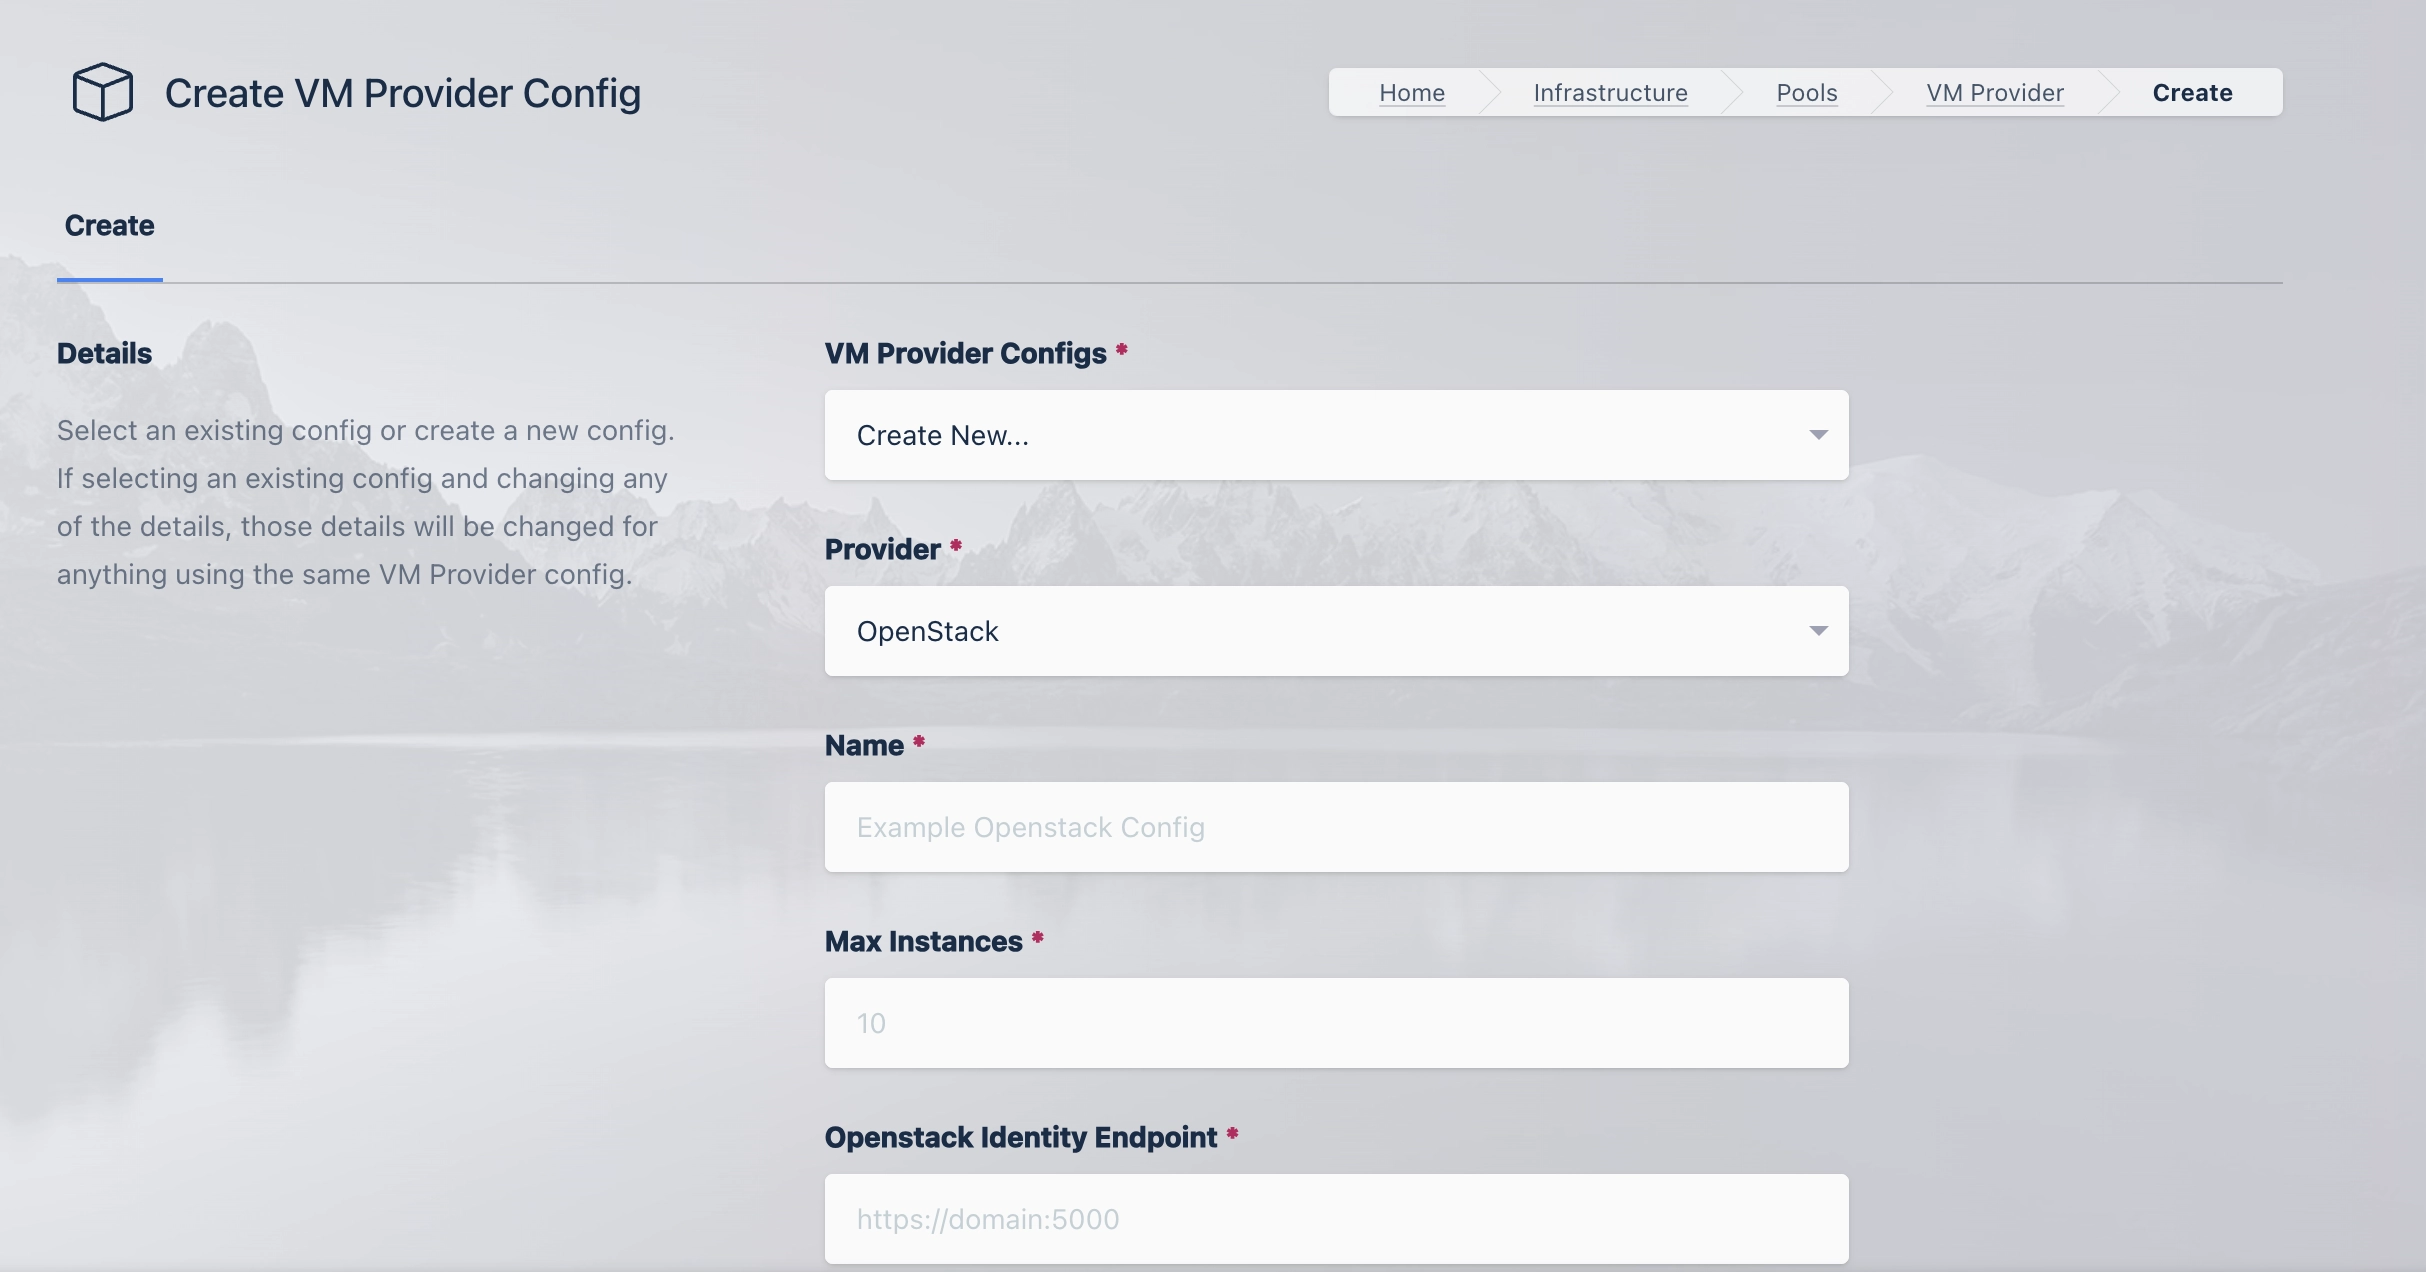
A number of settings are required to be defined to use this functionality.
The OpenStack settings appear in the Pool configuration when the feature is licensed.
The appropriate OpenStack configuration options can be found by using the “API Access” page of the OpenStack UI and downloading the “OpenStack RC File”.
The maximum number of OpenStack compute instances to provision regardless of the need for additional resources.
OpenStack Identity Endpoint
The endpoint address of the OpenStack Keystone endpoint (e.g. https://openstack.domain:5000)
OpenStack Nova Endpoint
The endpoint address of the OpenStack Nova (Compute) endpoint (e.g. https://openstack.domain:8774/v2/)
OpenStack Nova Version
The version to use with the OpenStack Nova (Compute) endpoint (e.g. 2.90)
OpenStack Glance Endpoint
The endpoint address of the OpenStack Glance (Image) endpoint (e.g. https://openstack.domain:9292)
OpenStack Glance Version
The version to use with the OpenStack Glance (Image) endpoint (e.g. 2)
OpenStack Cinder Endpoint
The endpoint address of the OpenStack Cinder (Volume) endpoint. Note: The address contains the OpenStack Project ID
(e.g. https://openstack.domain:8776/v3/383a0dad105e460ab5a863ea0a45932b)
OpenStack Cinder Version
The version to use with the OpenStack Cinder (Volume) endpoint. (e.g. 3)
Project Name
The name of the OpenStack Project where VMs will be provisioned.
Authentication Method
The kind of credential used to authenticate against the OpenStack Endpoints.
Application Credential ID
The Credential ID of the OpenStack Application Credential.
Application Credential Secret
The OpenStack Application Credential secret.
Project Domain Name
The Domain that OpenStack Project belongs to (e.g. domain-1353722761)
User Domain Name
The Domain that the OpenStack User belongs to (e.g. domain-1353722761)
Username
The Username of the OpenStack User used to authentication against OpenStack.
Password
The Password of the OpenStack User used to authenticate against OpenStack.
Metadata
A Json Dictionary containing the metadata tags applied to the OpenStack VMs (e.g. {"my_tag":"my_value"})
Image ID
The ID of the Image used to provision OpenStack VMs.
Flavor
The name of the desired Flavor for the OpenStack VM (e.g. gen.medium)
Create Volume
Enable to create a new Block storage (Cinder) volume for the OpenStack VM. (When disabled, ephemeral Compute (Nova) storage is
used.)
Volume Size (GB)
The desired size of the VM Volume in GB. This can only be specified when “Create Volume” is enabled.
Volume Type
The type of volume to use for the new OpenStack VM Volume (e.g. __DEFAULT__)
Startup Script
When OpenStack VMs are provision this script is executed. The script is responsible for installing and configuring the Kasm
Agent.
Security Groups
A list containing the security groups applied to the OpenStack VM (e.g. ["sg1","sg2"])
Network ID
The ID of the network that the OpenStack VMs will be connected to.
Key Name
The name of the SSH Key used to connect to the instance.
Availability Zone
The Name of the Availability Zone that the OpenStack VM will be placed into.
Config Override
A JSON dictionary that can be used to customize attributes of the VM request
The OpenStack provider requires that OpenStack endpoints present trusted, signed TLS certificates. This can be done through an API gateway that presents a valid certificate or
through configuring valid certificates on each individual service (Reference: Openstack Docs).
Openstack Endpoints Require Trusted Certificates
The OpenStack provider requires that OpenStack endpoints present trusted, signed TLS certificates. This can be done through an API gateway that presents a valid certificate or
through configuring valid certificates on each individual service (Reference: Openstack Docs.).
Application Credential Access Rules
Openstack Application credentials allow for administrators to specify Access Rules to restrict the permissions of an application credential further than a role might allow.
Below is an example of the minimum set of permissions that Kasm Workspaces requires in an Application Credential
KASM supports autoscaling in Kubernetes environments that are running KubeVirt. This includes generic k8s installations as well as GKE and Harvester deployments.
In the event that KASM providers do not expose a required feature, the provider configuration may be overridden.
In order to do this, the entire manifest must be stored in the provider config_override.
KASM will parse the manifest and attempt to update certain fields; the metadata will be updated so that the name field
contains a unique name, the namespace matches the namespace in the provider config, and the labels are updated to contain
various labels required for autoscale functionality. All other values will be preserved.
The runStrategy will be set to Always and the hostname will be set to match the unique name.
In order to support startup scripts, a disk with the following settings will be appended to the disks:
The manifest will be used to spawn multiple VMs, thus using unique names for certain resources such as PVCs is necessary.
To support this the provider will replace any instance of $KASM_NAME with a unique name, to use this for multiple different types of
resources you can append to the name such as this suggested PVC example:
Again, due to the fact that the manifest will be spawning multiple VMs it is necessary to utilize a disk cloning method
such as the dataVolume feature of the Containerized Data Importer interface created by KubeVirt.
The k8s namespace for KASM resources is configured on the provider, this should not be updated while the provider is in use.
Doing so can result in unpredictable behavior and orphaned resources. If it is necessary to change the k8s namespace, a
new autoscale and provider should be created with the new namespace and the old autoscale configuration should be updated
setting the standby cores, gpus and memory to 0. This should allow new resources to transition to the new provider.
It is possible for orphaned k8s objects to exist for various reasons, such as power loss of the KASM server during VM creation.
Currently, these objects must be cleaned up manually.
The k8s objects that KASM creates are: virtualmachines, secrets and PVCs.
The KASM kubevirt provider does not work out of the box with the following Kubernetes deployments:
KIND, the default KIND deployment uses local-path-provisioning for storage which does not support CDI cloning.
A number of settings are required to be defined to use this functionality.
The KubeVirt settings appear in the Pool configuration when the feature is licensed.
The appropriate Kubernetes configuration options can be found by downloading the KubeConfig file provided by your Kubernetes installation.
The maximum number of KubeVirt compute instances to provision regardless of the need for additional resources.
Kubernetes Host
The address of the kubernetes cluster (e.g. https://kubevirt.domain:5000).
Kubernetes SSL Certificate
The kubernetes cluster certificate as a base64 encoded string of a PEM file.
Kubernetes API Token
The bearer token for authentication to the kubernetes cluster.
VM Namespace
The name of the Kubernetes namespace where the VMs will be provisioned.
VM SSH Public Key
The Public SSL Certificate used to access the VM.
VM Cores
The nubmer of CPU cores to configure for the VM.
VM Memory
The amount of memory in Gibibyte (GiB) to configure for the VM.
VM Disk Size
The size of the disk in Gibibyte (GiB) to configure for the VM.
VM Disk Source
The name of the source PVC containing a cloud ready disk image used to clone a new disk volume
VM Interface Type
The interface type for the VM (e.g. masquerade or bridge).
VM Network Name
The name of the network interface. If using a multus network, it should match the name of that network.
VM Network Type
The network type for the VM (e.g. pod or multus).
VM Startup Script
When VMs are provisioned, this script is executed and is responsible for installing and configuring the Kasm Agent.
Scripts are ran as bash scripts on a Linux host and Powershell scripts on a Windows host.
Additional troublshooting steps can be found in the Creating Templates For Use With The VMware vSphere Provider section of the server documentation.
Configuration Override
A config override that contains a complete YAML manifest file used when provisioning the VM.
Enable TPM
Enable TPM for VM.
Enable EFI Boot
Enable the EFI boot loader for the VM.
Enable Secure Boot
Enable secure boot for the VM (requires EFI boot to be enabled).
It should display both the client and server versions, if it does not you can retrieve the current config used by kubectl to ensure it is using the correct config
kubectlconfigview
Ensure that it is using the local settings you generated and not an existing GKE configuration.
The virtctl tool can be used to upload a VM image. Both the raw and qcow2 formats are supported. The image should be cloud-ready, with cloud-init configured.
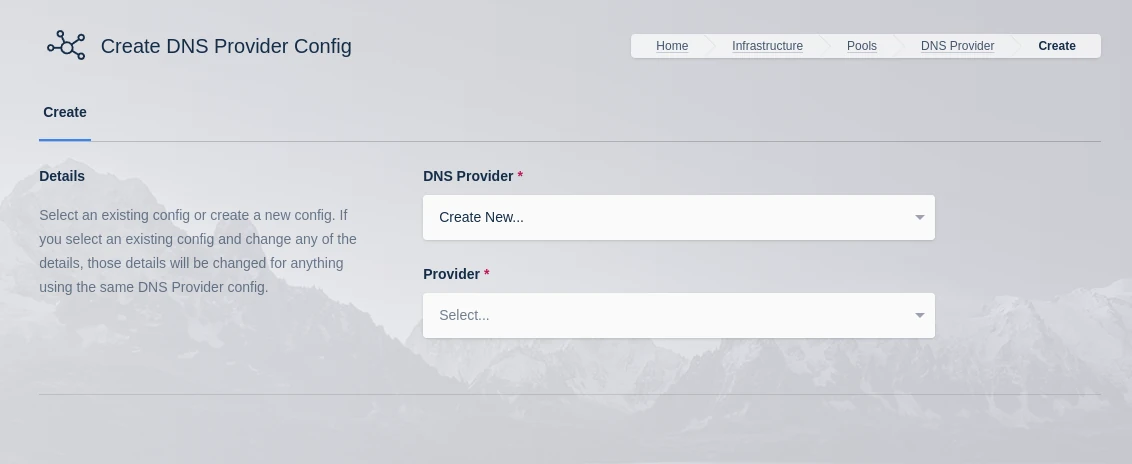
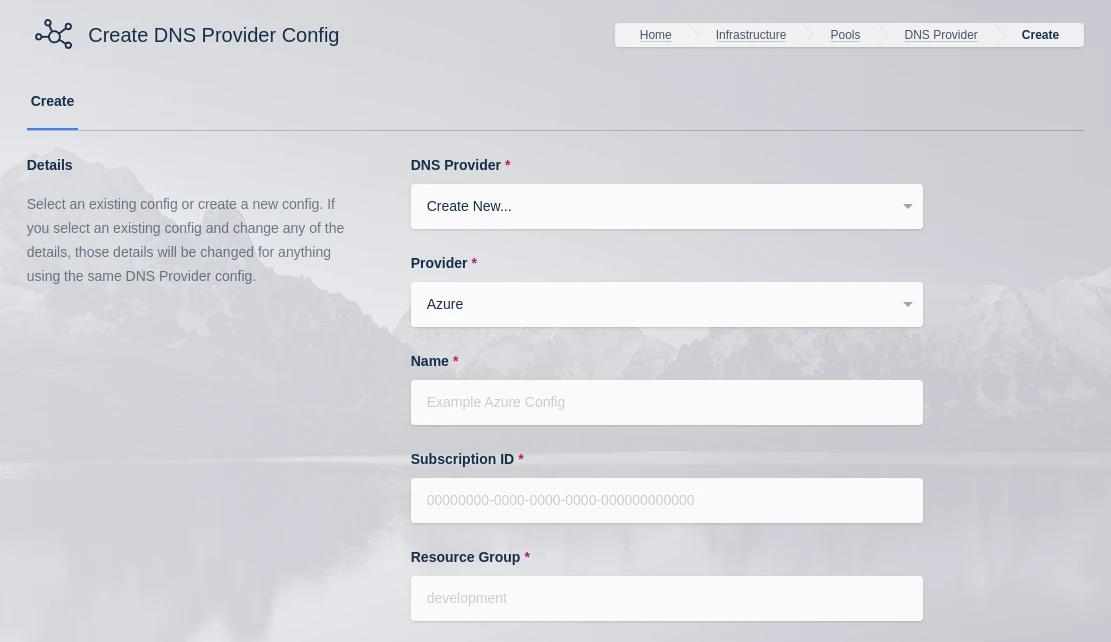
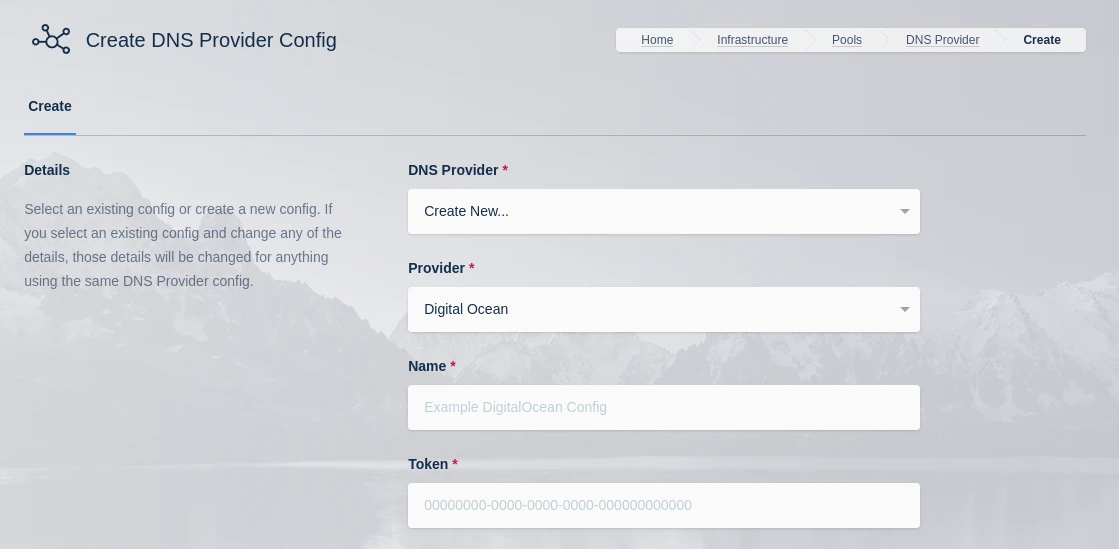
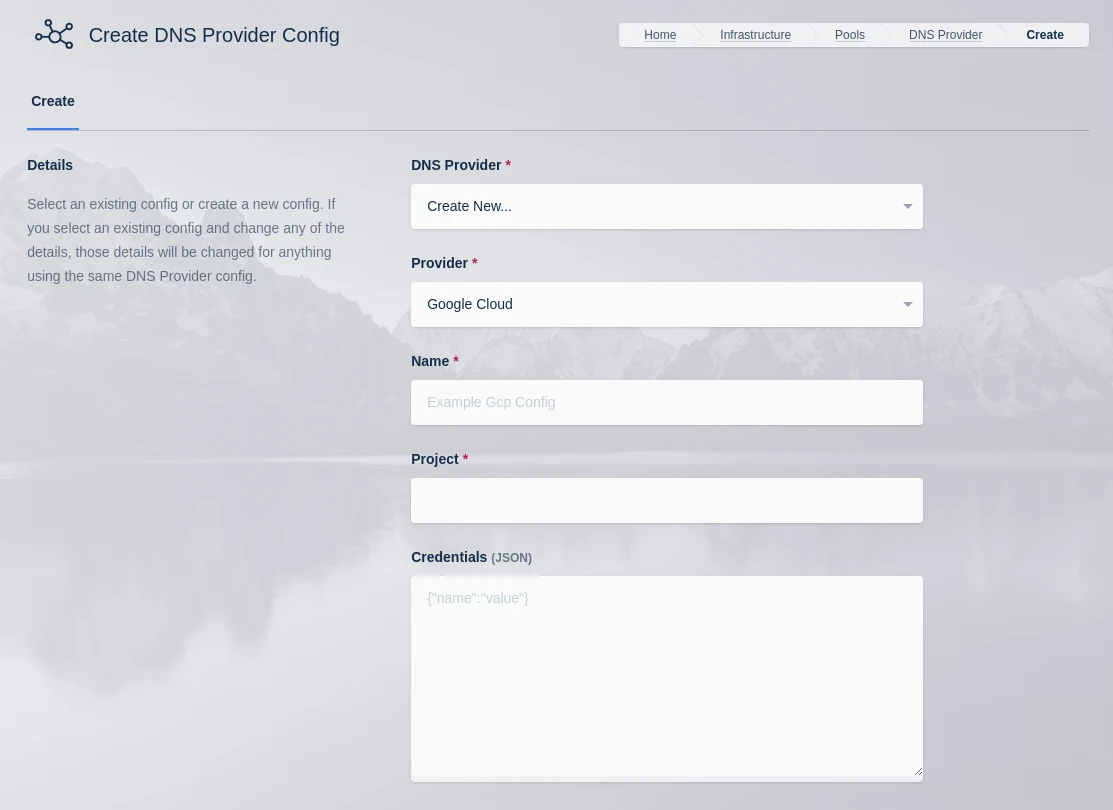
Select an existing config or create a new config. If you select an existing config and change any of the details, those details will be changed for anything using the same DNS Provider config.
Provider
Select a provider from AWS, Azure, Digital Ocean, Google Cloud or Oracle Cloud. If you select an existing provider this will be selected automatically.
The Subscription ID for the Azure Account.
This can be found in the Azure portal by searching for Subscriptions in the search bar in Azure home then selecting the subscription you want to use.
(e.g 00000000-0000-0000-0000-000000000000)
Resource Group
The Resource Group the DNS Zone and/or Virtual Machines belong to (e.g dev)
Tenant ID
The Tenant ID for the Azure Account.
This can be found in the Azure portal by going to Azure Active Directory using the search bar in Azure home.
(e.g 00000000-0000-0000-0000-000000000000)
Client ID
The Client ID credential used to auth to the Azure Account.
Client ID can be obtained by registering an application within Azure Active Directory.
(e.g 00000000-0000-0000-0000-000000000000)
Client Secret
The Client Secret credential created with the registered applicaiton in Azure Active Directory. (e.g abc123)
Azure Authority
Which Azure authority to use, there are four, Azure Public Cloud, Azure Government, Azure China and Azure Germany.
Region
The Azure region where the Agents will be provisioned. (e.g eastus)