Proxmox AutoScale
Table of Contents
This guide will walk you through configuring autoscaling for Kasm Workspaces on Proxmox. Autoscaling in Kasm Workspaces automatically provisions and destroys agents based on user demand, ensuring optimized resource utilization and cost efficiency.
Prerequisites
Access to Proxmox: Ensure you have admin access to your Proxmox environment
Kasm Workspaces Installed: A basic setup of Kasm Workspaces must already exist
Understand Key Concepts:
Zones: Logical groupings of Kasm services for geographical or organizational segmentation
Pools: Logical groupings of Kasm Docker Agents and Server Pools for load balancing
Plan Your Configuration:
Understand your deployment zone requirements
Have access to your Proxmox server details; target clusters, resource pool, storage, networks, etc.
Create template images in the resource pool you have designated for your autoscale agents, must include the qemu guest tools
Setup your Proxmox environment
Create Proxmox Pool
In your Proxmox dashboard, go to “Permissions” -> “Pools” -> “Create” to create a new kasm-autoscale pool.
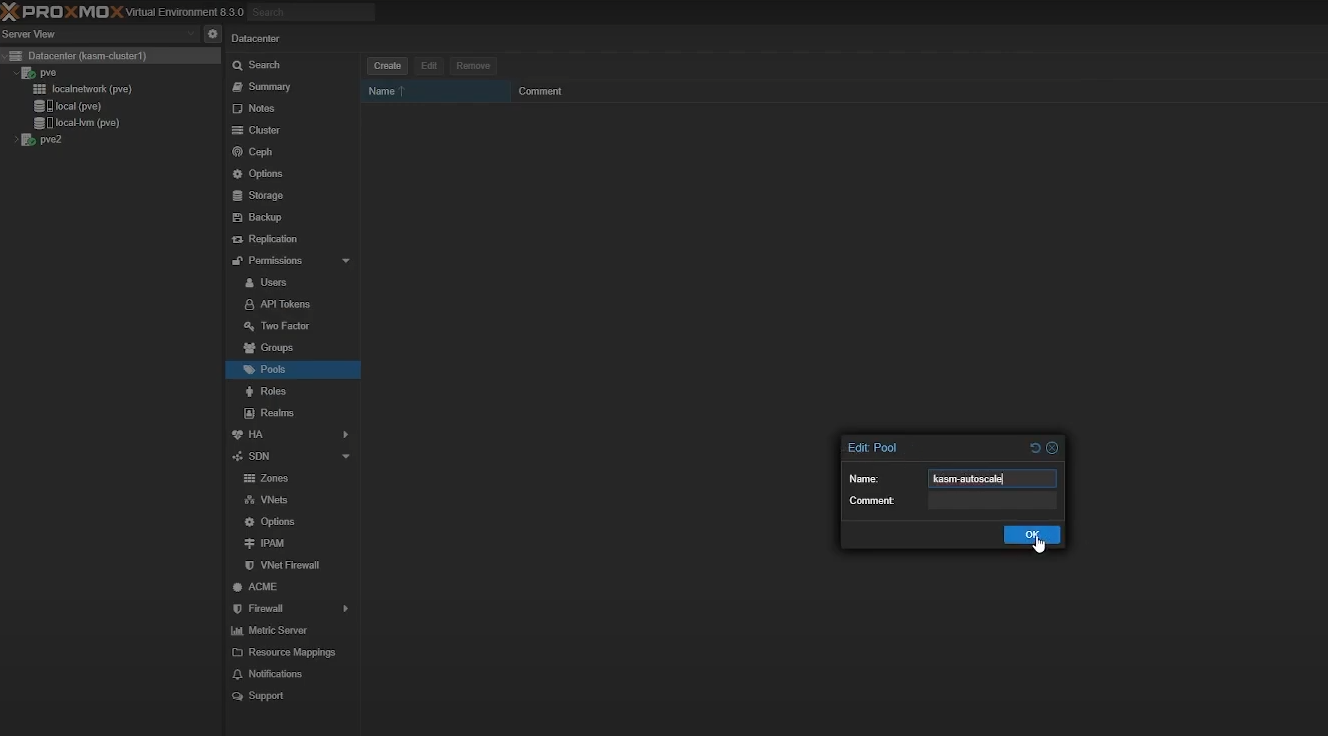
Create a pool in Proxmox
Create Proxmox user
Go to “Permissions” -> “Users” -> “Add” to create a new user. You don’t have to create a new account for autoscaling but we strongly recommend it.
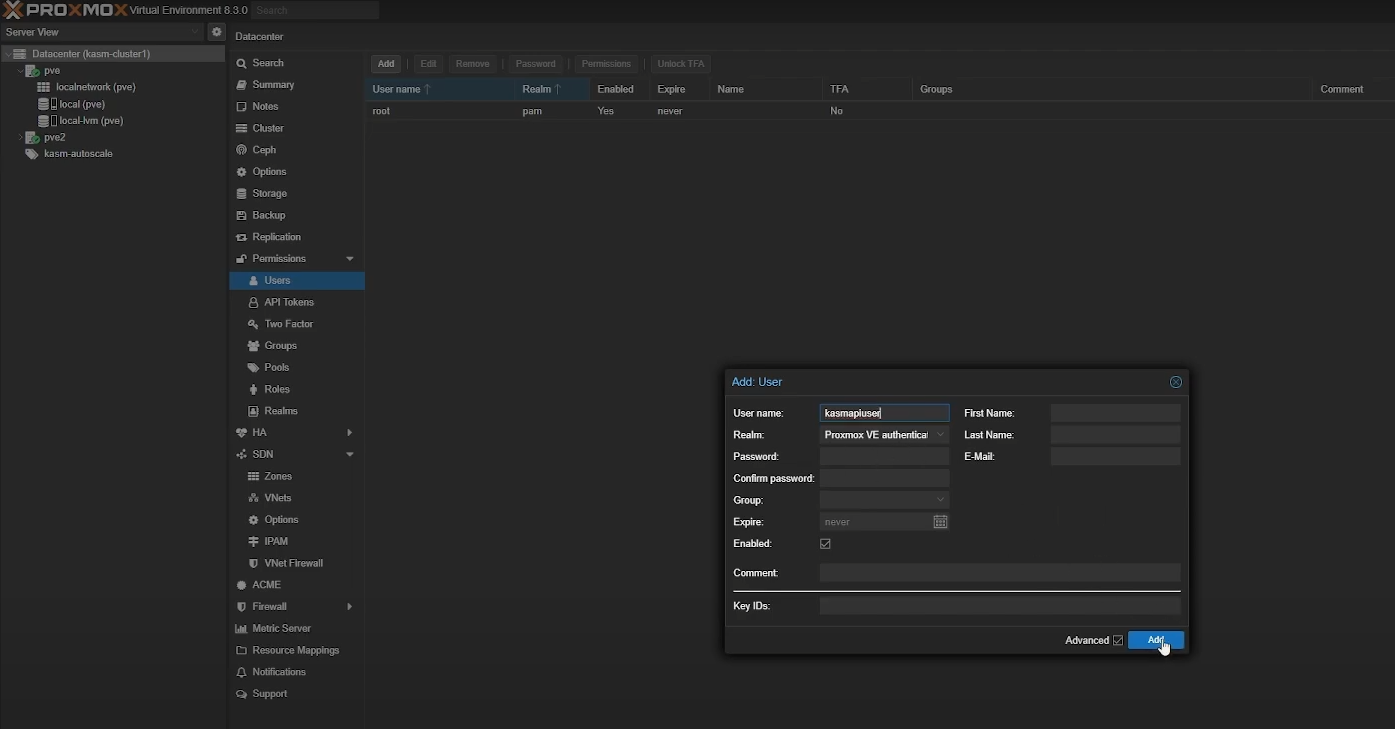
Create a user in Proxmox
Create API Token
Go to “Permissions” -> “API Tokens” -> “Add” to create a new Proxmox API token to use with Kasm. If you’re using an existing Proxmox account, we recommend you leave “Privilege Separation” enabled. If you’re using a dedicated Proxmox account, you can disable “Privilege Separation”. Make sure you save your generated Token ID and Secret securely as you cannot see them again.
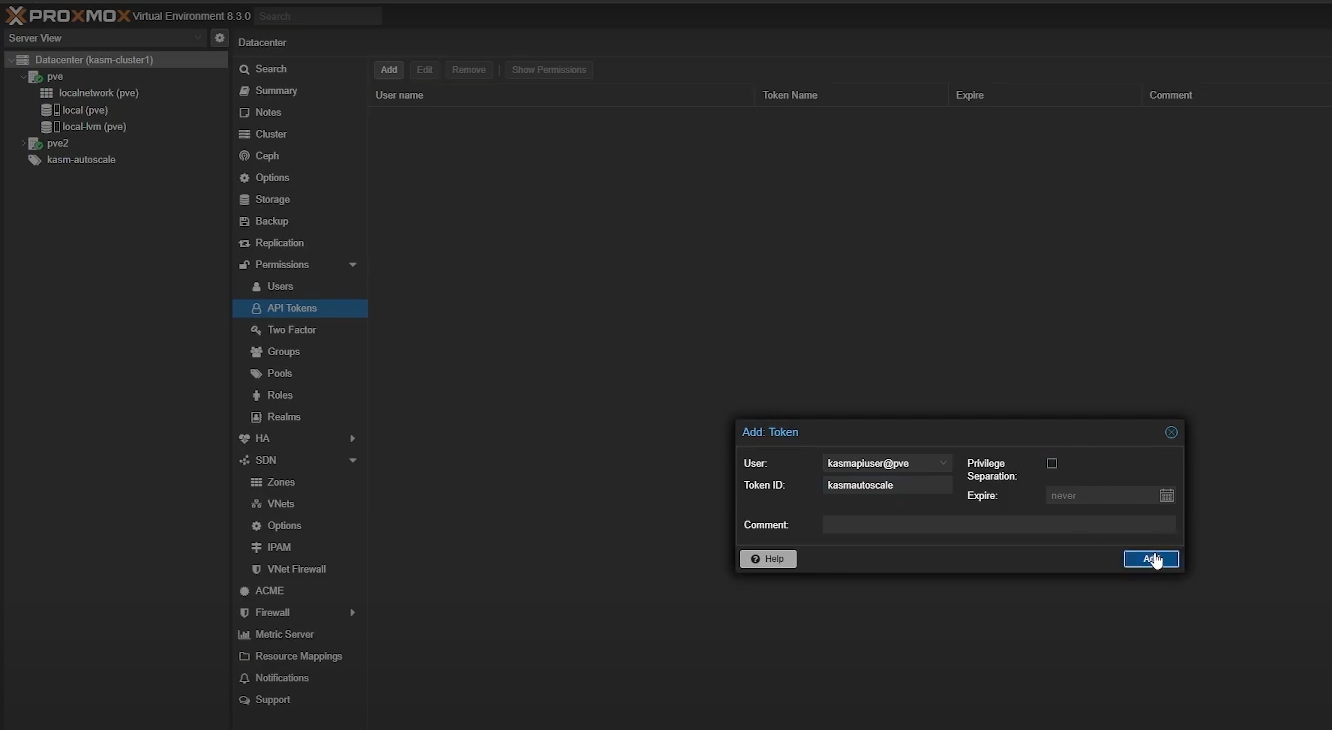
Create an API token in Proxmox
Create Role
To create a Role, go to “Permissions” -> “Roles” -> “Create”. You need the following privileges for Kasm autoscaling to function properly:
Pool.Audit
VM.Allocate
Datastore.AllocateSpace
SDN.Use
VM.Audit
VM.Clone
VM.Config.CDROM
VM.Config.CPU
VM.Config.Disk
VM.Config.HWType
VM.Config.Memory
VM.Config.Network
VM.Config.Options
VM.Monitor
VM.PowerMgmt
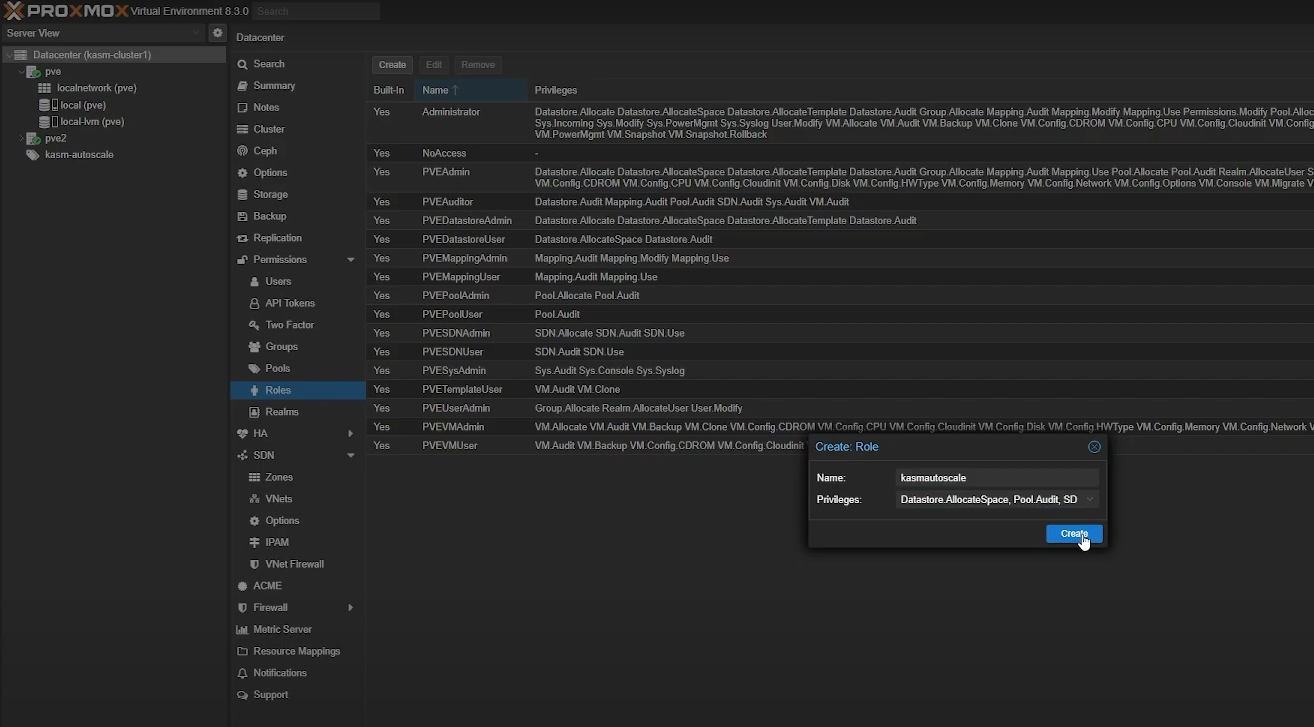
Create a Role in Proxmox
Assign Permissions
Finally, assign appropriate permissions to your user by going to “Permissions” -> “Add” -> “User Permission”. Select the appropriate user and role, and assign the following permissions
/sdn/zones/<networkzone>
/storage/<storagepool>
/pool/KasmPool
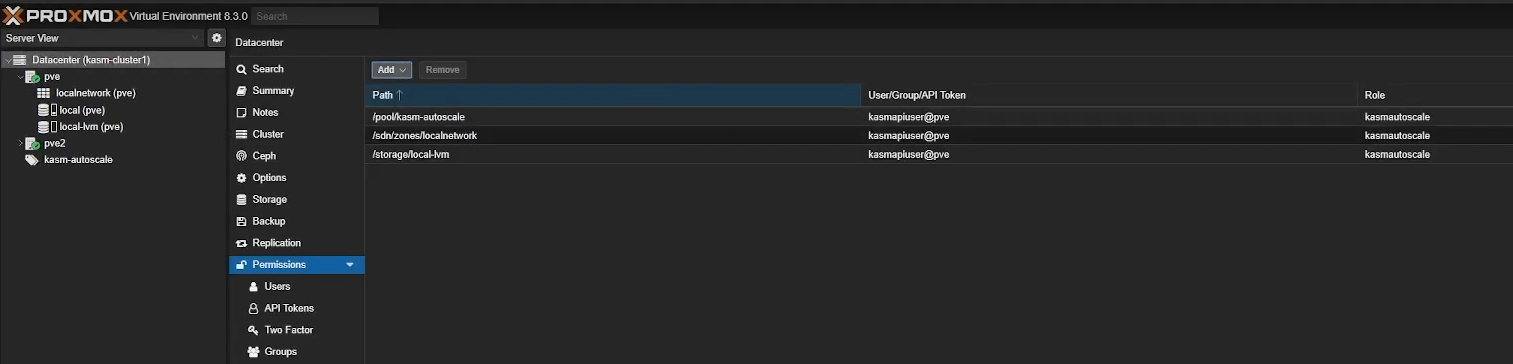
Assign permissions in Proxmox
Note
If you are using an existing account and have privilege separation enabled, you need to set these permissions from “Permissions” -> “Add” -> “API Token Permission”
Create a VM template
- Create the appropriate VM template based on whether you are implementing Server AutoScaling or Docker AutoScaling on Proxmox.
For Windows AutoScaling, follow the Windows Templating Guide
For Docker Agent AutoScaling, follow the Linux Templating Guide
Linux Templating
Go to your cluster -> local storage (e.g local (pve)) -> “Upload”
Upload your Linux installation ISO file (you can download Ubuntu Server from here). If you prefer a different distro, ensure it’s a supported operating system. Alternatively, If you have a pre-built or pre-configured linux template (like a cloud image), you can use that instead of installing the OS from scratch.
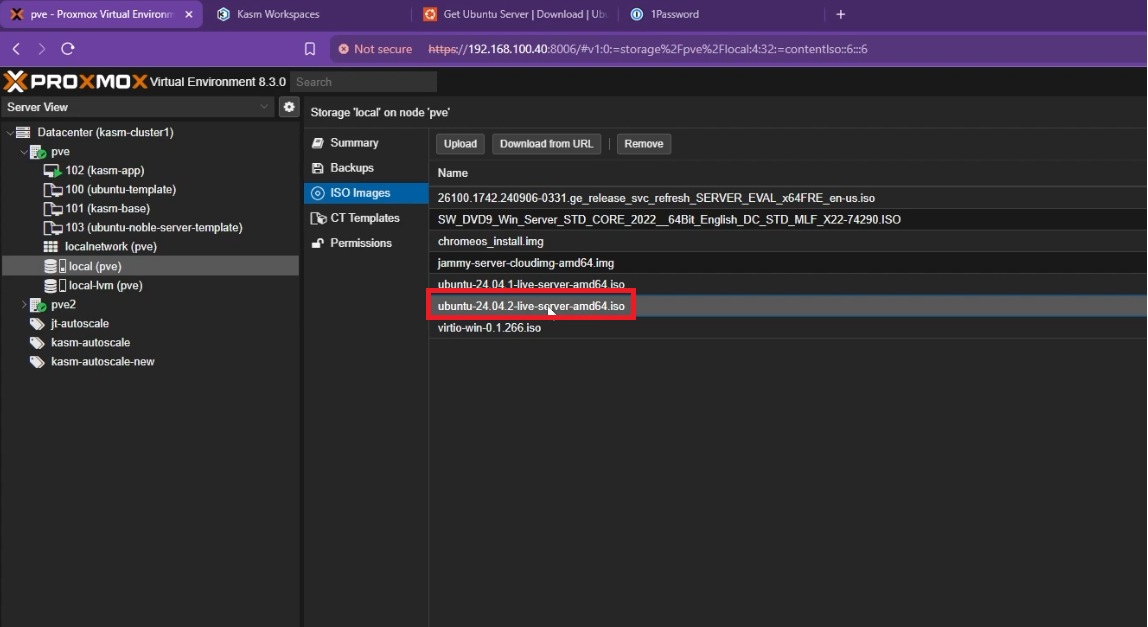
Upload Linux ISO file to Proxmox
Click “Create VM” from the top right corner
General Settings
Name: Give your template a name (e.g
ubuntu-server-template)Resource Pool: Set it to the resource pool you created earlier
Click “Next”
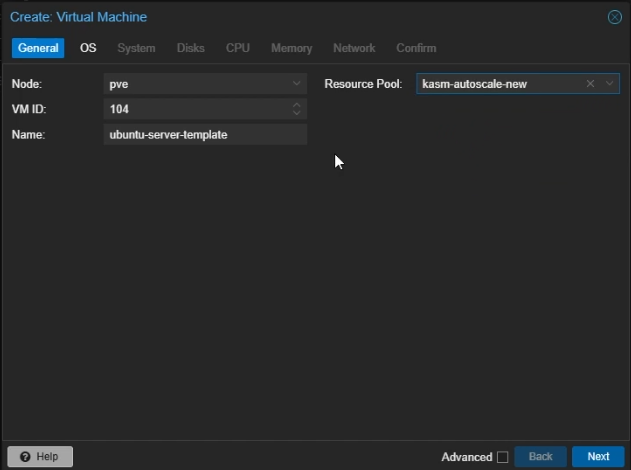
Create Proxmox Linux VM: General Settings
OS Settings
Select
Use CD/DVD disc image file (iso)Storage: Select your local storage to which you uploaded your ISO file
ISO Image: Select the Linux ISO image you uploaded
Guest OS Type: Set to Linux
Click “Next”
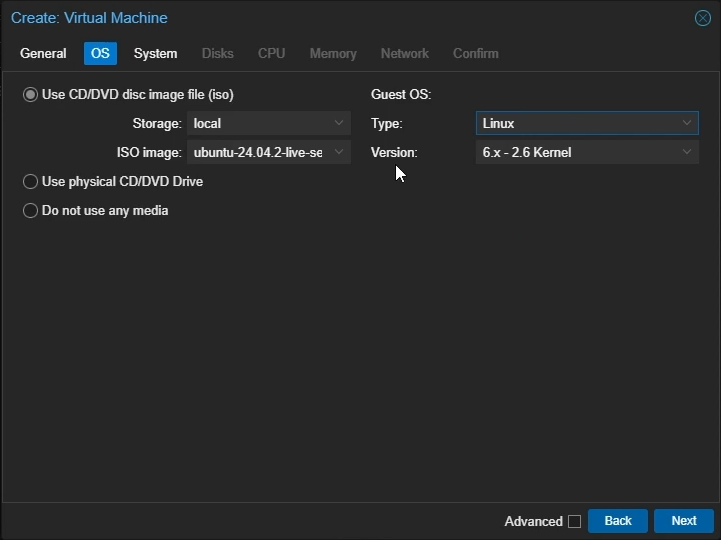
Create Proxmox Linux VM: OS Settings
System Settings
Machine: Select
q35SCSI controller: Select
VirtIO SCSI singleEnable
Qemu AgentClick “Next”
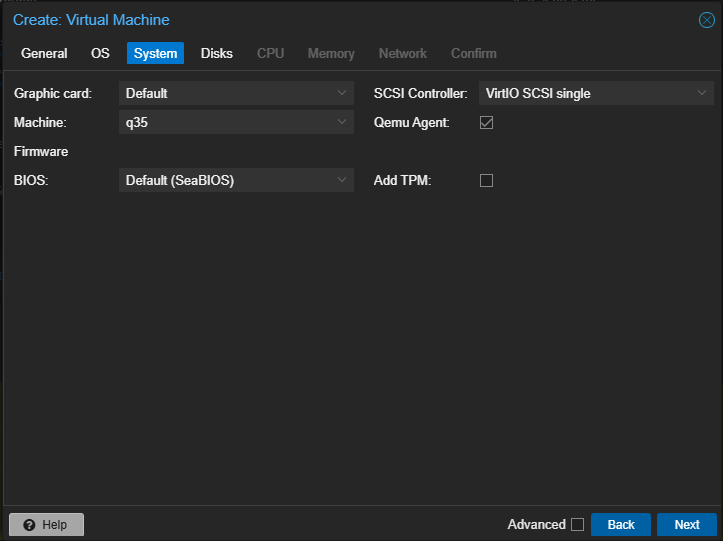
Create Proxmox Linux VM: System Settings
Disk Settings
Bus/Device: Select
VirtIO BlockDisk Size: Choose the amount of size you want to allocate to your VM (e.g 45GB)
Click “Next”

Create Proxmox Linux VM: Disk Settings
CPU Settings
Cores: Set to the number of cores you want to allocate to your VM (e.g 4)
Type: Select
hostClick “Next”
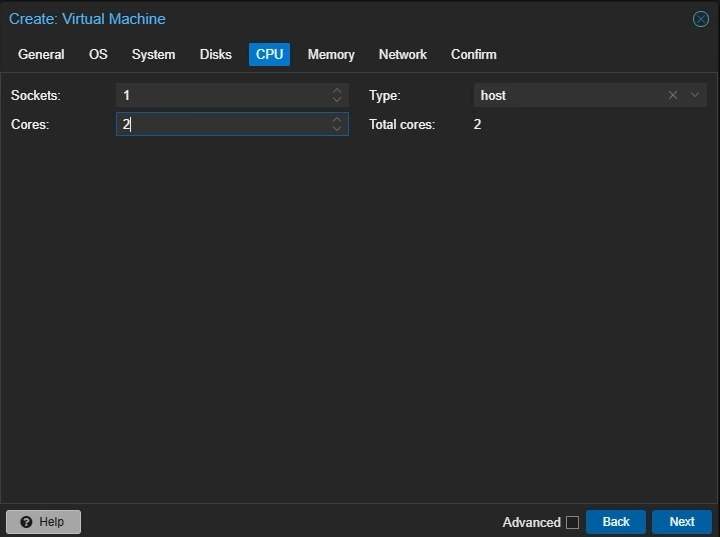
Create Proxmox Linux VM: CPU Settings
Memory Settings
Memory: Set to the amount of memory you want to allocate to your VM in MiB (e.g 4096)
Click “Next”
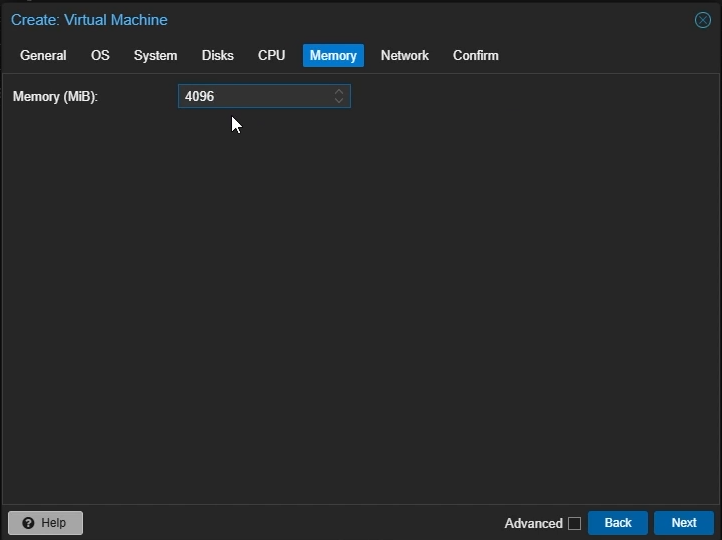
Create Proxmox Linux VM: Memory Settings
Network Settings
Model: Select
VirtIO (paravirtualized)Click “Next”
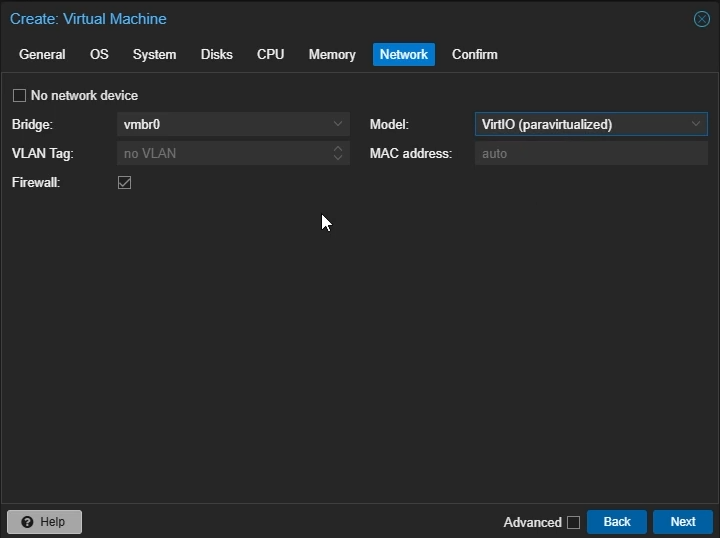
Create Proxmox Linux VM: Network Settings
Confirm your settings and click “Finish”
Right-click your created VM and select “Start”. Then double-click to open the noVNC window.
Follow the on-screen instructions to install Ubuntu Server
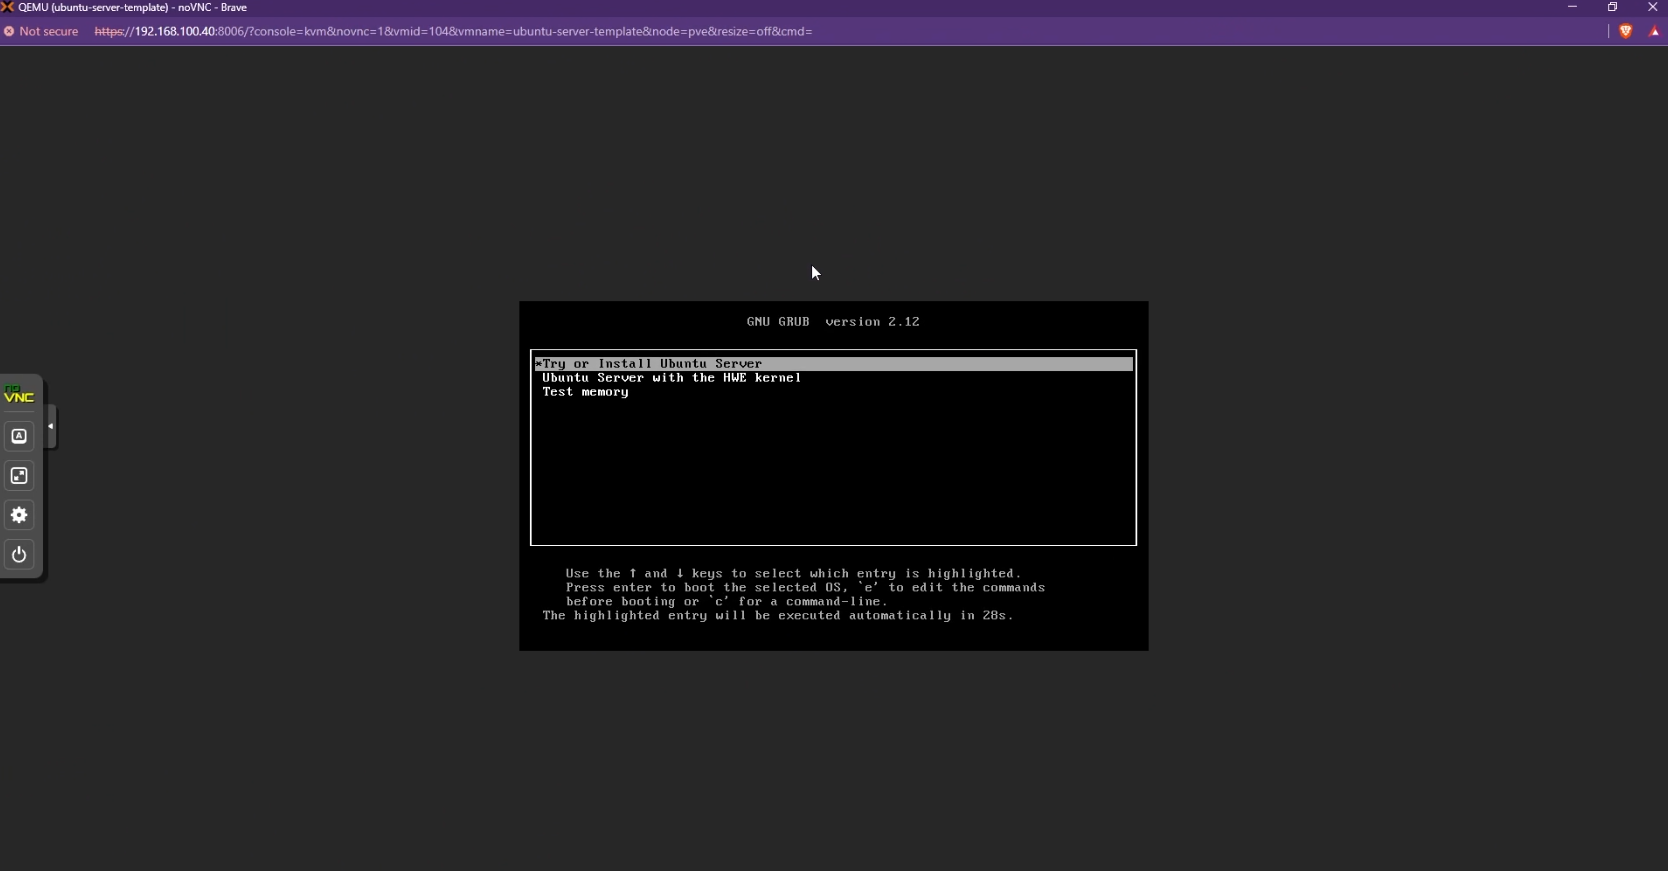
Install Ubuntu on Proxmox
Select “Install OpenSSH server” to be able to SSH into your autoscaled agents.

Select “Install OpenSSH server”
Once the installation is finished, click “Reboot Now”
Go back to your VM settings on Proxmox -> “Hardware” -> Double-click the
CD/DVD Driveand select “Do not use any media” to remove the Linux installation media.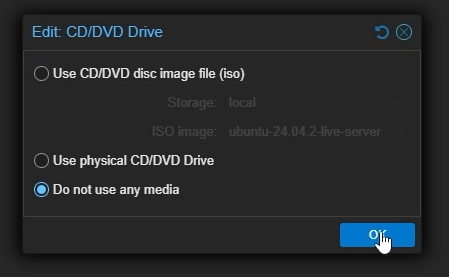
Remove Ubuntu ISO from your VM”
You can now SSH into your VM with your credentials instead of using noVNC for ease-of-access
Install and enable
qemu-guest-agenton your VMsudo apt update sudo apt install qemu-guest-agent -y sudo systemctl start qemu-guest-agent sudo systemctl enable qemu-guest-agent sudo reboot
Reset your Machine IDs to make your VM suitable for templating
sudo truncate -s 0 /etc/machine-id
sudo truncate -s 0 /var/lib/dbus/machine-id
Optionally, you can pre-load workspace images on your autoscaled agent VMs so that workspaces launch instantly after provisioning, without waiting for Kasm to pull the necessary Docker images. Read the Pre-load Workspace Images on Agents guide to learn more
Shutdown your VM
Once the VM is powered off, right-click and select “Convert to template”
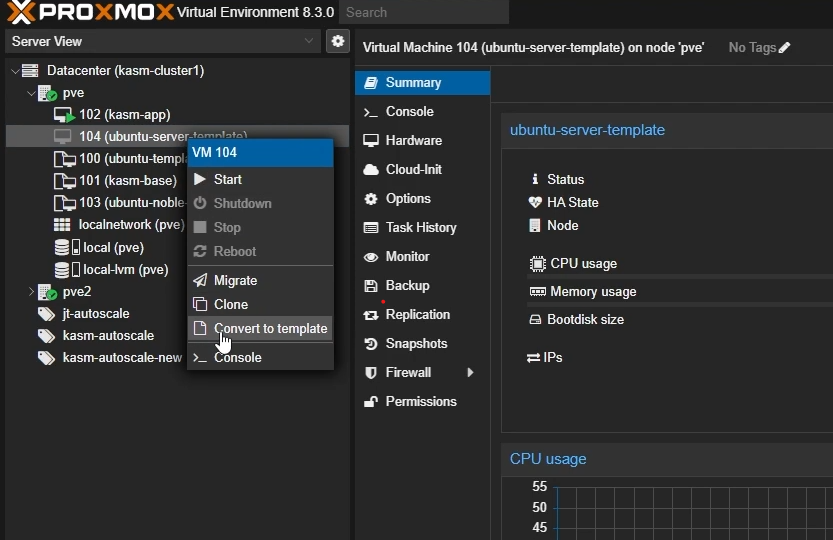
Create VM template in Proxmox”
Windows Templating
For an overview of Windows templating and its prerequisites, refer to the Windows AutoScale Template Creation Guide.
Go to your cluster -> local storage (e.g local (pve)) -> “Upload”
Upload your Windows installation ISO file (you can download Windows Server 2022 from here)
Also upload the VirtIO drivers ISO file (you can download VirtIO tools from here)
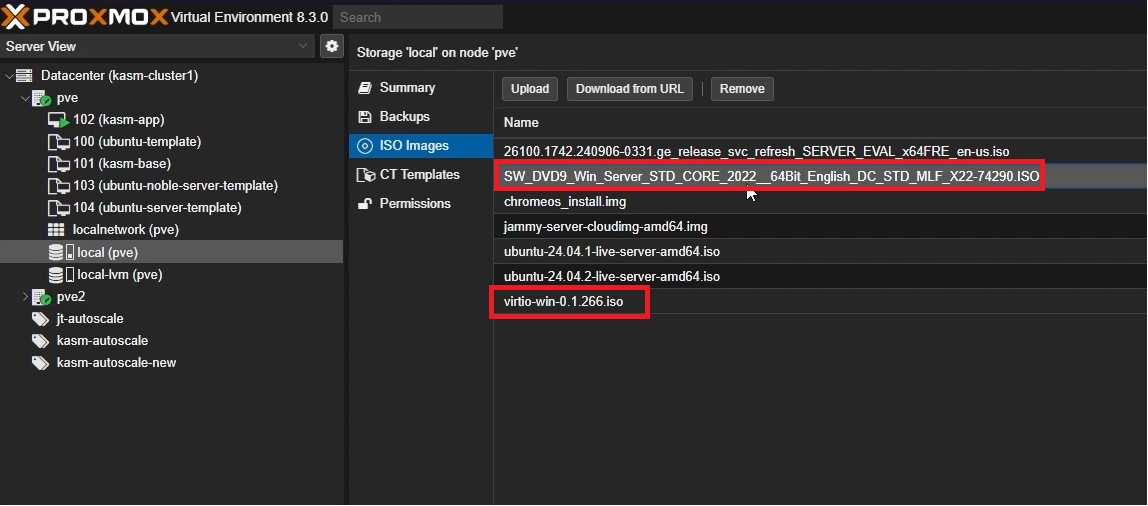
Upload Windows ISO and VirtIO ISO to Proxmox
Click “Create VM” from the top right corner
General Settings
Name: Give your template a name (e.g
windows-server-2022-template)Resource Pool: Set it to the resource pool you created earlier
Click “Next”
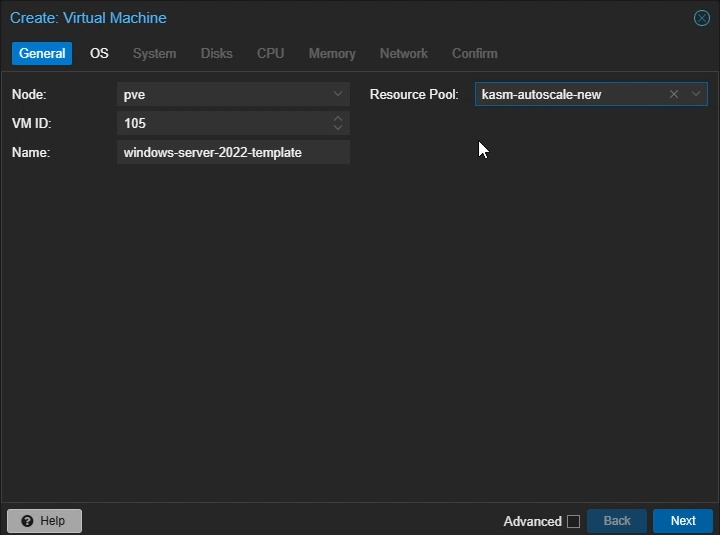
Create Proxmox Windows VM: General Settings
OS Settings
Select
Use CD/DVD disc image file (iso)Storage: Select your local storage to which you uploaded your ISO file
ISO Image: Select the Windows Server ISO image you uploaded
Guest OS Type: Set to
Microsoft WindowsSelect
Add additional drive for VirtIO driversISO Image: Select the VirtIO ISO image you uploaded
Click “Next”
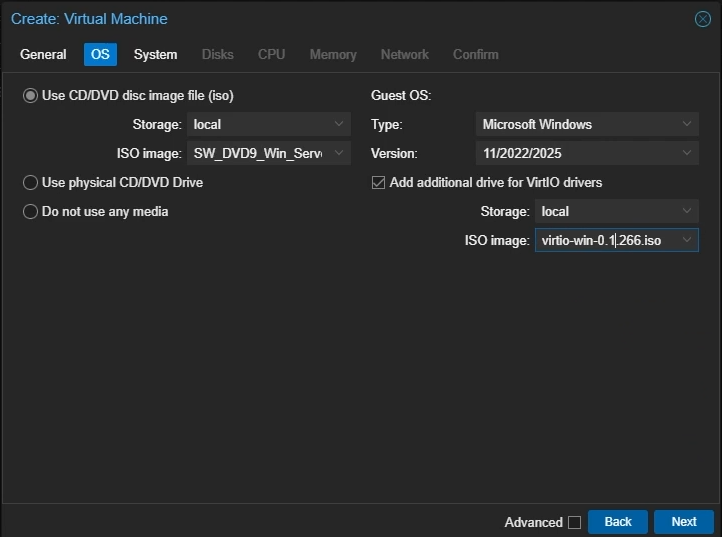
Create Proxmox Windows VM: OS Settings
System Settings
Machine: Select
q35SCSI controller: Select
VirtIO SCSI singleEnable
Qemu AgentDisable
Add EFI DiskDisable
Add TPMClick “Next”
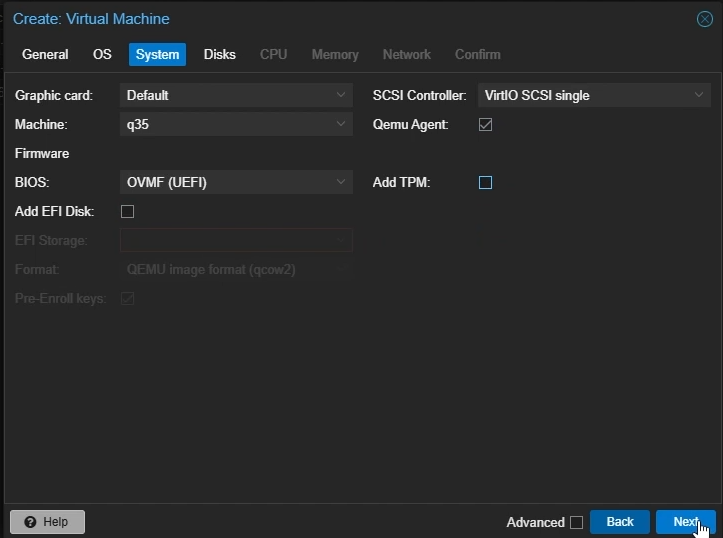
Create Proxmox Windows VM: System Settings
Disk Settings
Bus/Device: Select
SCSICache: Select
Write backDisk Size: Choose the amount of size you want to allocate to your VM (e.g 45GB)
Click “Next”
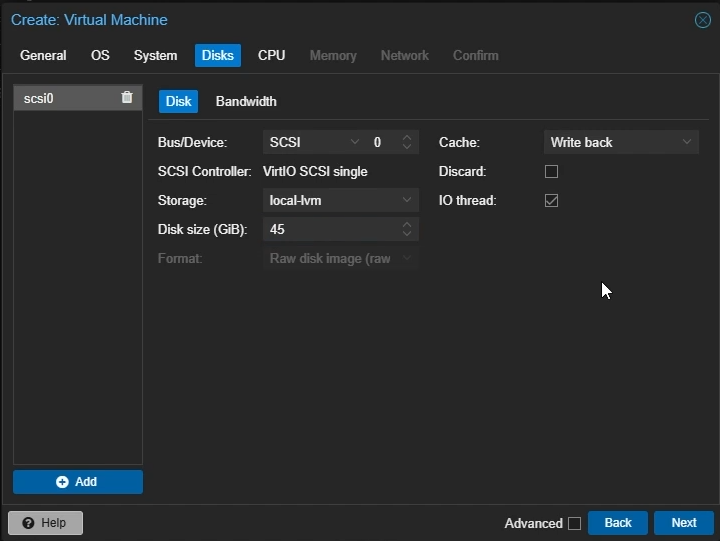
Create Proxmox Windows VM: Disk Settings
CPU Settings
Cores: Set to the number of cores you want to allocate to your VM (e.g 4)
Type: Select
hostClick “Next”
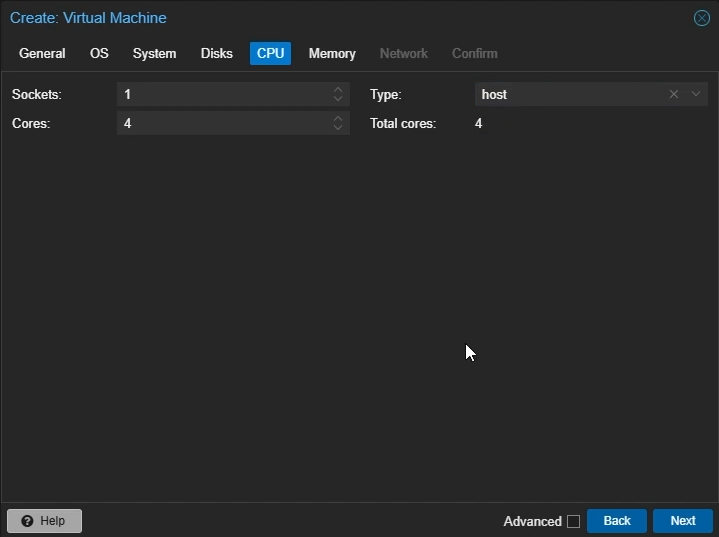
Create Proxmox Windows VM: CPU Settings
Memory Settings
Memory: Set to the amount of memory you want to allocate to your VM in MiB (e.g 4096)
Click “Next”
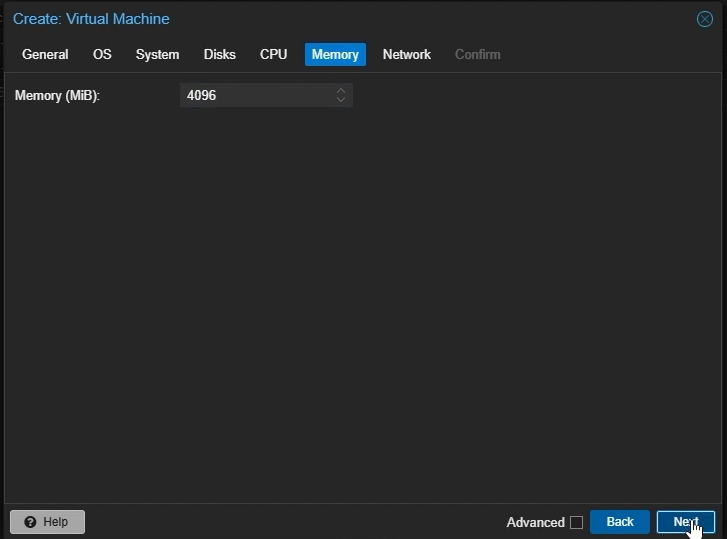
Create Proxmox Windows VM: Memory Settings
Network Settings
Model: Select
VirtIO (paravirtualized)Click “Next”

Create Proxmox Windows VM: Network Settings
Confirm your settings and click “Finish”
Right-click your created VM and select “Start”. Then, double-click to open the noVNC window.
Press any key to boot from the attached Windows Installation media
You will now see the Windows Installation screen. Proceed with the Installation.
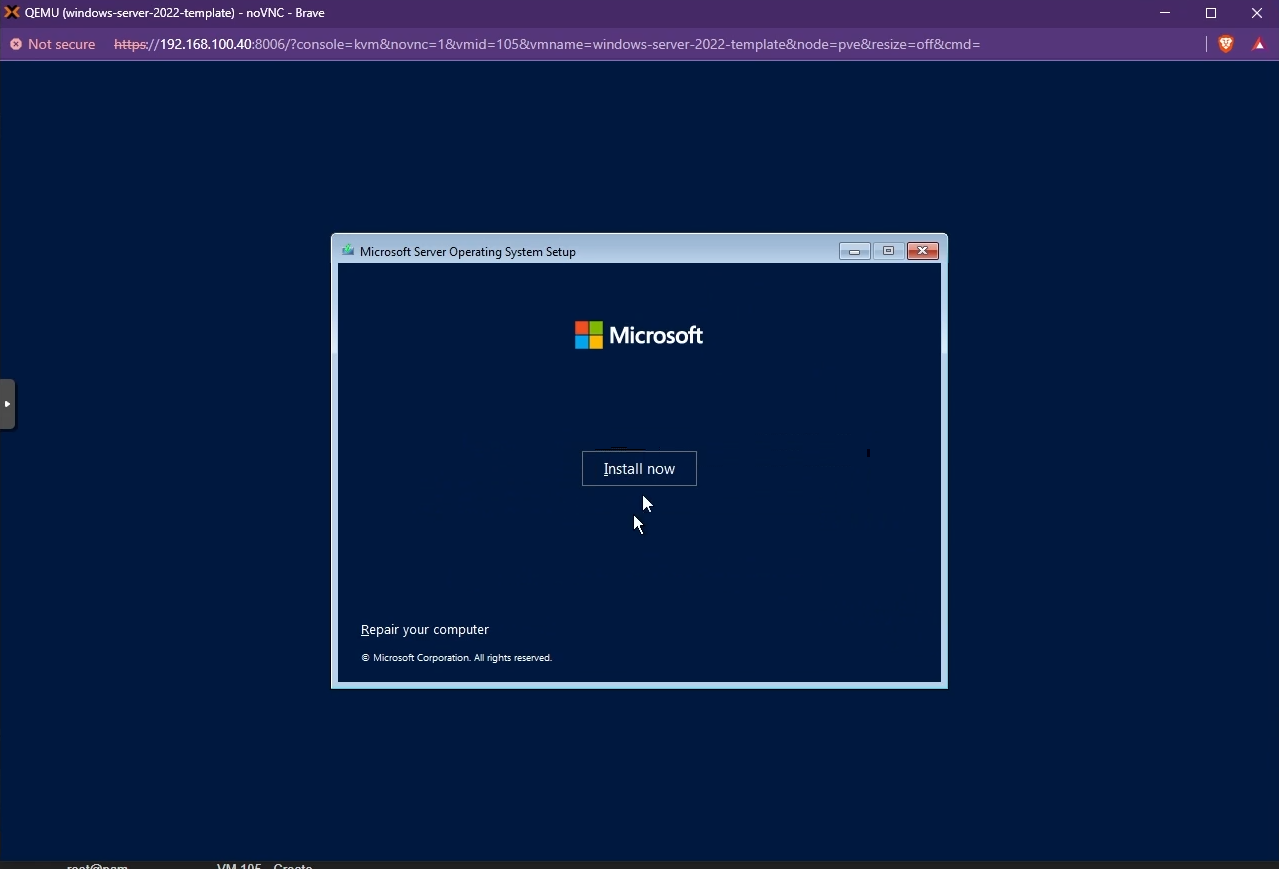
Follow on-screen instructions to Install Windows
By default, you may not be able to see the list of available disks to install Windows. To fix this, you need to install the VirtIO SCSI controller. Click “Load driver” to list all the compatible VirtIO SCSI controllers and install the appropriate driver.
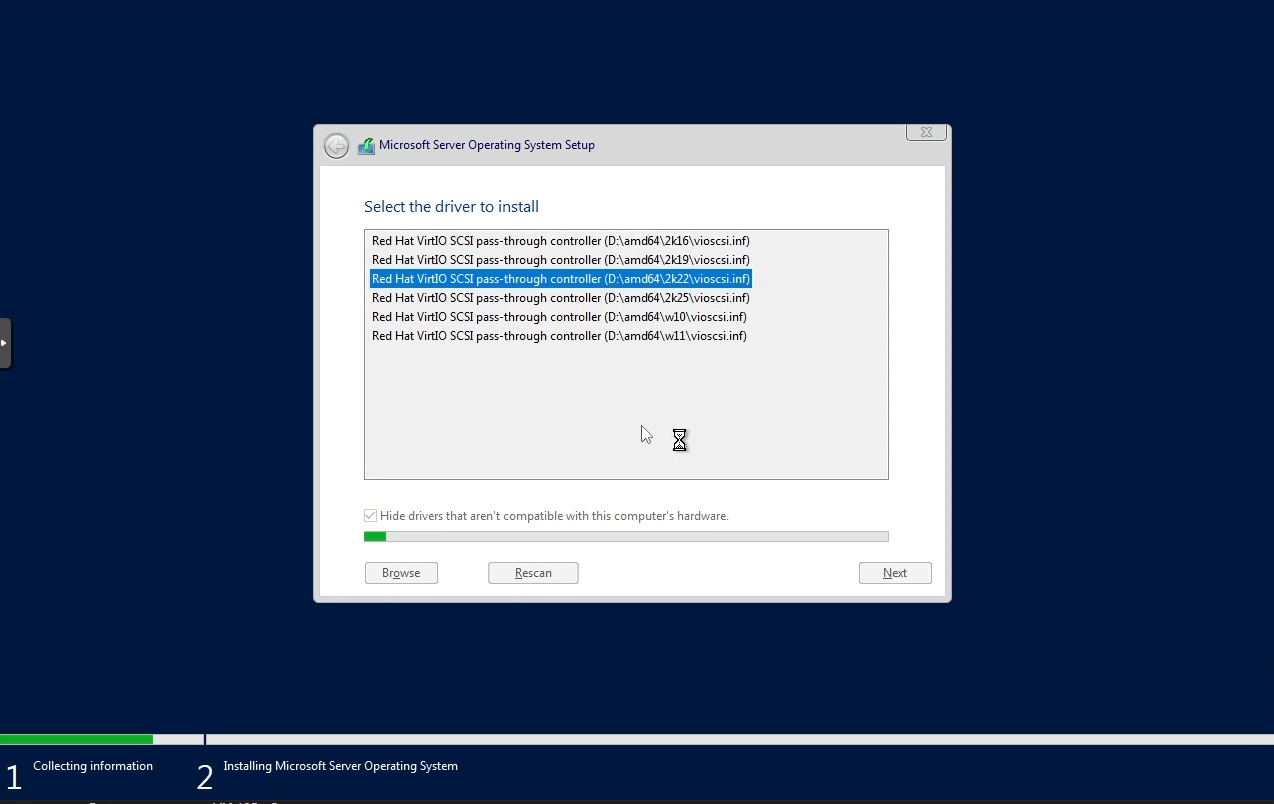
Install the appropriate VirtIO SCSI contoller
The available disks must now be listed and you can choose the Windows boot disk you created to install Windows.
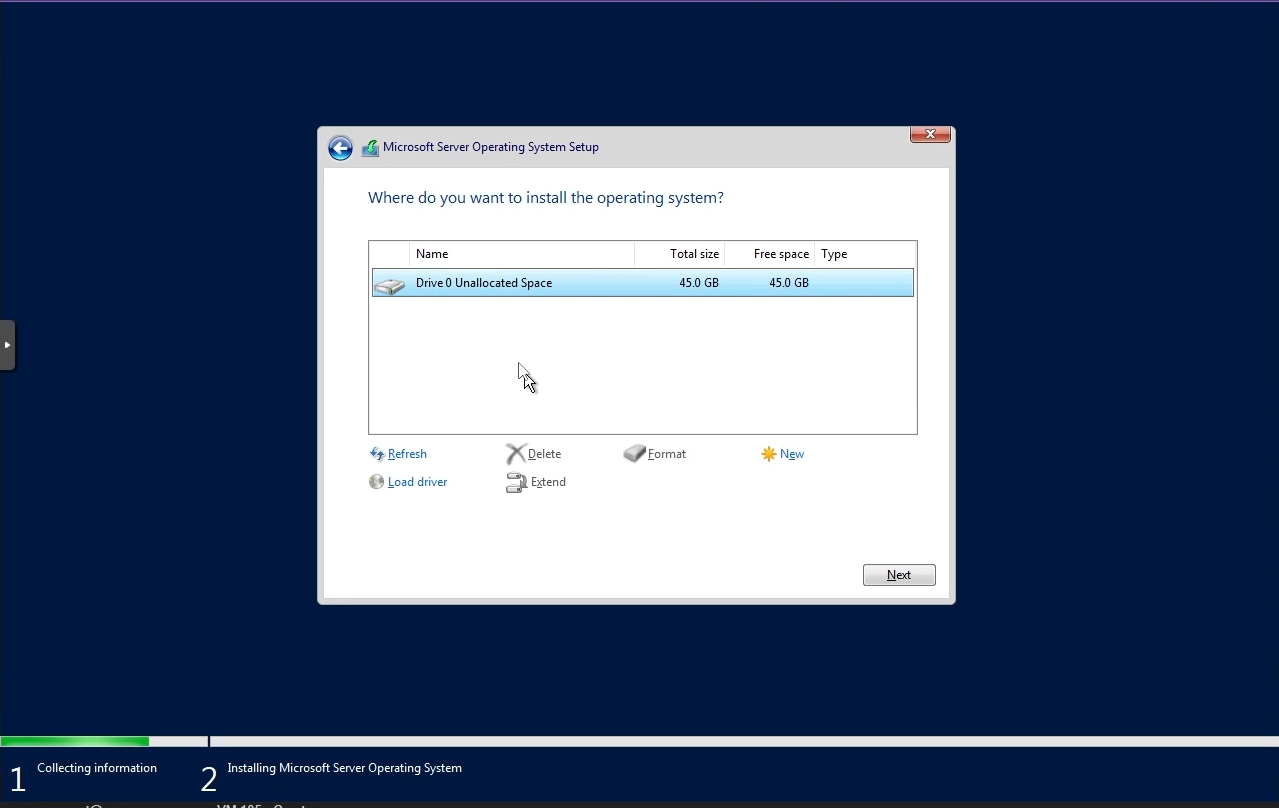
Install Windows
Once Windows is installed, you need to install the other VirtIO drivers like the Network driver. Simply navigate to your VirtIO disk from your File Explorer and install the drivers by running the installer.
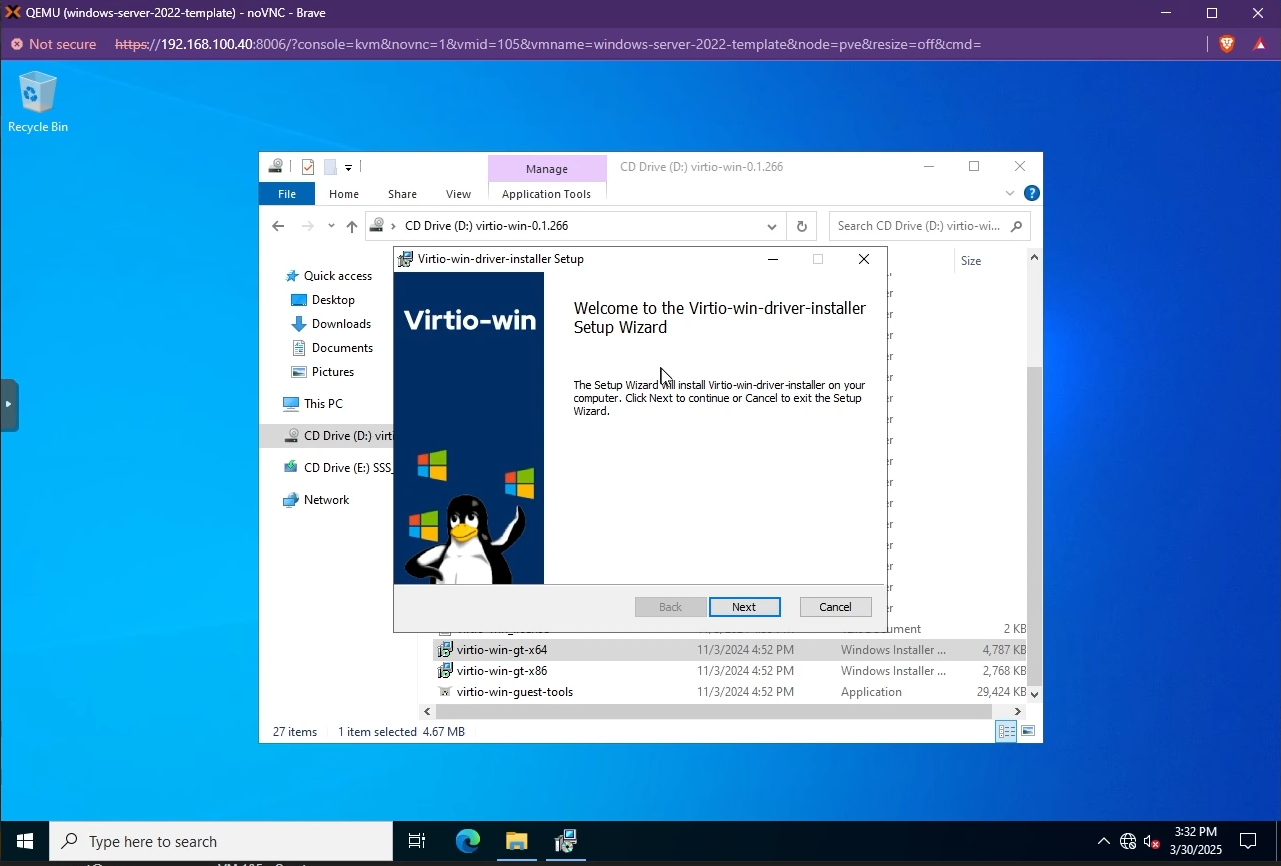
Install VirtIO drivers
You also need to install the QEMU Guest Agent tools. These can be found in the same VirtIO drive in the
guest-agentfolder.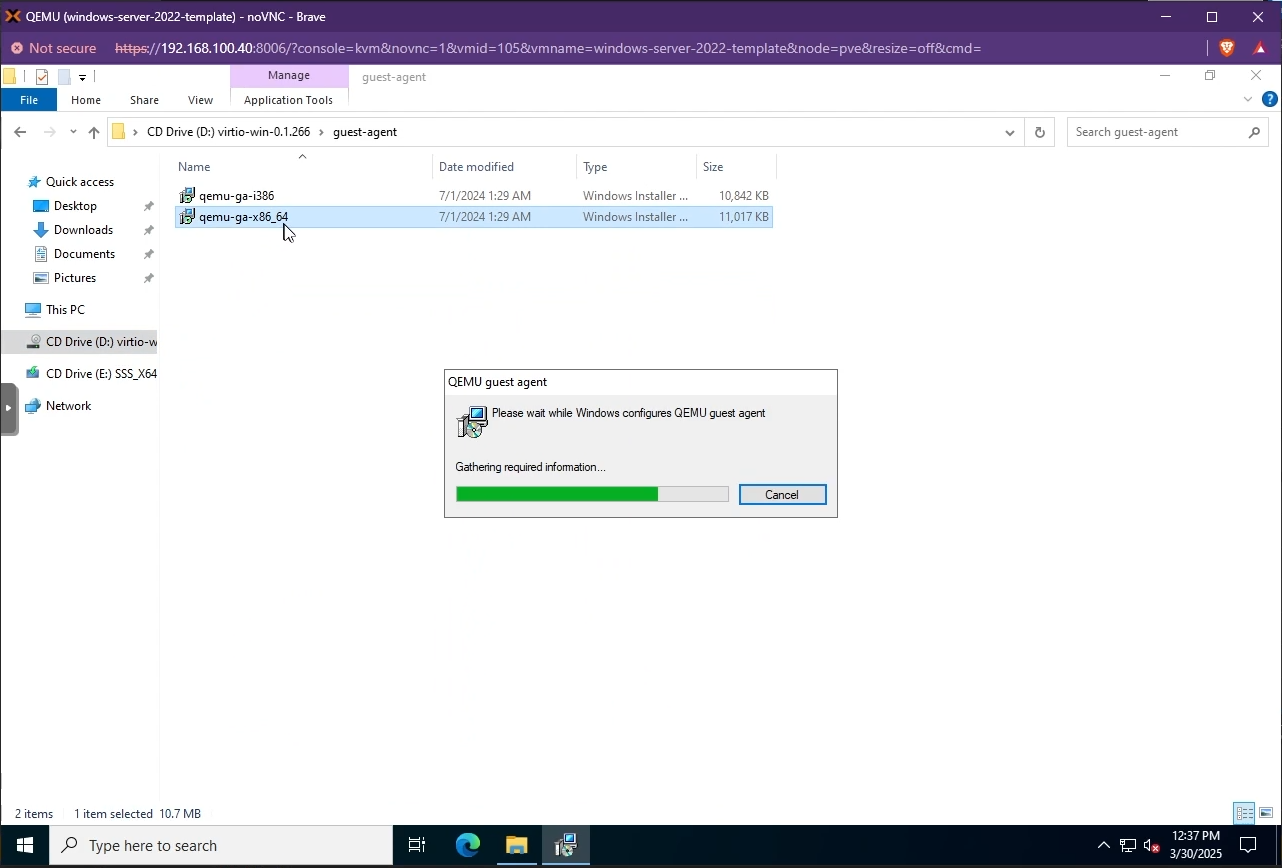
Install QEMU Guest Agent
Reboot your VM
Open a PowerShell window as administrator and set the
ExecutionPolicytoUnrestrictedso that Kasm can run the startup script when a VM is provisionedSet-ExecutionPolicy Unrestricted
Search for “Remote Desktop Settings” and enable “Remote Desktop” on your VM

Enable Remote Desktop
Now, you can install any custom software that you’d like to have on your VM (e.g Microsoft Office)
Shutdown your VM
Once the VM is powered off, right-click on it and select “Convert to template”
Go to your created template -> “Hardware” -> Remove the attached Windows ISO and VirtIO ISO disks
Configure VM Provider Details on Kasm
Follow AutoScale Settings for Agent Pool or AutoScale Settings for Server Pool to create to create a new AutoScale config, or select Create New in VM Provider Configs if you already have one.
Set Provider to Proxmox
Configure the following settings:
Setting |
Description |
|---|---|
Name |
An identifying name for this provider configuration e.g. Proxmox Docker Agent Autoscale Provider |
Max Instances |
The maximum number of autoscale instances to be provisioned, regardless of other settings |
Host |
The hostname or IP and port of your Proxmox instance (e.g. 192.168.100.40:8006) |
Username |
The name of the autoscale user in Proxmox, including the auth realm (e.g. KasmUser@pve) |
Token Name |
The name of the API token associated with the user (e.g. kasm_token and not KasmUser@pve!kasm_token) |
Token Value |
The secret value of the API token associated with the user |
Verify SSL |
Whether or not to verify the SSL certs in the Proxmox environment. Disable if you are using self-signed certs |
VMID Range Lower |
The start of the VMID range for Kasm to use for autoscale agents. Must not overlap with any other Proxmox autoscale providers configured in Kasm |
VMID Range Upper |
The end of the VMID range for Kasm to use for autoscale agents. Must not overlap with any other Proxmox autoscale providers configured in Kasm |
Full Clone |
If enabled performs a full clone rather than a linked clone. A linked clone is faster to provision but will have reduced performance compared to a full clone |
Template Name |
The name of the VM template to use when cloning new autoscale agents |
Cluster Node Name |
The name of the Proxmox node containing the VM template |
Resource Pool Name |
Specify the resource pool to use for cloning the new autoscale agents |
Storage Pool Name |
Optionally specify a storage pool to use for cloning the new autoscale agents. This requires Full Clone to be enabled |
Target Node Name |
Optionally specify a cluster node to provision new autoscale agents on (defaults to the Cluster Node Name) |
VM Cores |
The number of CPU cores to configure for the autoscale agents |
VM Memory |
The amount of memory in GiB for the autoscale agents |
Installed OS Type |
Linux or Windows |
Startup Script Path |
The absolute path to where the startup script will be uploaded and run from, typically /tmp for Linux or C:windowstemp for Windows. The path must exist on the template. |
Startup Script |
Bash (Linux) or Powershell (Windows) startup script to run after agent creation, typically to install the Kasm Agent and/or any other runtime dependencies. Example scripts are available on our GitHub repository |
Submit the Provider Config
Test your Proxmox Autoscaling setup
If you have configured non-zero Standby/Minimum Available Session values agents should start provisioning immediately. Otherwise, try launching multiple workspaces to increase resource utilization, prompting Kasm to autoscale new agents.
Provision a Workspace
Go to Workspaces > Registry
Make multiple workspaces available
Go to the Workspaces dashboard and launch sufficient workspace sessions to exceed your resource standby thresholds
Monitor the provisioning of new agents by going to “Infrastructure” -> “Agents”
Verify new VM instances in Proxmox
Check Downscaling
Terminate sessions to reduce resource usage
Confirm that Kasm removes agents after the back-off period