Protected Web Apps
The following is a guide for configuring Kasm to provide secure access via Protected Web Apps.
Protected Web Apps are browser based applications that are either hosted internally on protected enclaves or are other SaaS based web applications that administrators wish to publish to end user while employing the robust authentication and DLP controls of Kasm.
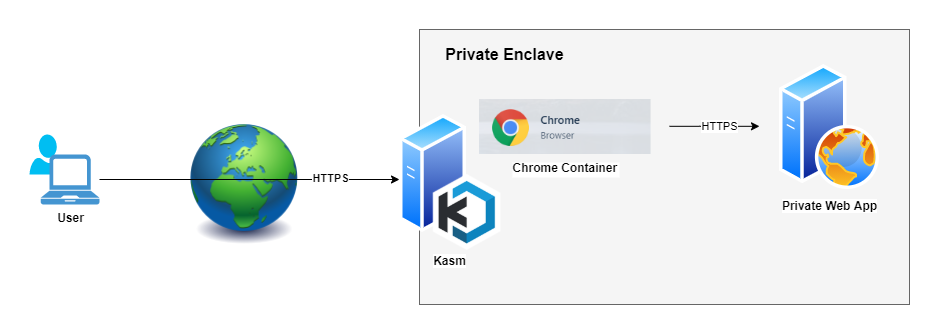
Protected Web App Diagram
Configuring a Browser-based Workspace
Log into the Kasm UI as an administrator.
From the Admin panel, expand Workspaces, and select Registry
The Kasm Workspace Registry entries should be visible. Select the Chrome Workspaces from the list, then select Edit

Chrome Workspace from Registry
Update the name description of the workspace to something helpful. In this example we will use
Gitlab.In the Docker Run Config Override section enter the following data to configure the chrome browser to open to a specified URL (e.g
https://gitlab.com/users/sign_in).
{
  "environment": {
    "LAUNCH_URL": "https://gitlab.com/users/sign_in"
  }
}

Chrome Workspace from Registry
Adding a URL to a thumbnail of the target application will help user’s quickly identify the workspace (e.g
https://gitlab.com/favicon.png). Once done, click Save
Launching the Workspace
Back on the Workspace dashboard, the new
Gitlabworkspace should be visible.

Gitlab Workspace
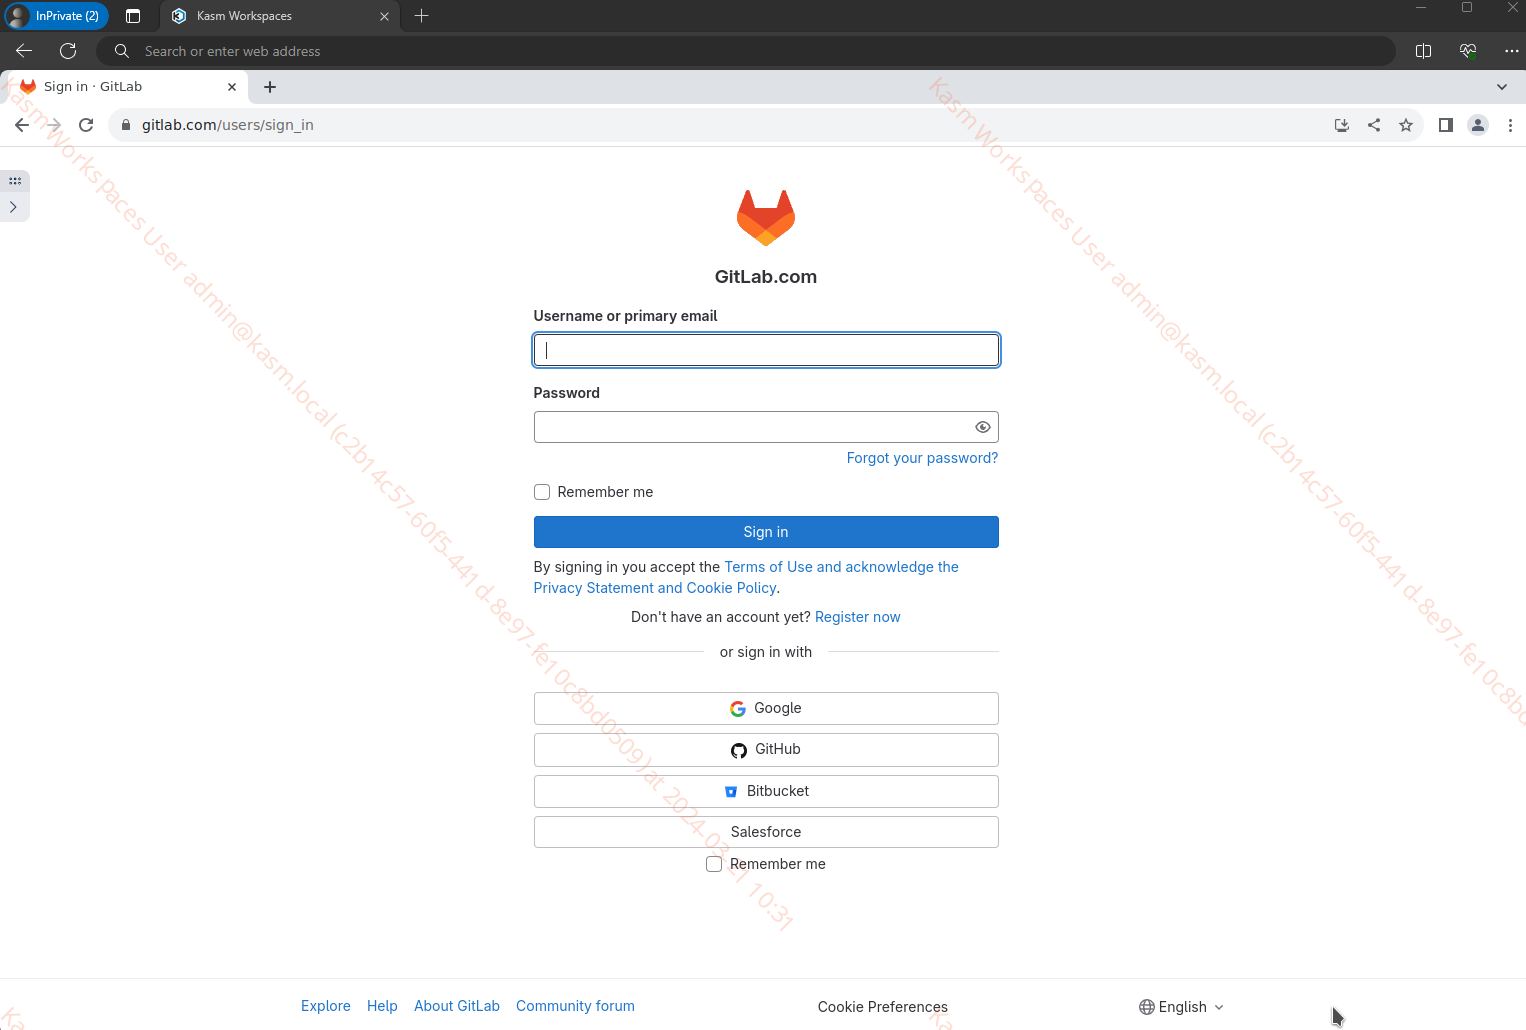
Launch the workspace and confirm the browser navigates to the desired web app.
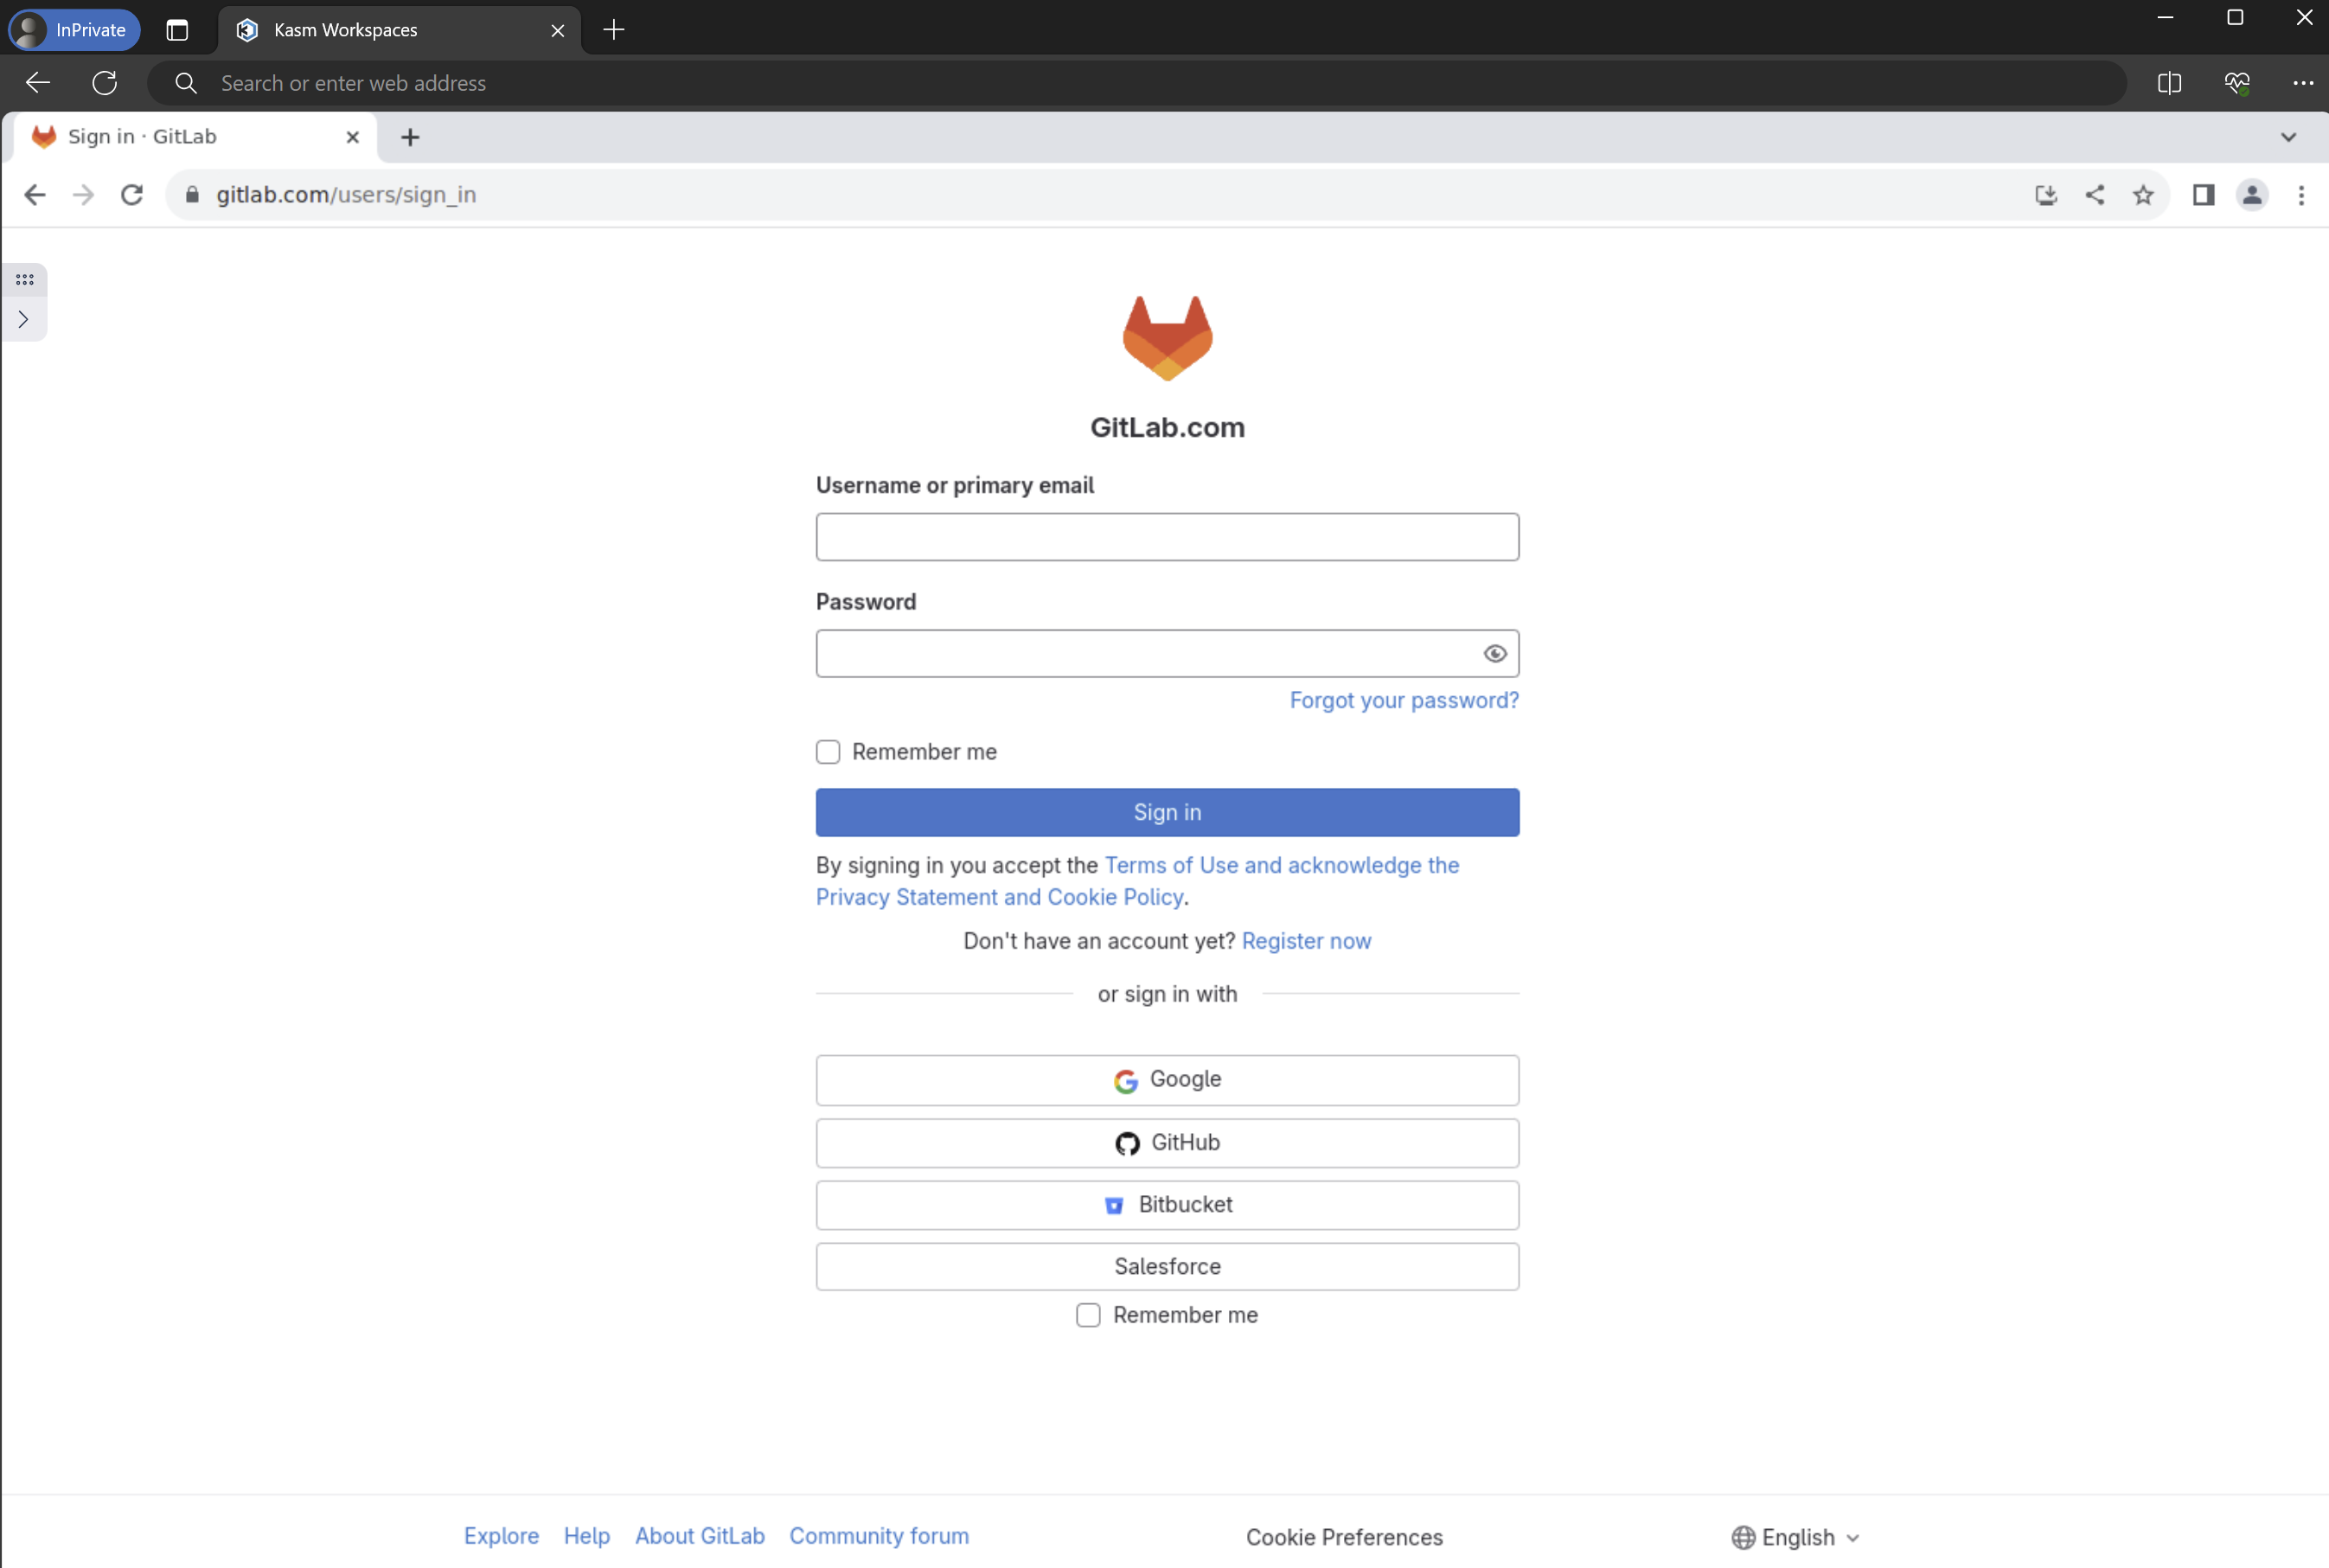
Protected Web App
(Optional) Kiosk Mode
In the last example, you will notice that the containerized chrome browser fully loads within the end user’s browser. This will give a “browser in browser” effect that may or may not be desirable.
If you’d like to remove the navigation bar from within the Chrome workspace, change the Docker Run Config Override setting
for the Gitlab (Chrome) Workspace to include the --kiosk argument for the LAUNCH_URL environment variable.
{
  "environment": {
    "LAUNCH_URL": "--kiosk https://gitlab.com/users/sign_in"
  }
}
The difference between the default behavior and kiosk mode can be seen below.
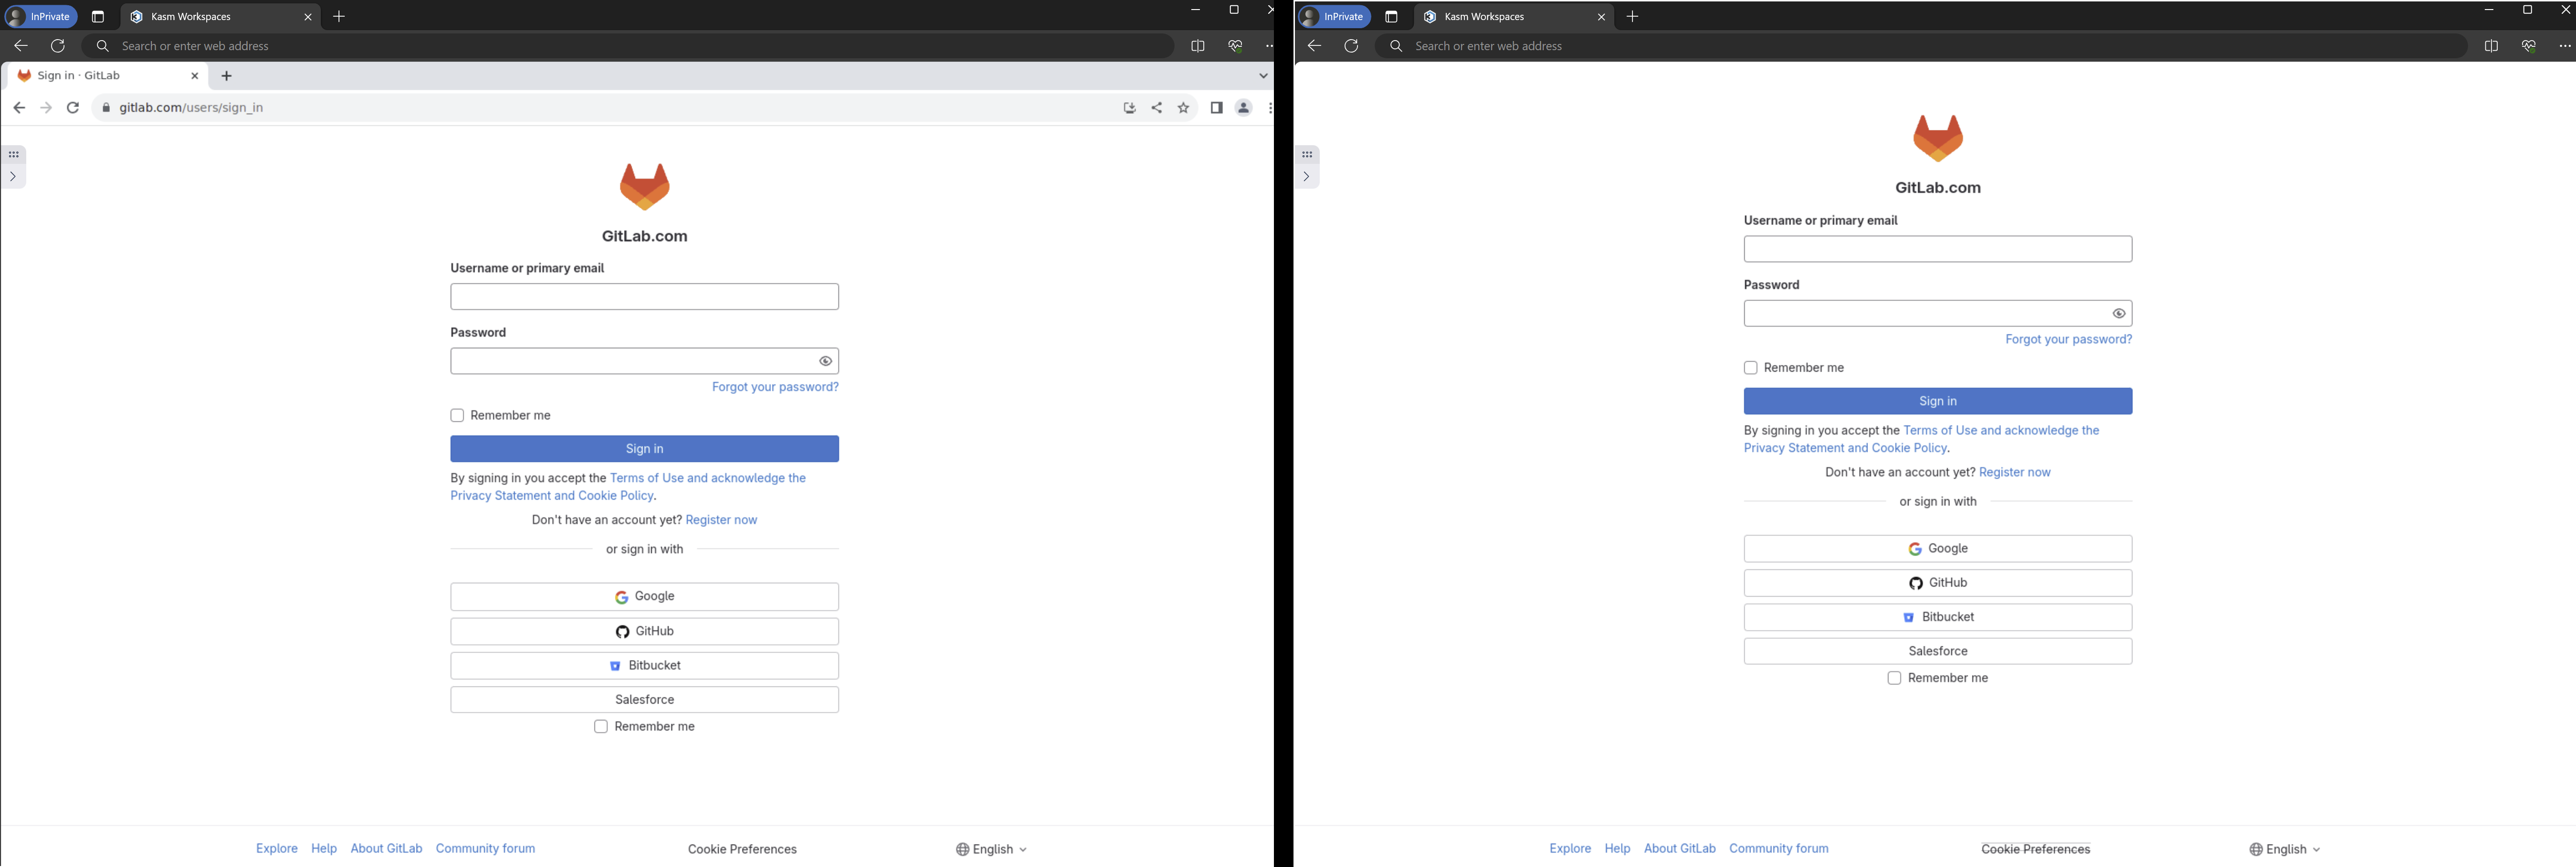
Protected Web App
(Optional) Managed Browser Policies
Administrators may wish to add and/or enforce certain capabilities within the containerized browsers such as pre-defining bookmarks, adding extensions or disabling features like developer tools. The best way to do this is via the Chrome’s Managed Policies Guide.
(Optional) Web Filter
Administrators my wish to employ the Web Filter to restrict users from accessing web content outside of the approved web app.
Log into the Kasm UI as an administrator.
From the Admin panel, expand Settings, and select Web Filter
Select Add Policy
Give the Policy a name (e.g
Gitlab Policy) and select Deny by Default.In this example we want to block all access except for the gitlab domain ad any other required domains needed (e.g for authentication with google). Add the approved domains to the Whitelist.
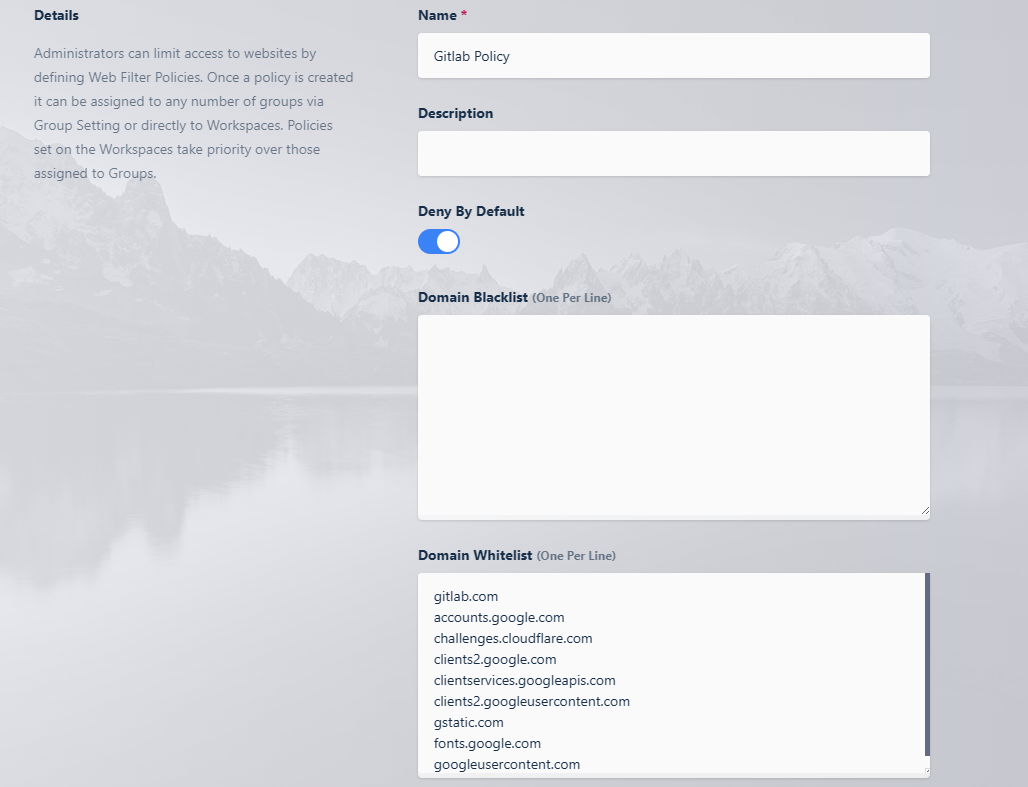
Protected Web App
Click Save.
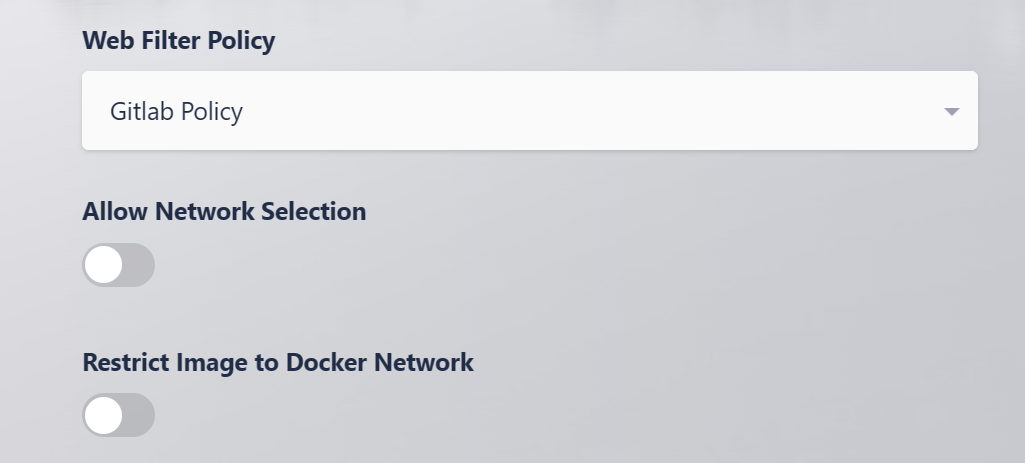
Edit the previously defined workspace, update the Web Filter Policy to the use the
Gitlab Policy.
Protected Web App
Test access to the Protected Web App. Ensure proper functionality is allowed. Navigating to an unapproved site should result in a blockage.
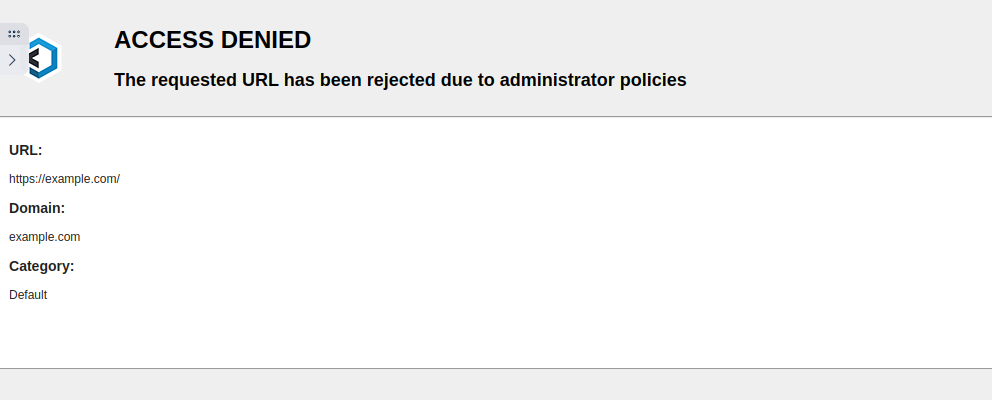
Protected Web App
(Optional) Watermarking
Administrators may wish to apply a graphic or text based watermark to be displayed during the session. Utilize the following File Mapping example, to apply a watermark to the Using File Mapping to Apply a Custom KasmVNC Watermark Workspace.
Protected Web App
(Optional) DLP Controls
Administrators may wish to apply additional data loss prevention settings such as restricting the user’s ability to upload/download files, copy and paste text/image via the clipboard etc. Most of these items can be applied via Group Settings and are explained in the Data Loss Prevention Guide
It may be helpful to review how Group Settings can be applied and layered. A walkthrough is available in the video below