IPVLAN Networking
Summary
By default Kasm uses docker bridge networking with NAT. While this makes networking and scaling very simple, it comes with the disadvantage that user generated traffic all comes from the single IP address of the Kasm Agent they are deployed on. A solution is to use Docker IPVLAN networks. Kasm allows you to assign Images to a docker network, making it possible to assign different groups of users to different VLANs on the physical network.
Virtualization
If your Kasm Agents are virtual machines, you must first setup your virtualization infrastructure to support trunking. This step can be skipped if Kasm is running on bare metal
VMWare vSphere
These instructions assume your vSphere is already setup with a Dswitch trunked to the physical network.
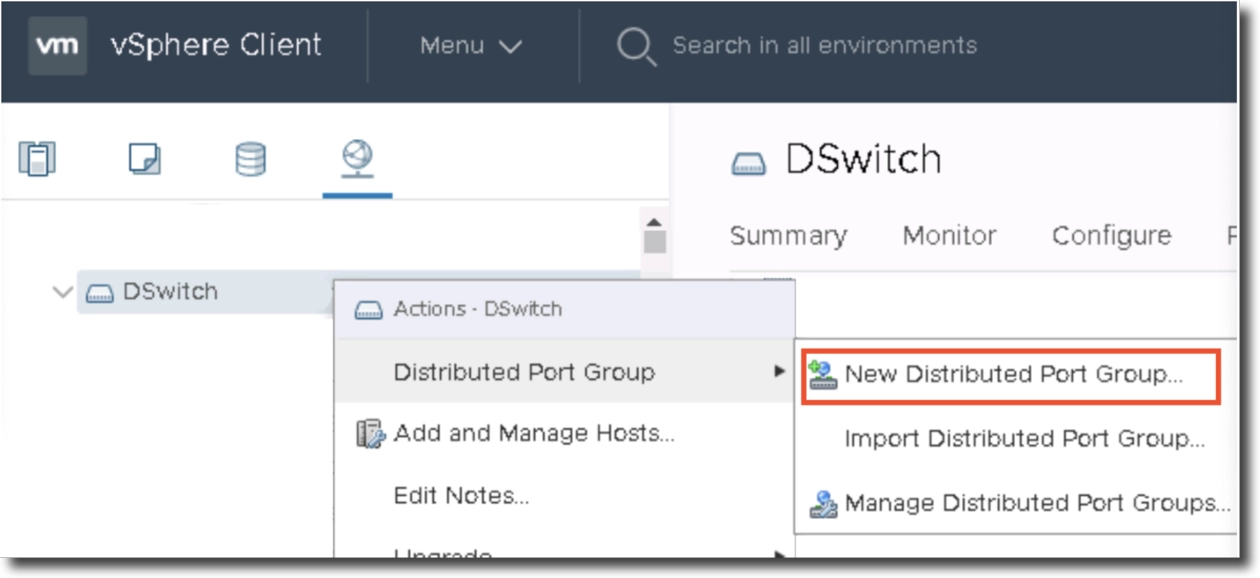
vSphere setup with Dswitch
Navigate to the networking tab in the vSphere Web Client
Right click on the appropriate Dswitch that has connectivity to the target physical network.
Click Distributed Port Group -> New Distributed Port Group
The new Distributed Port Group dialog has three pages.
Provide your new port group a name and hit next

New Port Group
In the VLAN section select “VLAN Trunking” for the VLAN Type and provide a trunk range.
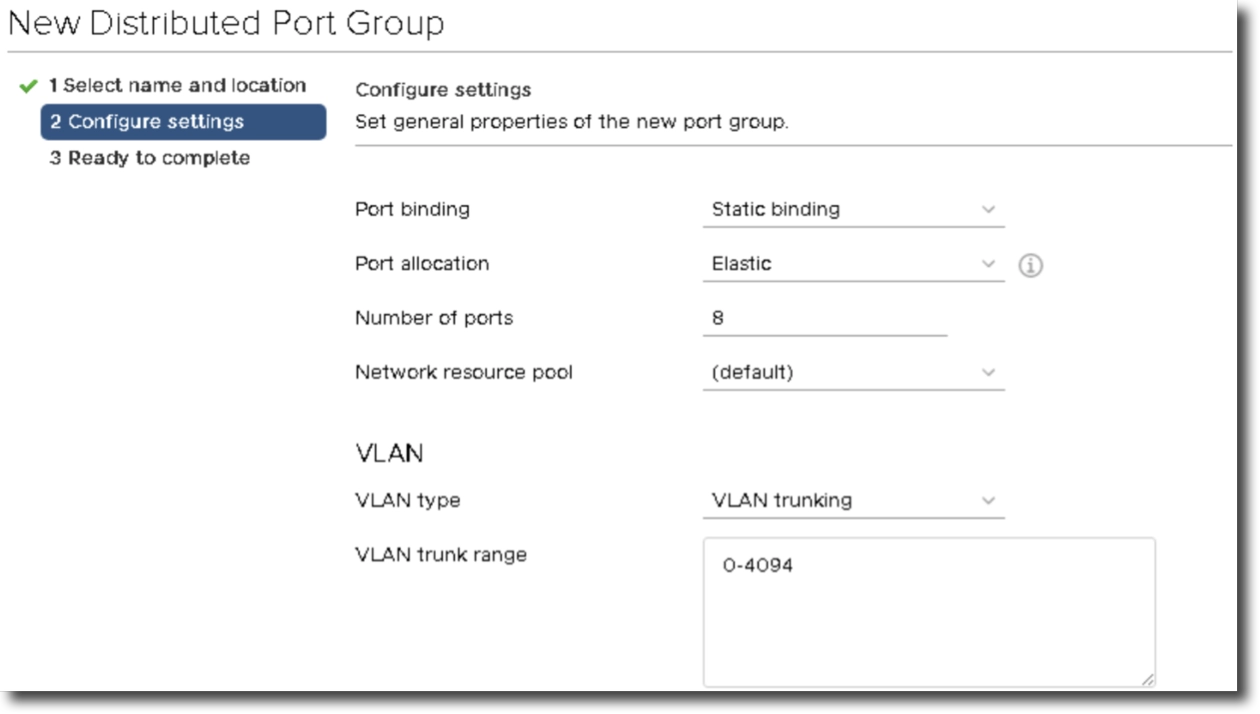
VLAN Section
Select Next to view the summary and then Finish to confirm.
Next you need to associate the trunk to the VM. It is recommended to have two NICs on the VM. One is a normal access port for the Kasm management interface. This NIC will have an IP address and that IP will be used to facilitate communication between the Kasm API server and the Agent. User generated traffic inside of a Kasm desktop or browser will come from the trunk interface.
In the vSphere Web Client, Navigate to the target VM, right click, and Edit Settings.
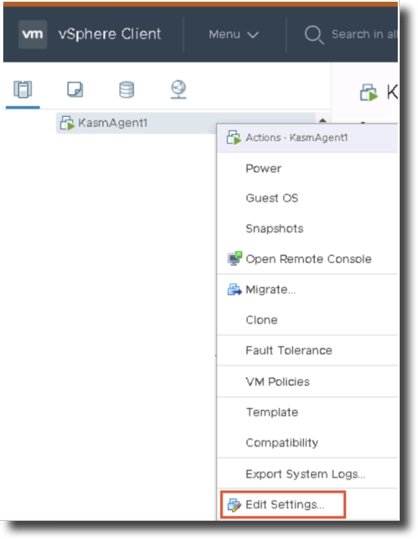
Target VM
Click Add Device, Network Adapter
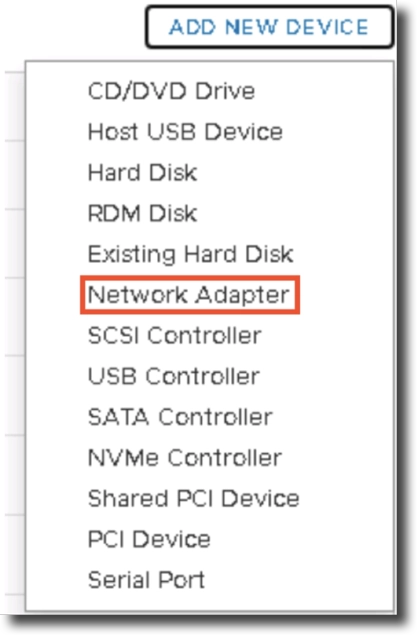
Network Adapter option
Assign one NIC to the Trunk and one NIC to the Management VLAN
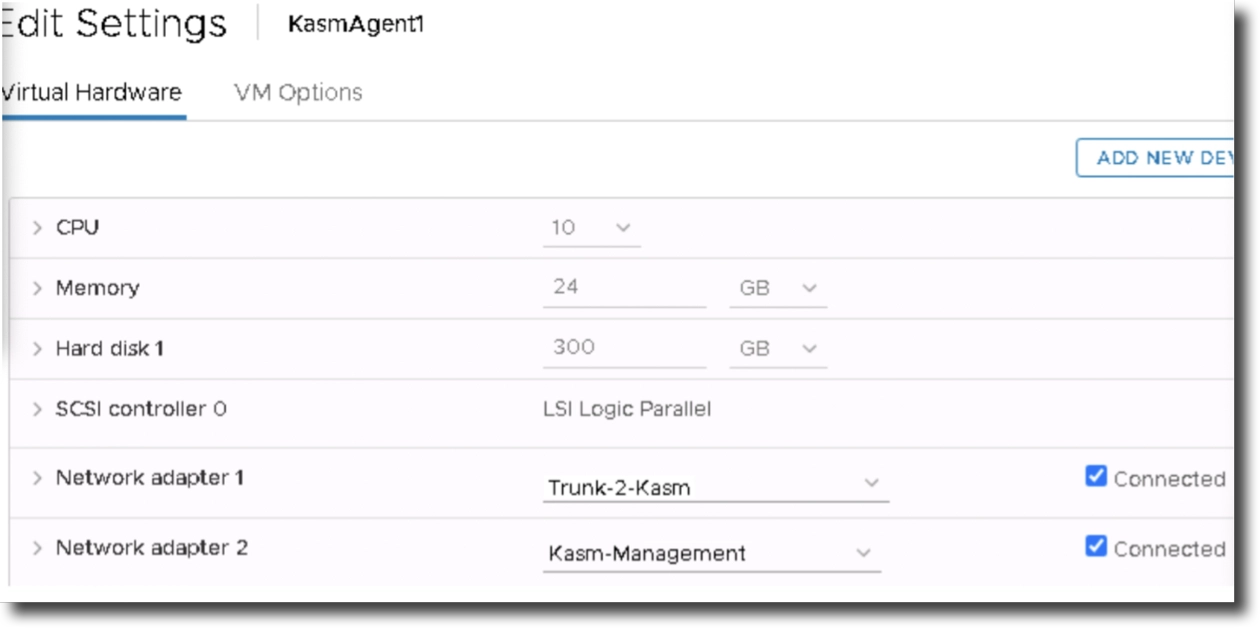
Assigning Trunk and NIC
Configure Kasm Agent OS for Trunking
The following instructions add trunking capabilities for Ubuntu 16.04LTS.
sudo apt-get install vlan
sudo modprobe 8021q
sudo su -c 'echo "8021q" >> /etc/modules'
Edit /etc/network/interfaces
admin@kasm-agent-1:~$ cat /etc/network/interfaces
# This file describes the network interfaces available on your system
# and how to activate them. For more information, see interfaces(5).

source /etc/network/interfaces.d/*

# The loopback network interface
auto lo
iface lo inet loopback

# The primary network interface
auto ens192
iface ens192 inet static
        address 192.168.10.1
        netmask 255.255.255.0
        network 192.168.10.0
        broadcast 192.168.10.255
        gateway 192.168.10.1
        # dns-* options are implemented by the resolvconf package, if
installed
        dns-nameservers 8.8.8.8

auto ens160
iface ens160 inet manual
In the example configuration above, ens192 is the management port and ens160 is the trunk. There is no need to define VLAN interfaces, docker will do this automatically and any attempt to create them will only interfere or break things.
Docker Networking
There are two types of docker networks that would allow placing containers on VLANs directly, macvlan and ipvlan. If you are running in a virtualized environment, using macvlan requires special configurations on the hypervisors, therefore, we recommend IPVLAN instead of macvlan.
Warning
IPVLAN was an experimental feature prior to docker 19.03.0, released 2019-07-22. If you are using a version of docker prior to 19.03.0, you must enable experimental features by editing/creating the file /etc/docker/daemon.json
{
  "experimental":true
}
The following is an example of creating an IPVLAN docker network.
sudo docker network create -d ipvlan --subnet=192.168.150.0/26 --
gateway=192.168.150.1 --ip-range=192.168.75.16/28 -o ipvlan_mode=12 -o
parent=ens160.150 vlan150
The proceeding command creates a docker network called “vlan150” on the parent network adapter ens160, sub interface 150 “-o parent=ens160.150”. The name “vlan150” can be any arbitrary name you desire. In this example the subnet is a /26 as configured with the –subnet option. However, you may have multiple Kasm agents and you will want each agent to use different IP addresses for their respective containers. Therefore, in the example we used the –ip-range option to specify a smaller /28 inside the /26 subnet. This particular agent will use ip address specified in the ip-range option for its containers.
We recommend using larger IP spaces to allow for easier expansion. For example, if today you had 4 hosts, you may want to consider using a /22 for each VLAN, which would support up to 510 users, and each agent’s docker network would have a /25 within the subnet allowing each agent to support up to 128 users.