Two Factor Authentication
Two Factor Authentication requires the user provide an additional piece of evidence beyond their standard password, to gain access to the system. Kasm implements a Time-based One-Time Password (TOTP) algorithm that can be used with popular apps such as Google’s Authenticator. Physical tokens can also be used.
Two factor authentication can be enabled by the administrator through group settings. Each user will be required to setup their own secret and authentication application during their next login.
Download the Apps:
Note
Google Authenticator is the only officially supported Application but others like Microsoft’s Authenticator App or others that implement TOTP may be compatible.
Enable Two Factor
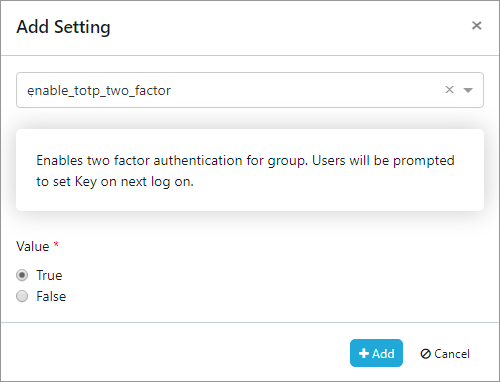
Navigate to the Groups tab in the Administrators Sidebar and select green view button for the group
Select Add Settings from the Group Settings card
Select the “enable_totp_two_factor” setting and select True to add to all of the users in the group
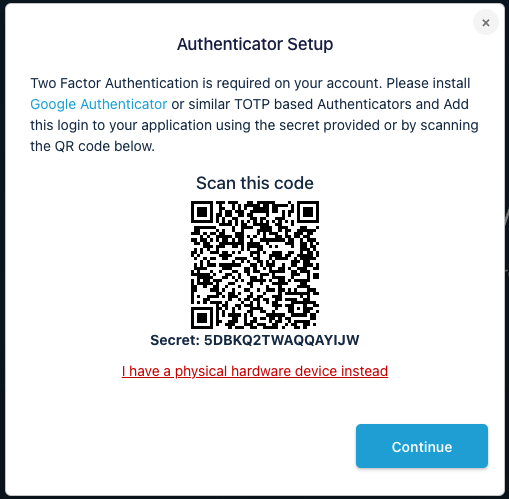
User Authentication App Setup
The user will be asked to add the authentication to their Authenticator App on the first log on after two factor was enabled.
Once the username and password have been verified a QR code and secret are provided for easy implementation in Google’s Authenticator
The User will select the plus icon in Authenticator and select Scan barcode to use thier phones camera to add the secret or Manual Entry to enter the secret manually
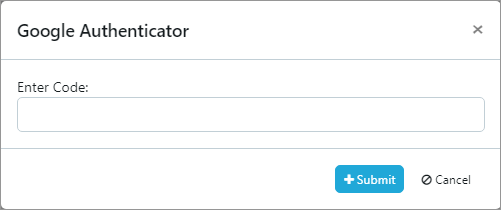
User must enter one time password provided in the Authenticator App to login
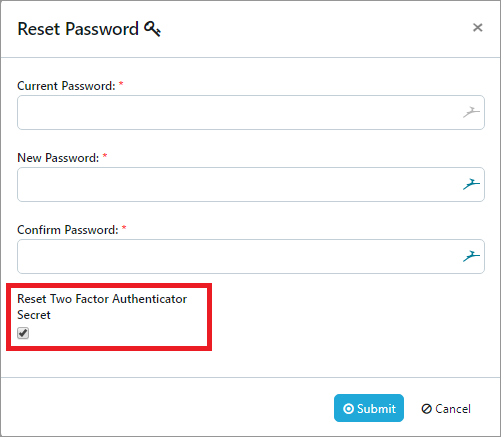
Reset Single-User Authentication
The user can reset the authentication code in the reset password section.
Navigate to the profile tab in the Sidebar and select “Reset Password”
Enter current password and a new password
Check the “Reset Two Factor Authenticator” checkbox and then click Submit
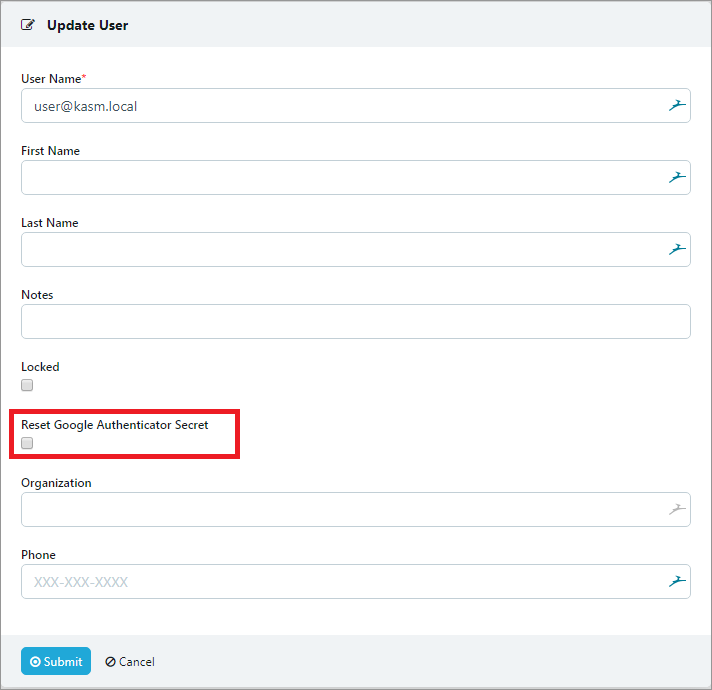
The administrator can reset the users authentication.
Navigate to the Users tab in the Administrators Sidebar and select edit for the user
Check the “Reset Two Authenticator Secret” checkbox and then click Submit
Physical TOTP Tokens
Kasm Workspaces supports using physical tokens that meet the TOTP specification defined in RFC 6238. The tokens must use a 30 second token interval and use SHA1. Physical tokens purchased must come with a seed file, which is a password encrypted zip file containing a list of serial numbers with the associated base32 secret for each token.

Import Physical Tokens
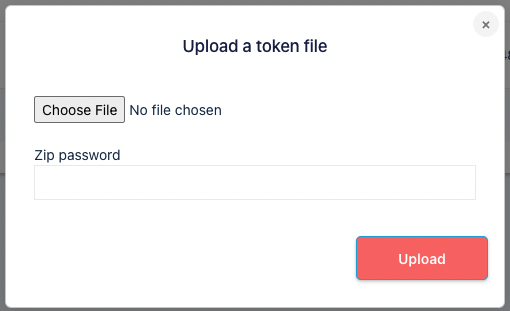
Physical tokens will come with an encrypted zip file containing a list of serial numbers and associated secrets. In the administrator panel, go to Authenticate, Physical Tokens, and click the Import button. Provide the file and password associated with the file and click upload.
Assigning Tokens
Administrator Assigned
Tokens can be assigned and unassigned by the administrator by clicking the three dot menu icon next to a token and selecting assign or unassign.
User Self Register
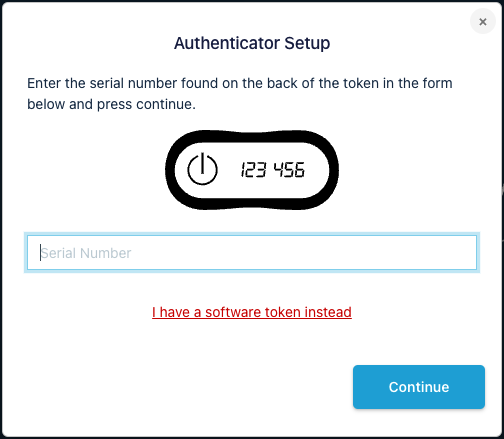
If an administrator does not explicitly assign a token to a user, the user can input the serial number on login to self register the token. A user will only be able to self-register a token if they are required to login with two factor authentication and they don’t currently have a token assigned. Under those conditions, the user will be prompted to setup a token on login. The user will need to select the “I have a physical hardware device instead” link, which will then display the following dialog where they can enter the serial number located on the back of the physical token.
Deleting Tokens
Tokens can either be deleted individually or the administrator can delete all tokens that were imported together as part of the same seed file by clicking the Delete Seed Series button on the Physical Tokens view. Deleting a token will make it unusable to the currently assigned user.