Workspace Registry

Installing workspaces in kasm
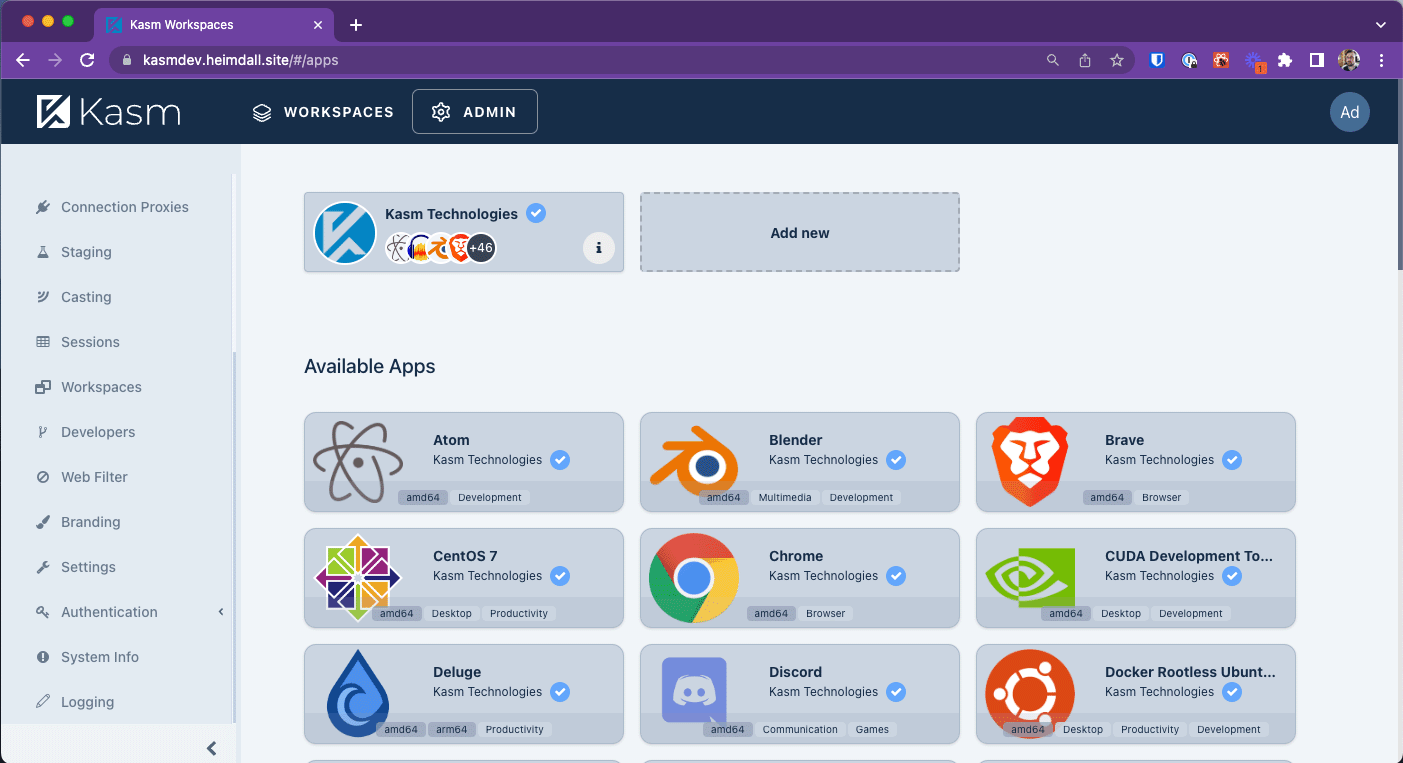
The Workspace Registry is a mechanism for allowing users to easily install workspaces. This can be from our own 1st party registry or from 3rd party registries.
The intention was twofold. First to make it as simple as possible for users to add workspaces without needing to fill in lots of fields, and secondly to make it as simple as possible for anyone to create their own registries without us needing to be gatekeepers.
1st Party Registry
The 1st party registry comes pre-installed in 1.13.0 and makes it simple to install any of our workspaces that aren’t already installed on your system.
Note
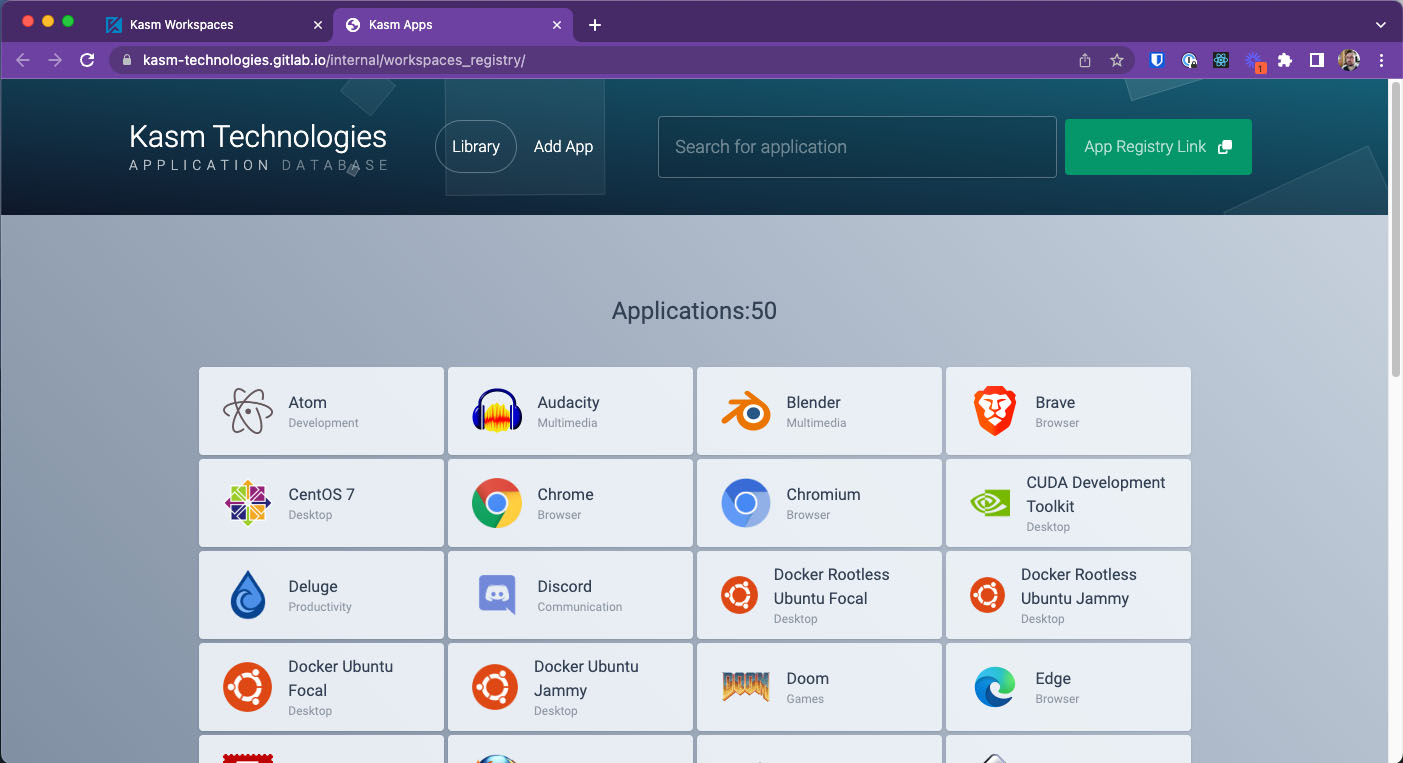
If you remove the 1st party registry and want it back at any point, our registry store front is located at https://registry.kasmweb.com/
3rd Party Registry

3rd Party Workspace Registries
3rd Party repositories allow external developers to create their own workspaces that will work seamlessly with Kasm Workspaces.
Warning
You should only install registries from 3rd parties that you trust, and even then before installing a workspace you should either click the edit button, or click on the icon on the 3rd parties Registry page to see what commands are being executed.
Create your own workspace registry
We have worked hard to try and make it as simple as possible for 3rd party developers to build and maintain their own Workspace Registries. With that goal in mind we have a github template repository which can be used as a basis for your own workspace registry.
The template repository will even generate a front end site ready for use, though it’s primary purpose is to give you confidence that the list is being built correctly and to help you generate the files needed for workspaces.
Note
Once you have set up your own repository, the generated site has a utility to help with creating workspaces. You simply click on “New”, select an image, fill in the text fields, and it will automatically generate everything you need, ready to upload to your repository. The following is just for reference.
To add workspaces to your own registry, you will need to create a folder and the necessary files using the following format:
Workspace Name
- workspace.json
- workspace-name.png
For example

Workspace config sample
Folder name - The folder name can be whatever it needs to be. You probably want to stay clear of special characters to be on the safe side, but spaces should be fine.
workspace.json - This is a JSON file with all the parameters you want to be sent to Kasm Workspaces when it builds the container. You can see the valid paramaters in the schema section and whether they are required or not.
{
  "description": "Visual Studio Code is a code editor redefined and optimized for building and debugging modern web and cloud applications.",
  "docker_registry": "https://index.docker.io/v1/",
  "name": "kasmweb/vs-code:develop",
  "image_src": "vs-code.png",
  "categories": [
    "Development"
  ],
  "friendly_name": "Visual Studio Code",
  "architecture": [
    "amd64",
    "arm64"
  ]
}
Image file - The image can be .png or .svg and ideally will be square and at least 50 x 50px. If you use the workspace builder on your registry store front it will try to normalise everything to make it simpler.
Schema v1.0
Property |
Required |
Description |
|---|---|---|
friendly_name |
True |
The name to show |
name |
True |
The docker image to use |
description |
True |
A short description of the workspace |
image_src |
True |
The name of the workspace icon used |
architecture |
True |
Json list containing either “amd64”, “arm64” or both |
categories |
False |
Json list containing the categories the workspace belongs too. This should be limited to a max of 3. |
docker_registry |
False |
Which docker registry to use |
run_config |
False |
Any additional parameters to add to the run config |
exec_config |
False |
Any additional parameters to add to the exec config |
notes |
False |
Notes about running the workspace, such as if it requires libseccomp. |
cores |
False |
Specify the amount of cores to use for this workspace |
memory |
False |
Specify the amount of memory to use for this workspace |
gpu_count |
False |
Specify the amount of GPUs to use for this workspace |
cpu_allocation_method |
False |
What CPU allocation method to use for this workspace. Can be either “Inherit”, |
Generate your repository
Click on “Use this template”, select Create a new repository
Select a Repository name, you will need to use this name later in the process as well, then click on the “Create repository from template” button
Click on the actions tab and check whether workflows need enabling, if they do, enable them, otherwise you should be good to go.
Go to
/site/next.config.jsand edit theenvsection with the relevant details.name- The name you want to displaydescription- A short description to display when a registries information button is pressed.icon- The image to display for your registry. You can upload an image to/site/public/and reference that by https://domain.com/image.png or if you aren’t using a {sub}domain by referencing it from https://username.github.io/repositoryname/image.png where image.png is the name of the image you uploaded.listUrl- The link to the JSON. This will follow the same format as the icon above but ends in list.json, for example https://username.github.io/repositoryname/list.jsoncontactUrl- A link users can use to contact you on. If you are using a domain or a subdomain, you need to completely remove thebasePath: 'kasm-registry',line, otherwise change the value to match what you chose for the repository name in step 2.
Upload your workspaces to the
/workspacesfolderGo to Settings then Pages and select Branch - gh-pages and click Save
Check progress in Actions
Once complete go back to Settings / Pages and you should have a live site. Click on the Visit Site button.
You should now have a working site which includes any workspaces you added
Using workspace registries in Kasm
The idea behind Workspace Registries was to try and make it as simple as possible to add and delete the registries.
Find a workspace registry.
Click the “Workspace Registry Link” button.
In Kasm click on the “Workspaces” navigation link.
Click on the “Workspace Registry” button.
Click on the “Add new” link at the top, and paste into the text box, then click the “Add” button.