OneLogin SAML Setup
In the Administration panel of OneLogin:
Select add app
Select SAML Test Connector (IdP w/attr)
Select Save
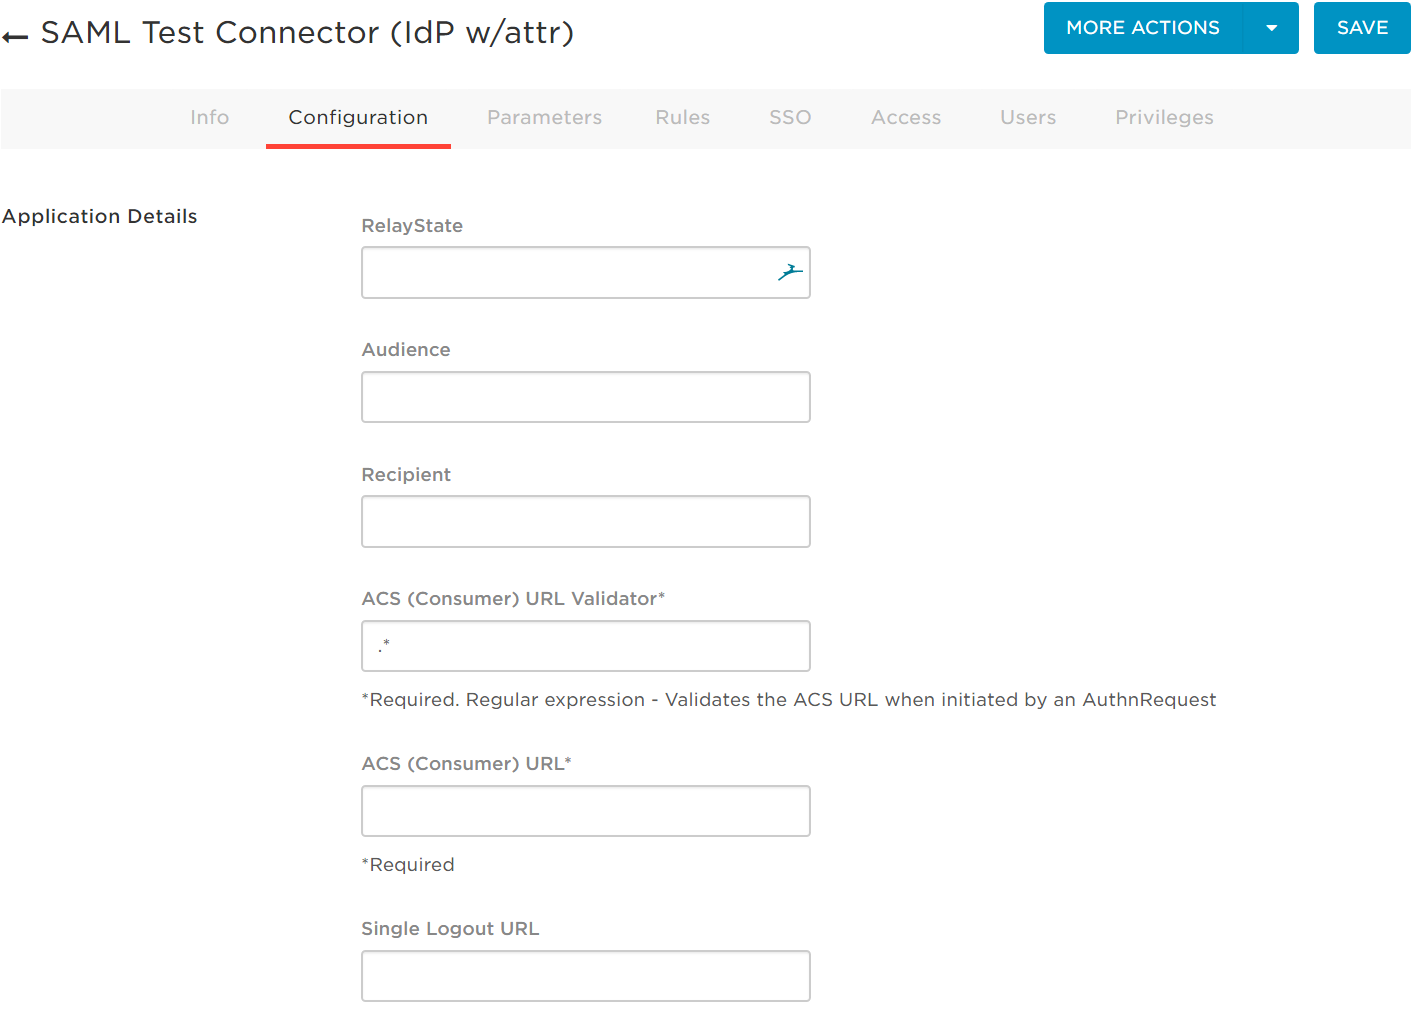
Select the Configuration tab

Open Kasm as an administrator.
Go to Authentication/Saml in Kasm’s navigation bar
Click “Create New Configuration”
Copy Entity ID to OneLogin’s Audience field
Copy Single Sign On Service to OneLogin’s Recipient Field.
Copy Single Sign on Service to OneLogin’s ACS (Consumer) URL
Enter .* in ACS validator (this should be updated with regex for the ACS URL later once login is setup)
Optionally copy Single Logout Service to Single Logout URL
Select Save on the OneLogin configuration page
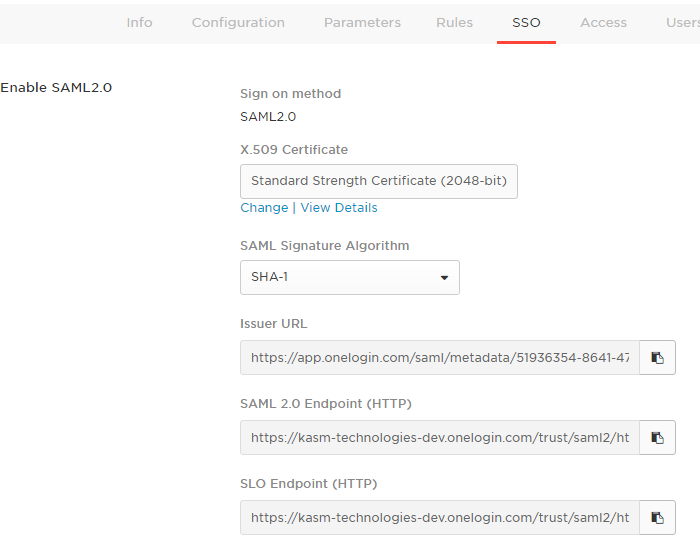
Go to the SSO tab on OneLogin’s page

Copy the Issuer URL to the Identity Provider Entity ID field on the bottom of the Kasm SAML configuration form
Copy the SAML 2.0 Endpoint URL to the Identity Provider Single Sign field on the bottom of the Kasm SAML configuration form
Optionally add the SLO endpoint single logout service to the Single Logout Field
Select the SSO, then select View Details of the X.509 certificate on the OneLogin page
Copy the certificate into the X509 certificate text area in Kasm
Select Submit on the Kasm Configuration
In OneLogin select the Access tab and select the default roles for users. Go back to the Kasm Saml configuration and select Test SSO.
This will launch the login with the OneLogin portal. If the test is successful the Kasm will be logged in under the username for the OneLogin email provided.
If the test was successful it will have logged out the Admin. Logout and log back in as an administrator.
If the login is not working you may select the debug checkbox in the saml configuration the response will contain the specific saml error
If the login works properly enable the configuration with the enabled checkbox under service Provider
Navigate to the Settings tab in the administators navigation bar
Select the enable_saml setting and change it to “true”
Select enabled in the Saml configuration
This will enable the login to be seen by the users