Keycloak OpenID Setup

This guide walks through a basic setup allowing Keycloak users to authenticate with your Kasm deployment.

Reference Docs:

Creating a Keycloak OAuth App

  1. Login to the Keycloak portal as an Admin.

  2. Under the the desired realm (e.g Master) , select Realm Settings.

  3. Click OpenID Endpoint Configuration next to Endpoints.

    ../../_images/realm_settings.png

    Realm Settings

  4. Save off the urls for authorization_endpoint , token_endpoint, and userinfo_endpoint. These will be used in future steps.

    ../../_images/endpoints.png

    Keycloak Endpoints

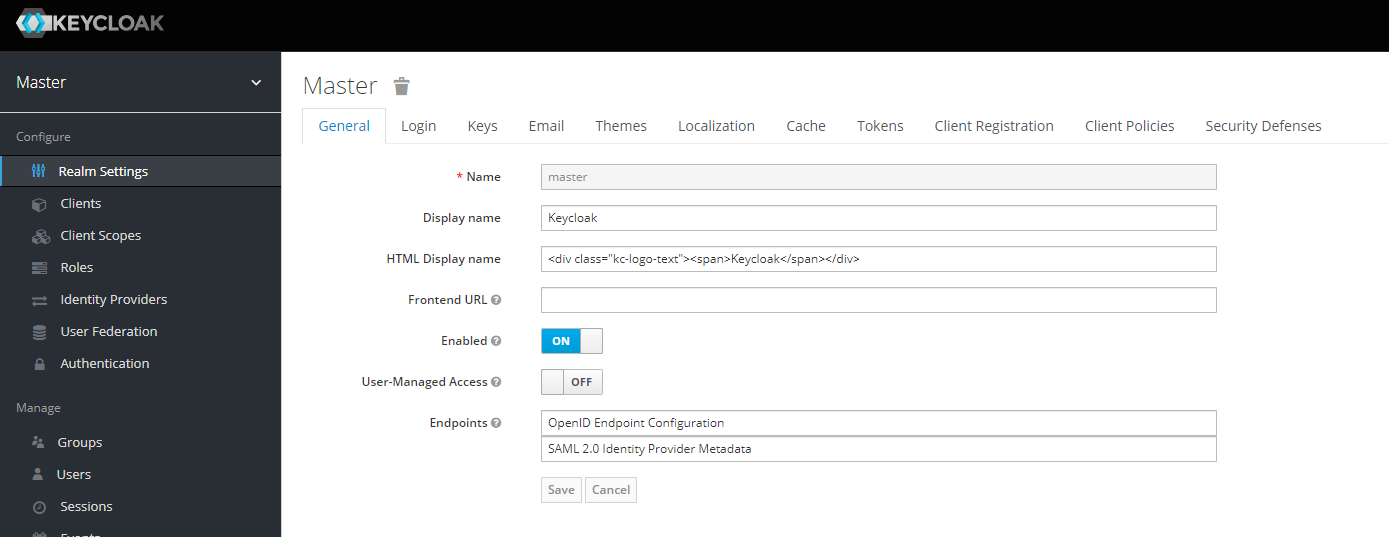
  5. Back in the console, select Clients under the Realm.

  6. Select Create.

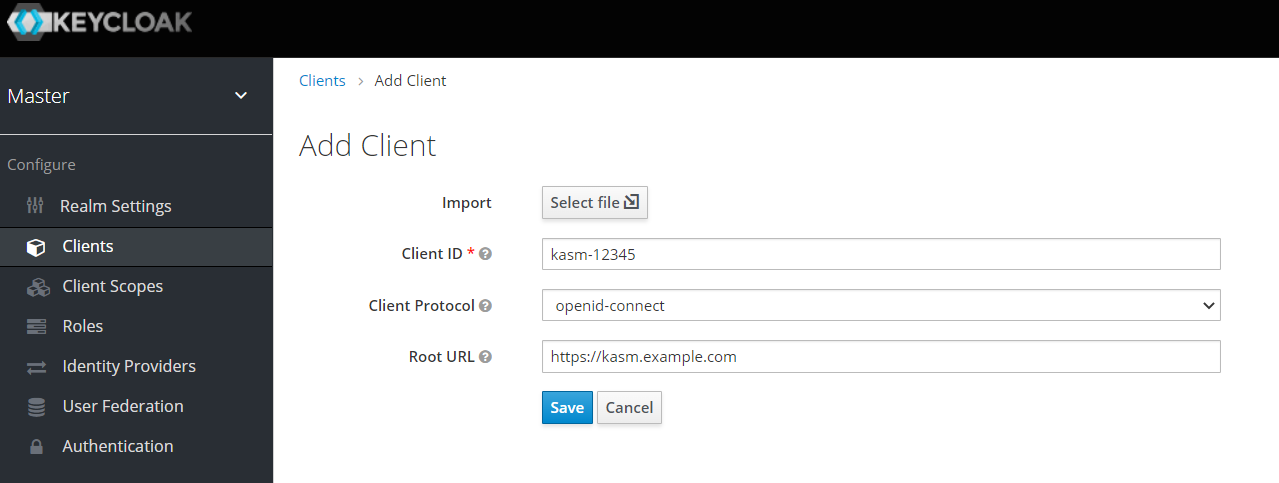
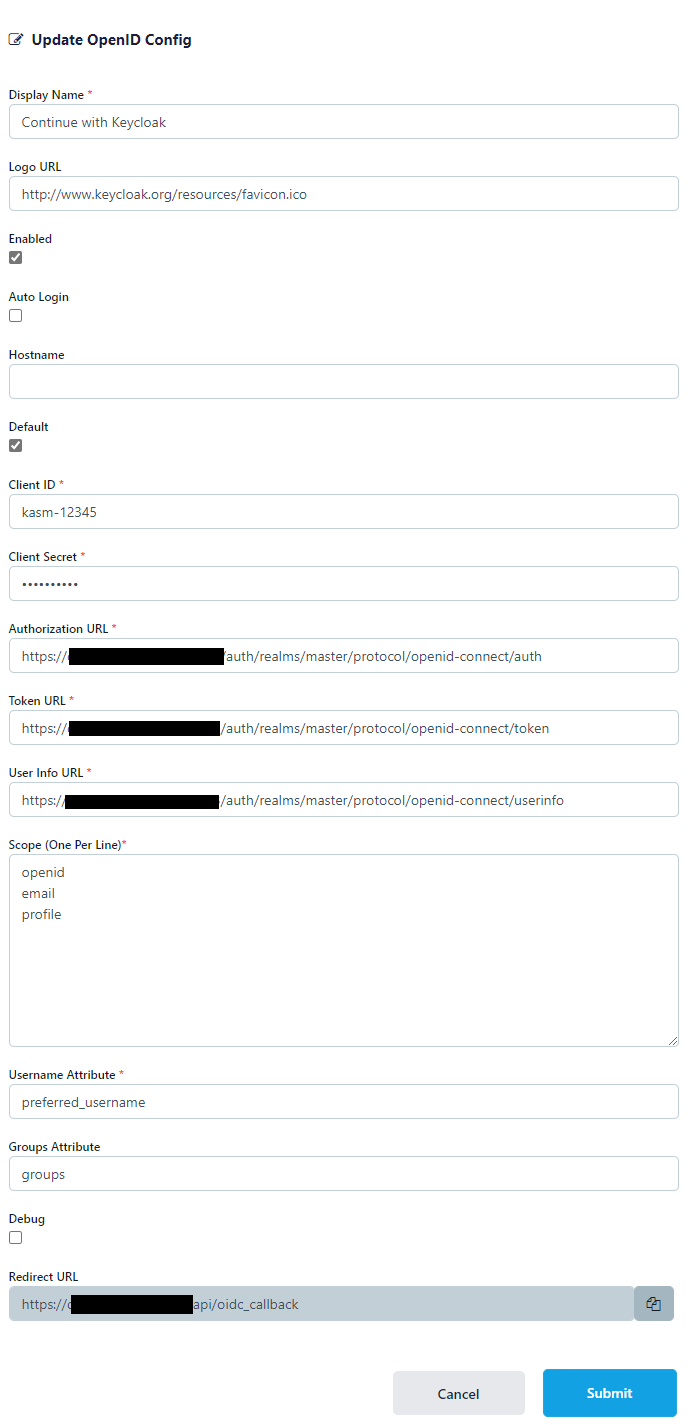
  7. Define a Client ID , e.g kasm-12345. Select openid-connect for Client Protocol and enter the URL for the Kasm deployment under Root URL (e.g https://kasm.example.com).

    ../../_images/add_client.png

    Add Client

  8. In the client settings, change Access Type to confidential, then slick Save.

  9. Select Credentials. Save off the Secret. It will be used in future steps.

    ../../_images/secret.png

    Client Secret

  10. In the client settings, select Mappers, then click Create.

  11. Enter groups for Name, and select Group Membership from the Mapper Type. Enter groups for Token Claim Name, then select Save.

    ../../_images/mapper.png

    Mappers

Kasm OpenID Config

  1. Log into the Kasm UI as an administrator.

  2. Select Authentication -> OpenID -> Create New Configuration.

  3. Update the form with the following entries, using the Client ID and Client Secret gathered in the previous section.

    Property

    Value

    Display Name

    Continue with Keycloak

    Logo URL

    http://www.keycloak.org/resources/favicon.ico

    Enabled

    Checked

    Auto Login

    Unchecked

    Hostname

    <Empty>

    Default

    Checked

    Client ID

    <Client ID from Keycloak>

    Client Secret

    <Client Secret from Keycloak>

    Authorization URL

    <authorization_endpoint from the Keycloak configuration>

    Token URL

    <token_endpoint from the Keycloak configuration>

    User Info URL

    <userinfo_endpoint from the Keycloak configuration>

    Scope

    openid email profile

    Username Attribute

    preferred_username

    Groups Attribute

    groups

    Debug

    Unchecked

    ../../_images/kasm_oidc_configuration2.png

    Kasm OIDC Configurations

  1. Click Submit to save the changes.

Keycloak Login Test

  1. Logout of the Kasm to display the login screen. The OpenID configuration should be shown.

    ../../_images/login3.png

    Login Screen

  2. Click Continue with Keycloak

  3. The user is redirected to Keycloak for auth.

    ../../_images/authorization2.png

    Keycloak Auth

  4. Upon completion, the user is logged into the Kasm app.

Group Mapping

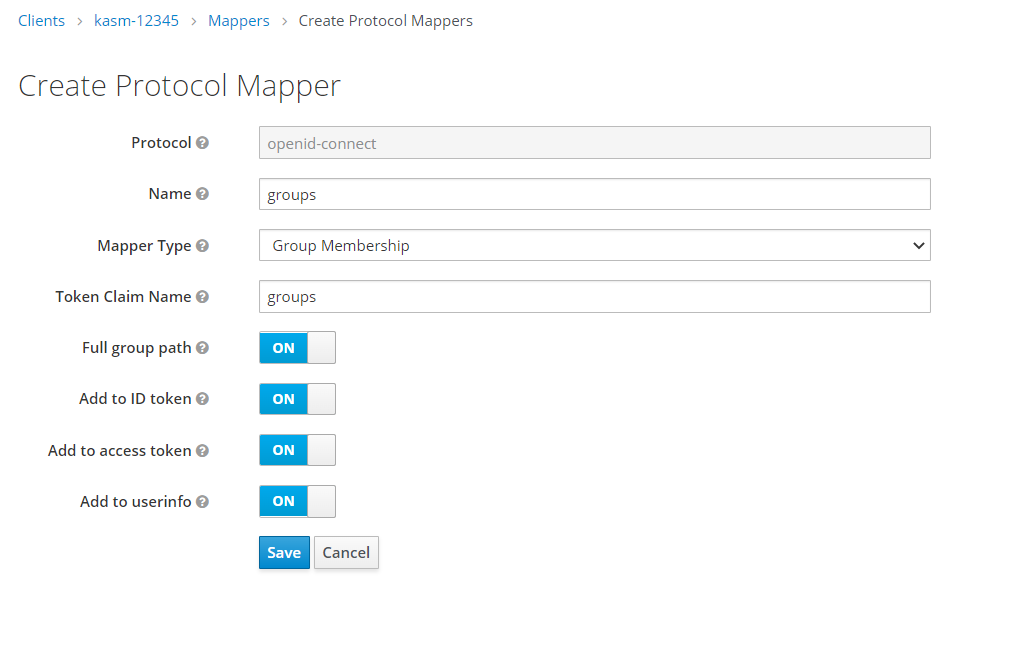
The previous configurations will instruct the identity provider to send a list of Security Group ID the user belongs to during the OpenID auth workflow. We can configure Kasm Groups with the Security Group IDs from Azure AD so that users are automatically added/removed based on their Azure AD group Membership.

  1. Log into the Kasm UI as an administrator.

  2. Select Groups -> Add Group.

  3. Name the Group Group Test, and define a priority.

  4. Click Submit to create the group.

../../_images/groups.png

Group Configuration

  1. On the groups screen, using the three dot menu select View on the group that was just created.

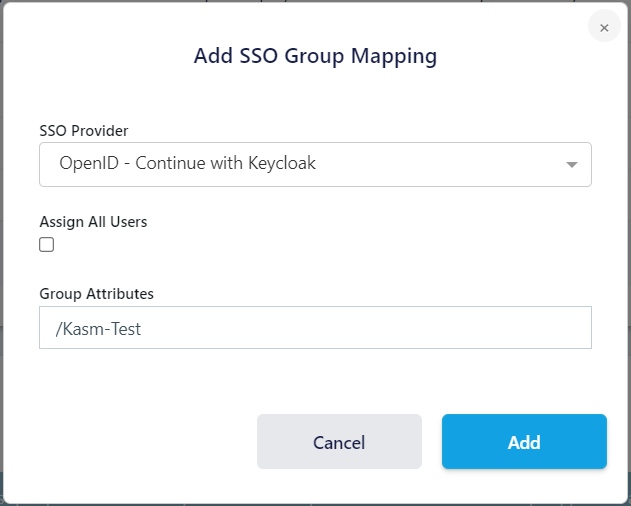
  2. Scroll to the bottom of the screen and select Add SSO Mapping.

  3. Select the OpenID IDP that was created above “OpenID - Continue with Keycloak” for the SSO Provider.

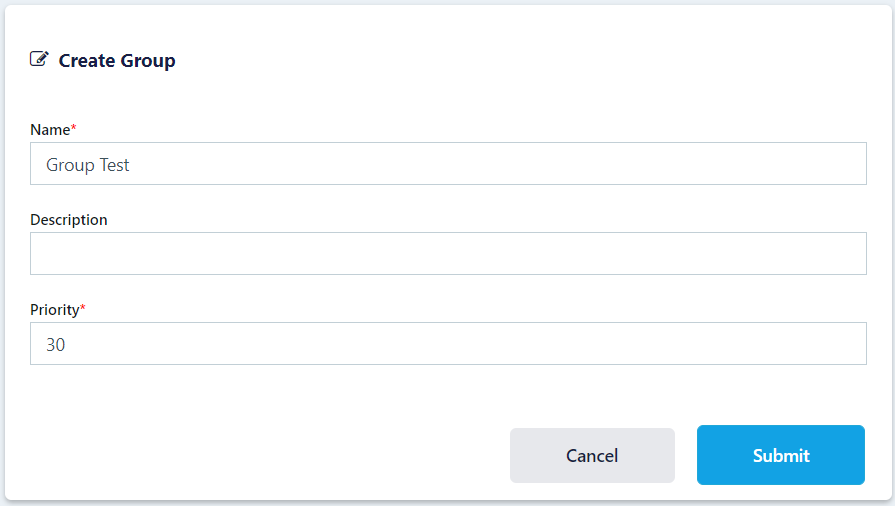
#. Then enter the Keycloak group name desired in the Group Attributes field, e.g /Kasm-Test. Note the slash. This is needed when Full group path is set in the Keycloak Client Mapper which is the default.

  1. Click Add

../../_images/sso_group_mapping.png

Add SSO Group Mapping

  1. Logout, then login via the Keycloak Open ID login with a user that is a member of the specified group.

  2. View the users group membership to ensure they are added to the newly created group.