Fixed Infrastructure - RDP/KasmVNC
Overview
Kasm Workspaces can be configured to connect to fixed remote endpoints that are using either the Remote Desktop Protocol or KasmVNC. In this document we will be going over the steps needed to configure these endpoints and present them to users on the Workspaces dashboard.
Remote Desktop Protocol - RDP
In this example an RDP endpoint is an external Windows server with RDP enabled that is always online and waiting for an external connection. This server is not managed by Kasm Workspaces in any way, we are simply providing a web based methodology of connecting to it.
In order to add the server first we need to create a server record under Compute > Servers > + Add. In this example we are using the following connection information:
Host: windows.example.com
Port: 3389
User: Administrator
Password: windowstest123
Once configured it should look like this: (note the name and type we assigned to this server)
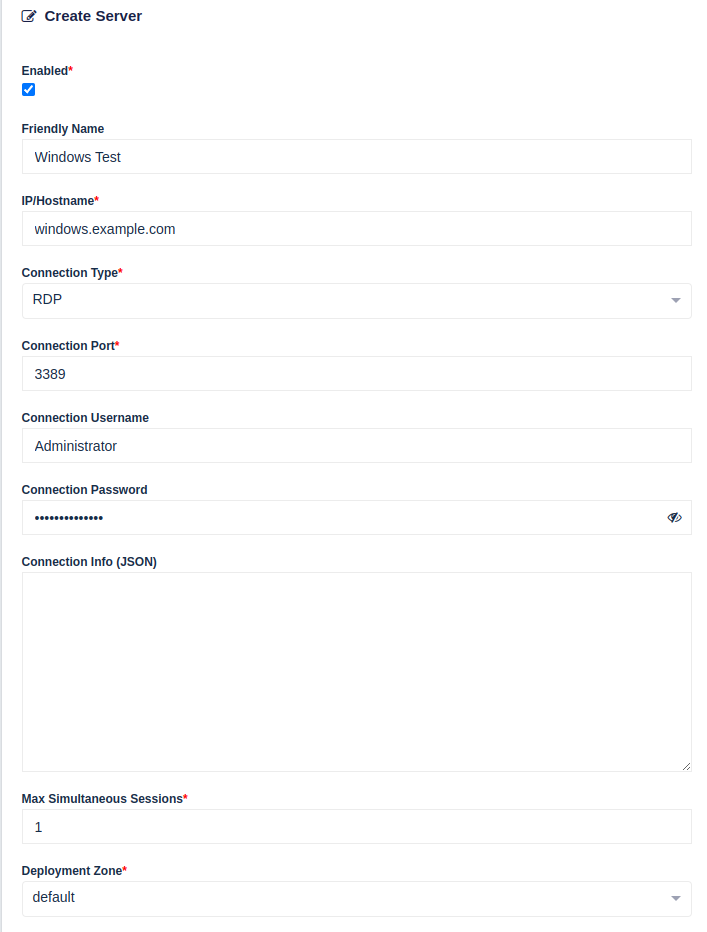
As you can see we are limiting this to a single Max Simultaneous Sessions as this is a single Windows server without sharing.
Click submit and now we need to link this server to a Workspace that can be launched from the User dashboard.
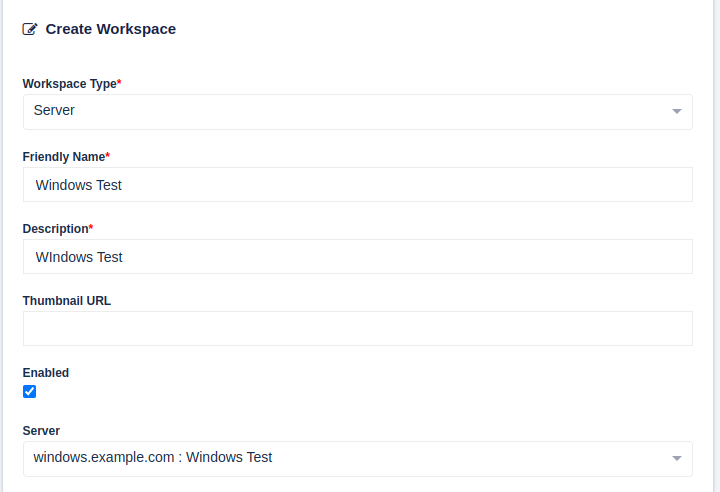
Click on Workspaces > + Add Workspace.
Select Server as Workspaces Type, choose a friendly name and description, click enabled, and select the server we just configured from the Server dropdown. In this case windows.example.com : Windows Test. Once configured it should look like this:
Click submit and the server will be available to launch from the User Dashboard:

Advanced Settings
Connection info (JSON) settings can be found here. These can be used on a per server basis to overide the defaults found under Settings.
Important
Some features like file upload/downloads, screenshots, and resource monitoring are only available on a Windows RDP server with a Kasm Windows Service installed. For installation instructions please see here. Connections to standard RDP servers will still function without these additional features if this service is not installed and running.
Forcing login on connection
When connecting to a Windows RDP endpoint it is possible to omit the Connection Username and Connection Password settings to force the user to login when launching the workspace. If omitted the user will be presented with a web based login page each time they launch the Workspace.
KasmVNC
In this example a KasmVNC endpoint is an external stand alone Linux machine running KasmVNC. This server is not managed by Kasm Workspaces in any way, we are simply providing an enhanced web based methodology of connecting to it.
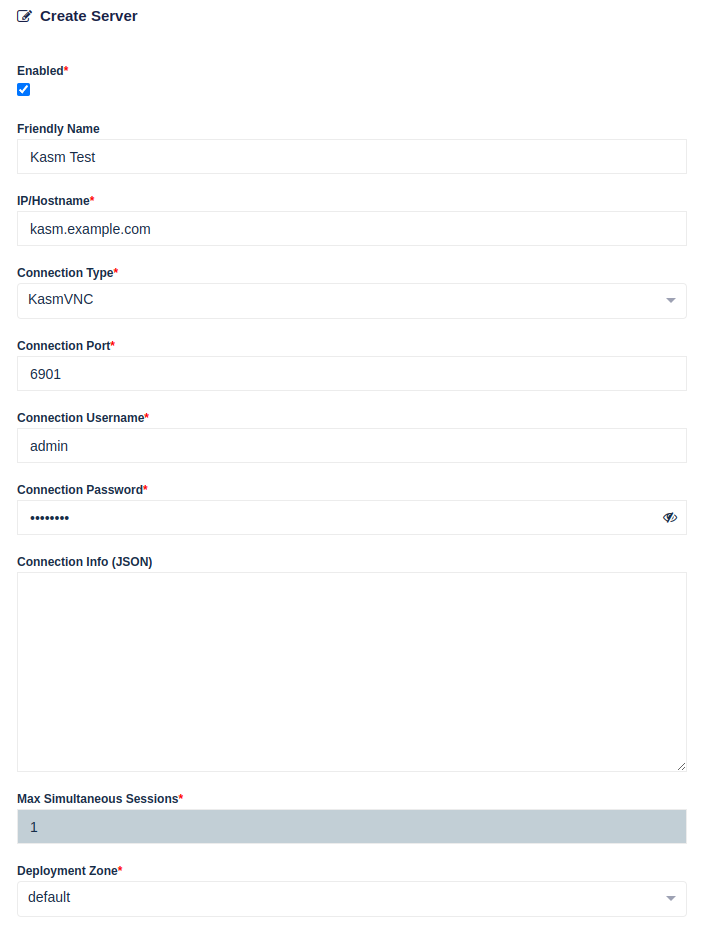
In order to add the server first we need to create a server record under Compute > Servers > + Add. In this example we are using the followi ng connection information:
Host: kasm.example.com
Port: 6901
User: admin
Password: admin123
Once configured it should look like this: (note the name and type we assigned to this server)
Click submit and now we need to link this server to a Workspace that can be launched from the User dashboard.
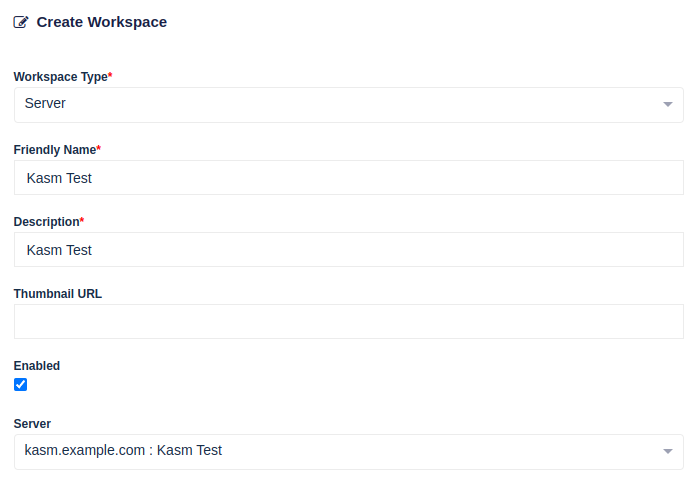
Click on Workspaces > + Add Workspace.
Select Server as Workspaces Type, choose a friendly name and description, click enabled, and select the server we just configured from the Server dropdown. In this case kasm.example.com : Kasm Test. Once configured it should look like this:
Click submit and the server will be available to launch from the User Dashboard:

Advanced Settings
Connection info (JSON) settings can be found here. These can be used on a per server basis to overide the defaults found under Settings.
Server Pools
We previously configured individual server endpoints and linked them to Workspaces that can be launched from the user dashboard. These individual servers can also be tagged to a Pool of servers and launched from a single Workspace using any available server from the pool. In this example we will be adding a server pool and tagging two servers to it.
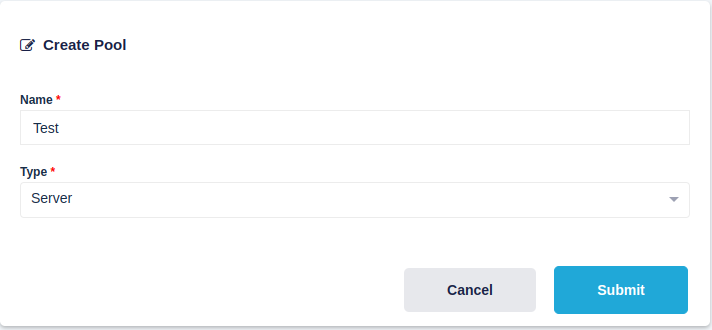
First from the Admin dashboard click on Compute > Pools > + Add. Assign a name to the pool and select Server under Type, when finished it should look like this:
After clicking submit you will be presented with the ability to add new servers or assign existing in this example we will be assigning the servers we created previously in this document:
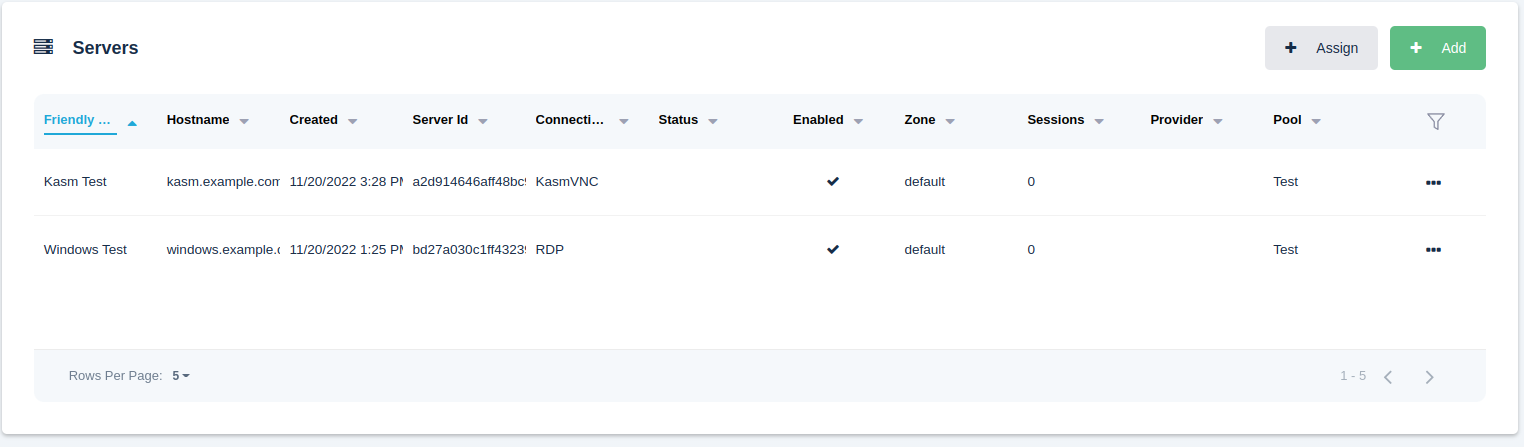
This server pool can be any combination of RDP/KasmVNC server endpoints, but in a production scenario they will likely be a series of similar Virtual or Bare metal servers avaialble for your users to connect to.
Outside of editing the existing pool, individual servers can also be assigned to a pool by editing them and and selecting the pool you want to use under the Pool setting.
After you have a pool of servers configured you will need to create a Workspace. Click on Workspaces > + Add Workspace.
Select Pool as Workspaces Type, choose a friendly name and description, click enabled, and select the pool we just configured from the Pool dropdown. In this case Test. Once configured it should look like this:

Click submit and the pool of servers will be available to launch from the User Dashboard: