Direct To Agent
Overview
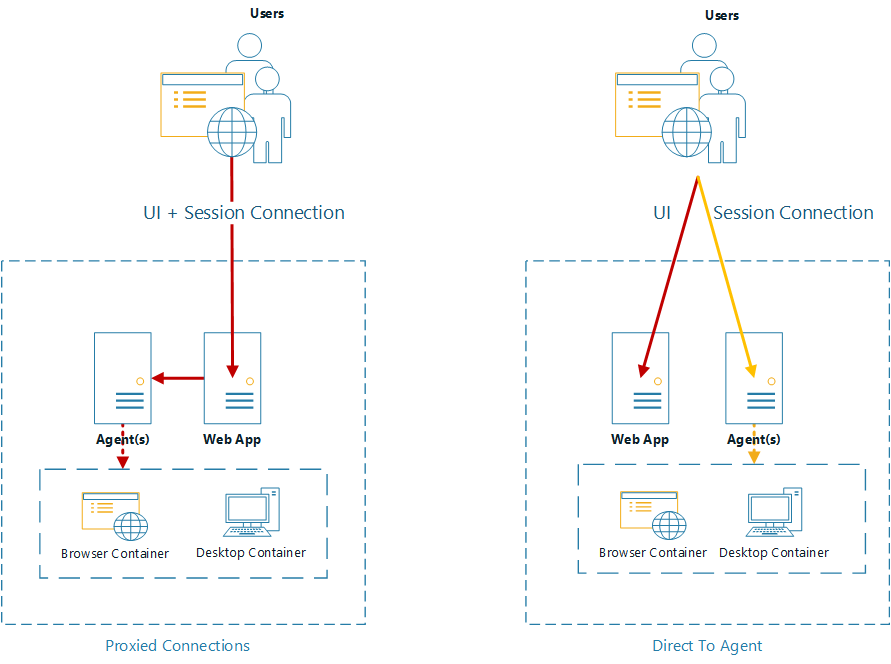
By default, connections to Kasm session are proxied through the Web App role to the Agent role. This works well in most situations, and reduces complexity.
In some situations it may be desired have users make connections directly through the agent instead of being proxied through the Web App.

Connection Workflows
In order to utilize the Direct to Agent workflow, the following requirements must be met.
Kasm Workspaces is installed in a multi-server configuration.
All Web App and Agent servers must be resolvable via DNS by clients and all Kasm role servers and must be registered within the same domain eg.
app-1.kasm.example.comagent-1.kasm.example.com.Clients and Kasm role servers must be able to connect to the Agent and Web App addresses (as resolved by DNS) via HTTPS.
All Web App and Agent servers must have valid certificates trusted by the clients. See Certificates for configuration details.
These instructions assumes starting from a working multi-server install.
Agent Update
In this section we will configure the Agent’s to utilize their DNS name when registering to the Workspaces system.
Stop the services on the Agent
sudo /opt/kasm/bin/stop
Update the
public_hostnamevalue in/opt/kasm/current/conf/app/agent.app.config.yamlthe the public DNS name of the Agent egagent-1.kasm.example.com
vi /opt/kasm/current/conf/app/agent.app.config.yaml
Start the services on the Agent
sudo /opt/kasm/bin/start
Log into the Workspaces UI as administrator. Select Agents. Verify the Agent is checking in as the proper DNS name.
Repeat these steps for all Agents.
Application Settings
Log into the Workspaces UI as an administrator
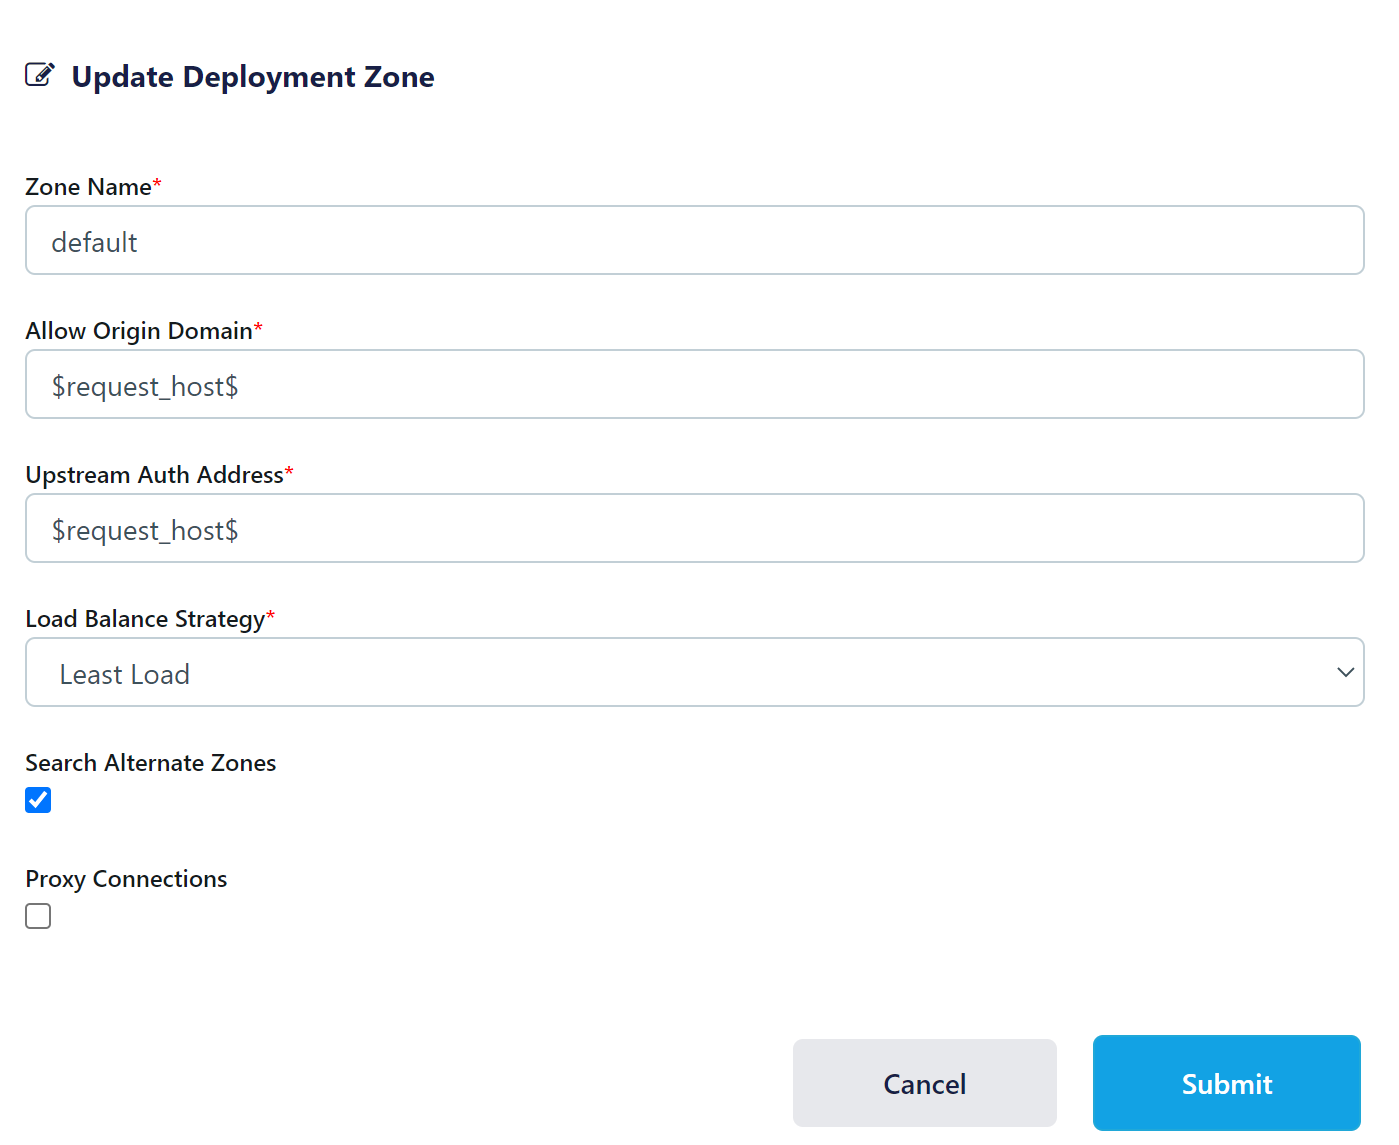
Select Zones then select Edit next to the applicable Zone.
Uncheck Proxy Connections. Click Submit.

Zone Configuration
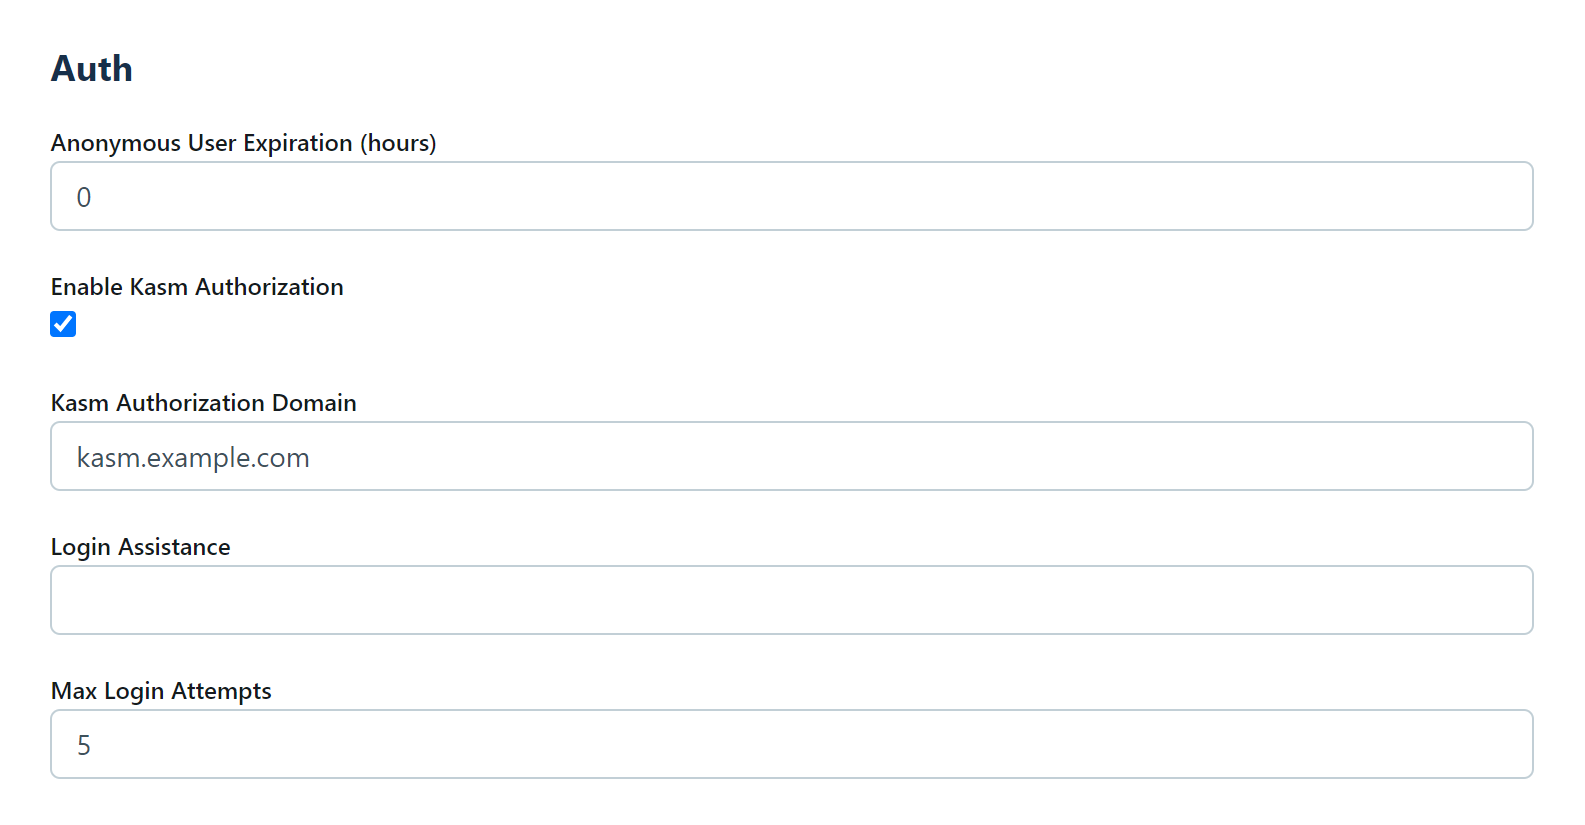
From the Admin panel select Settings
Set Kasm Authorization Domain to the parent domain of the Web App and Agent servers. eg
kasm.example.com.

Restart the services on all Web App servers
sudo /opt/kasm/bin/stop
sudo /opt/kasm/bin/start
Testing
Log out of the Workspaces UI.
In a new Incognito browser window log into the Workspaces UI.
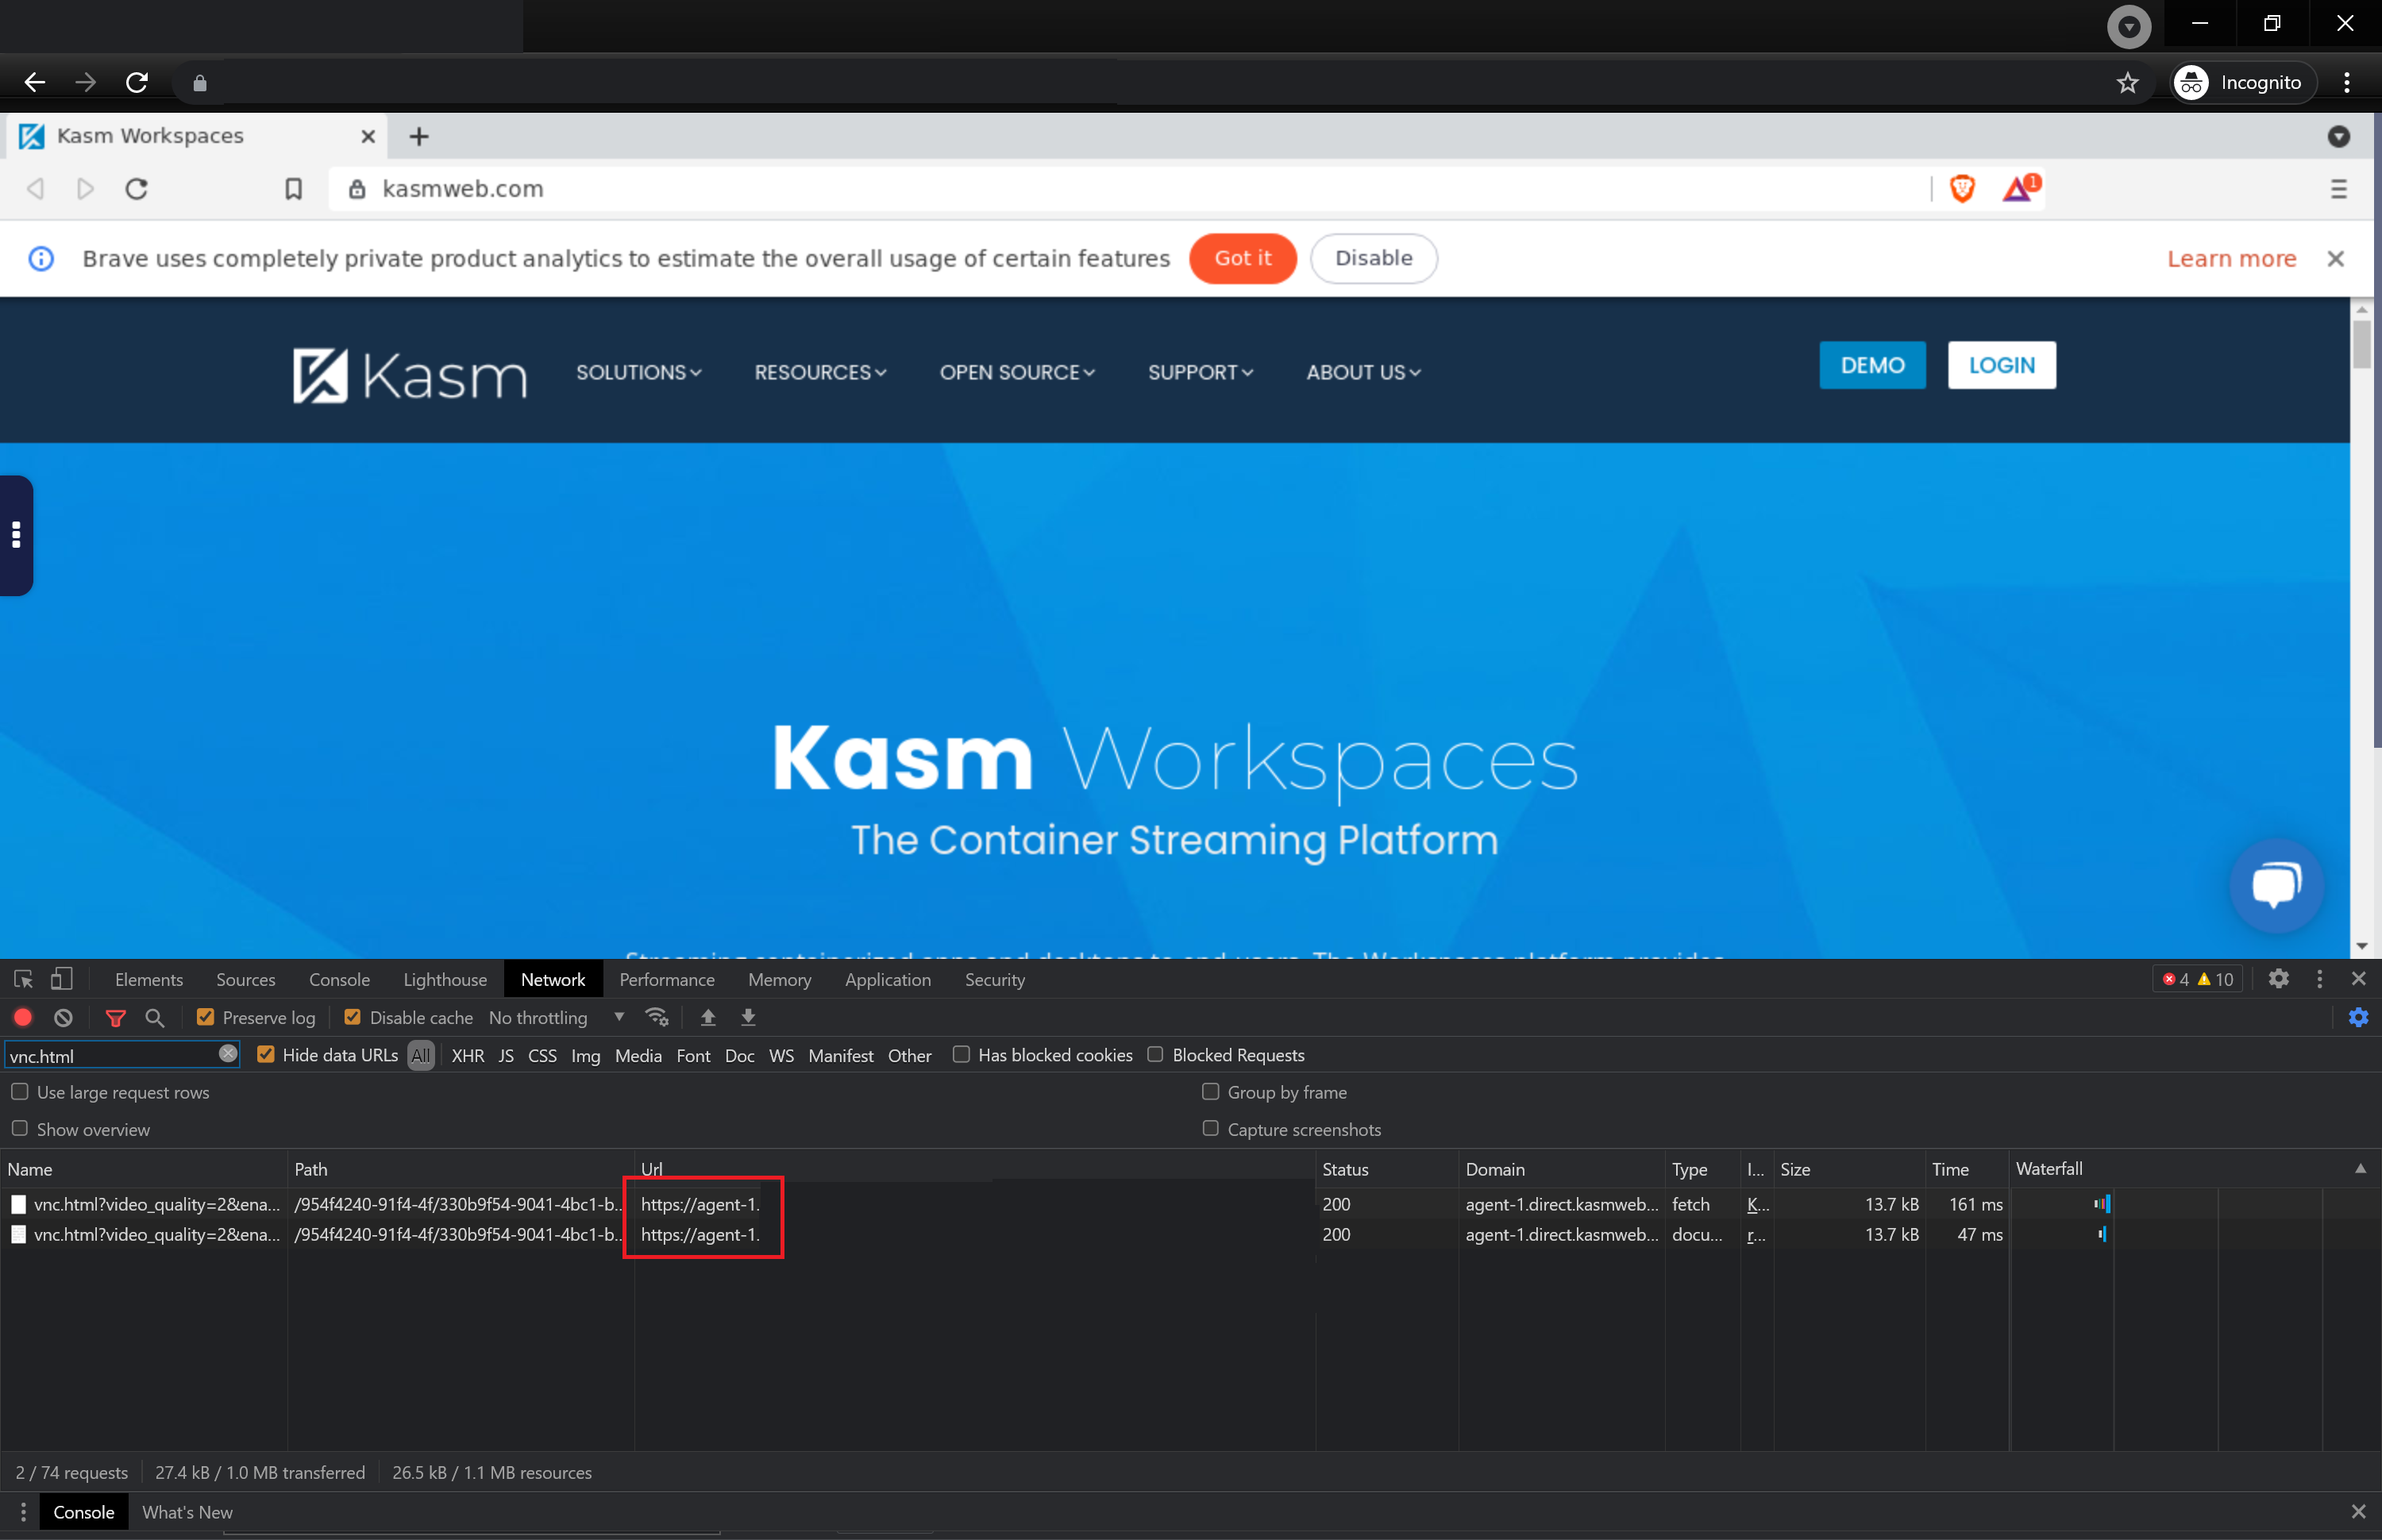
Open the browser developer tools and navigate to the Network tab. Enter
vnc.htmlinto the filter.Launch a new session. The Url in developer tools should have the Agent’s address as the domain
