Cisco Umbrella / OpenDNS
Administrators have several options for integrative Kasm with Cisco Umbrella / OpenDNS.
Users can be redirected to Kasm session when accessing restricted sites.
Kasm sessions can be configured to use custom DNS servers, thus using DNS filtering systems such as Cisco Umbrella / OpenDNS. In some situations this may be preferred to Kasm Workspace’s built in Web Filtering.
Redirect Blocked Requests to Kasm
Administrators can configure Cisco Umbrella to redirect the user’s request to Kasm when a policy is violated. For example, it certain categories of sites are denied by Cisco Umbrella policy, the Administator may wish to provide access to the site only through Kasm isolation. This is instrumented via the use of a Custom Block Page that is coded to either automatically redirect the user to Kasm or provide a link for the user to click.

Redirect Process
The following figure shows an example of a user’s request being denied by Cisco Umbrella policy to auctions sites. The custom block page is shown, and the user has the option to open the link inside a Kasm session. The Kasm session is opened in a new window and automatically launches to the requested site.
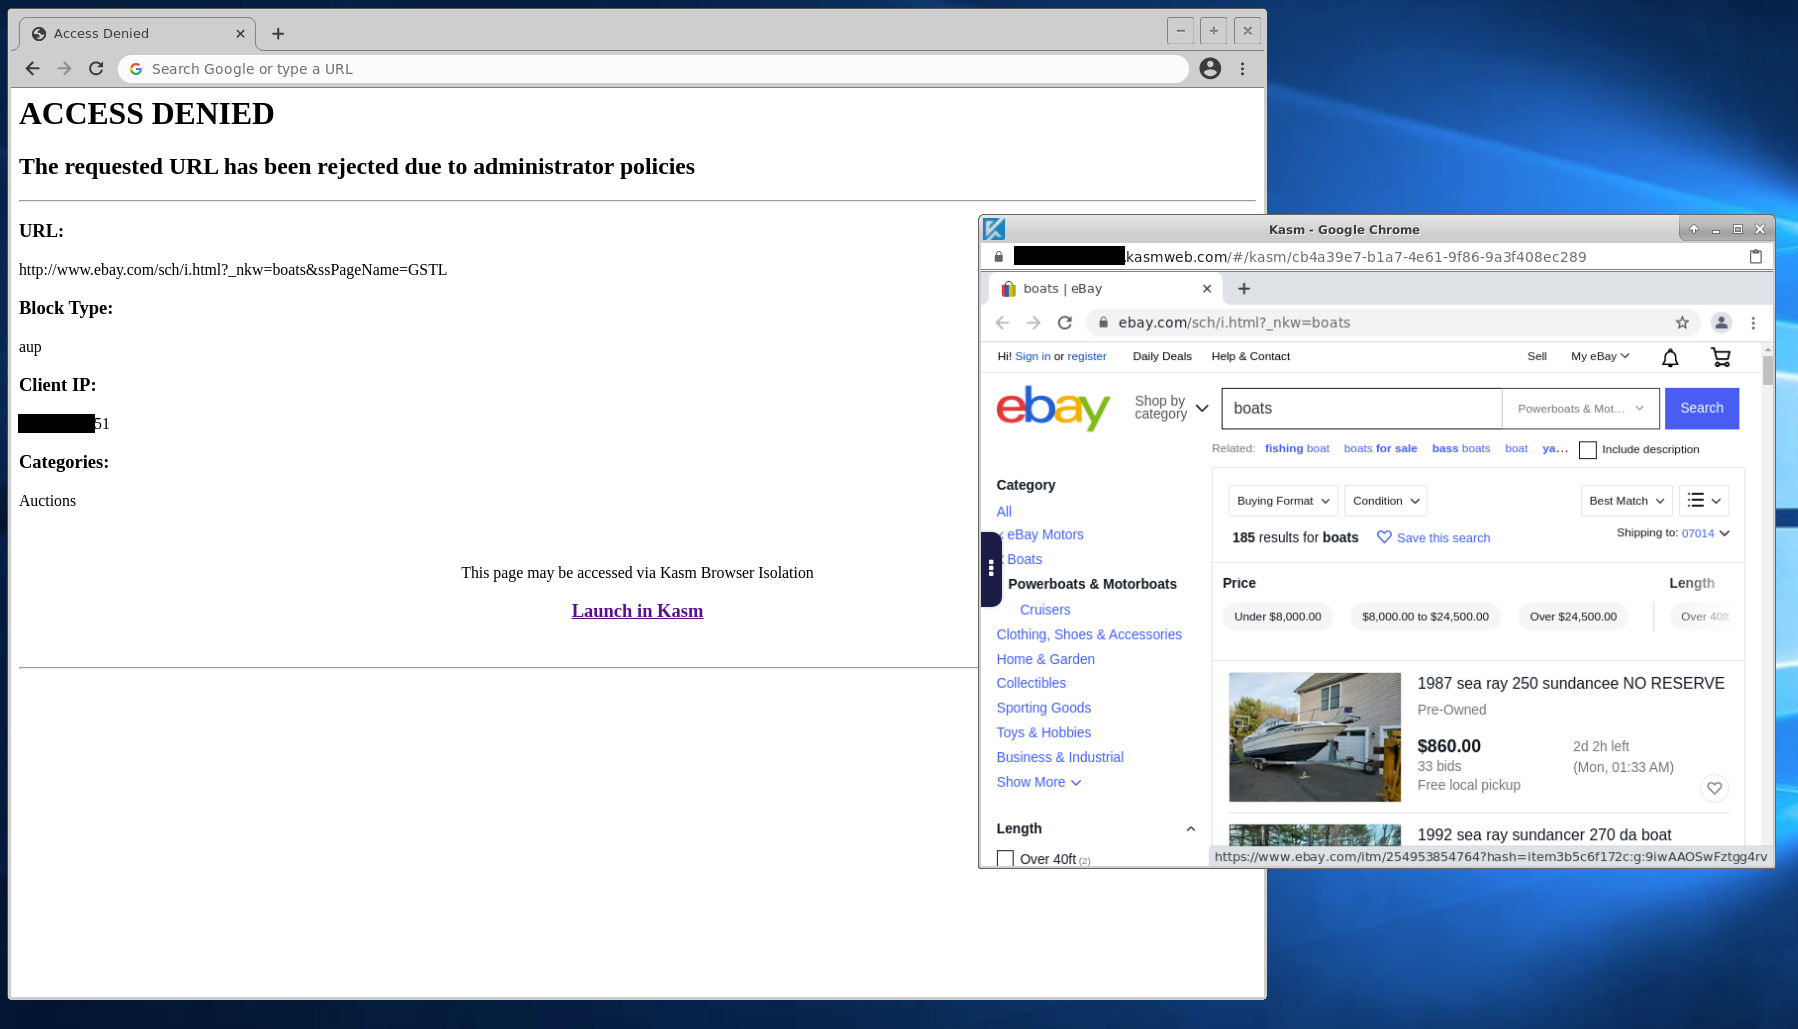
Block Page in Action
Deploy a Custom Block Page
A custom block page is used to redirect the user’s original request to Kasm or provide them a link to do so. Administrator’s must customize and place the block page in a website that is accessible to all users.
Download the example block page: Custom Block Page Example (Right Click and Save)
Note
The example block page is intentionally devoid of styling to more simply illustrate the workflow. Administrators can customize the page with styling and branding as desired.
Edit the file and replace
kasm.serverin thekasm_urlvariable with a domain for your Kasm Deployment.Partial Block Page Contents¶... var kasm_url = "https://kasm.server/#/go?kasm_url="; var urlParams = new URLSearchParams(window.location.search); var kasm_message_elem = document.getElementById("kasm"); var kasm_link_elem = document.getElementById("kasm_link"); var url_elem = document.getElementById('url'); ...Deploy the file to a web server that is accessible by the users. e.g
https://my.server/block.html
Update Cisco Umbrella
Log into the Cisco Umbrella Portal
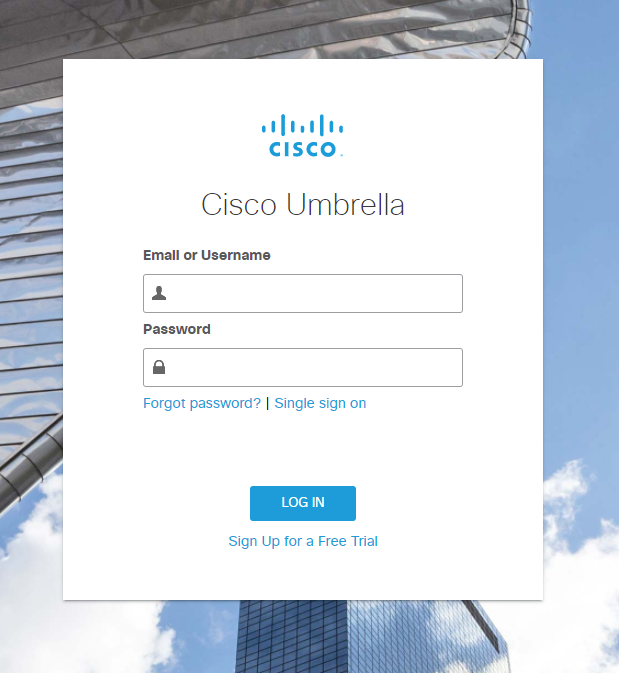
Portal Login
Select Policies -> Policy Components -> Block Page Appearance
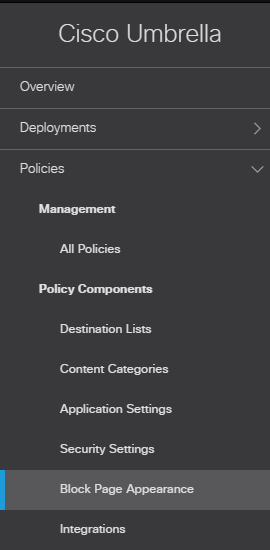
Policies Menu
Click Add
Update the Block Page Appearance Name (e.g Kasm Block Page)
Choose a Blocked requests should be treated: method.
Select Redirect users to this URL and enter the address of the deployed custom block page: e.g
https://my.server/block.htmlSelect Save
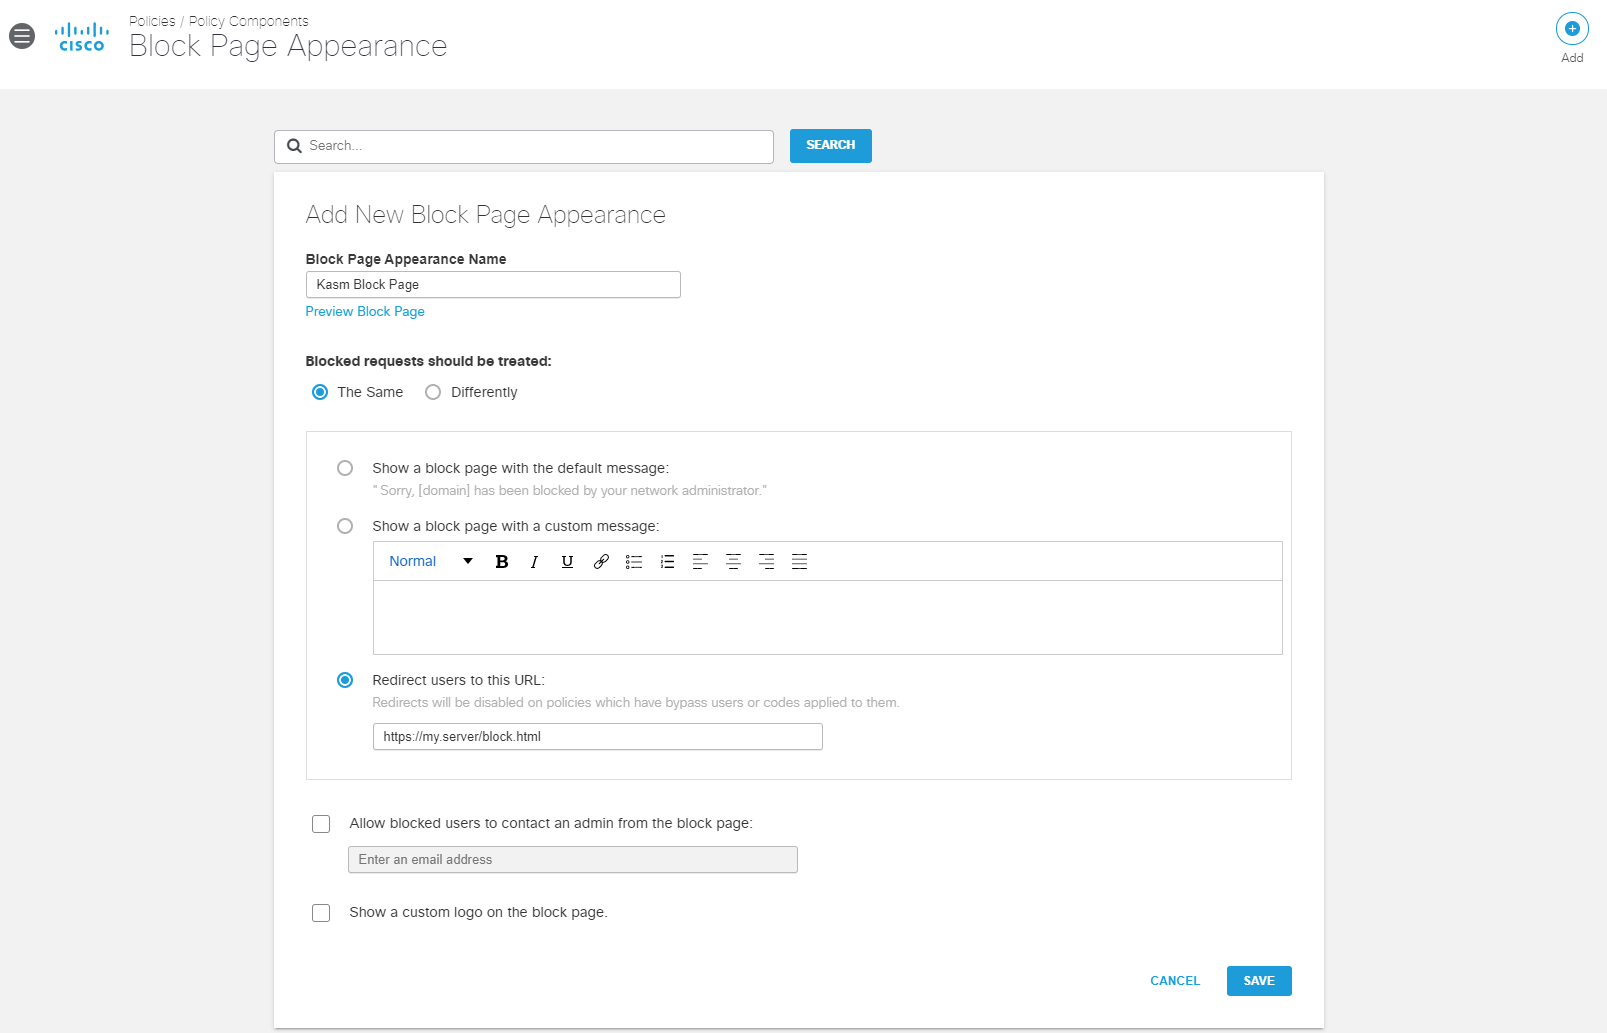
Add New Block Page Appearance
Select Policies -> Management -> All Policies
Expand the desired policy (e.g Default Policy) and select Edit under Custom Block Page Applied
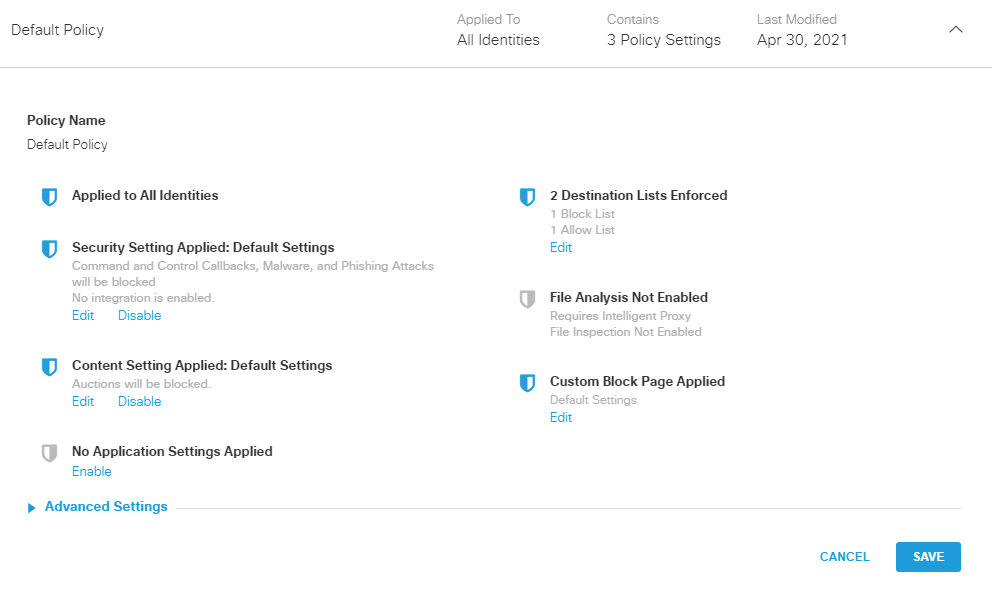
The Default Policy
Select Use a Custom Appearance and select the policy created in the previous steps (e.g Kasm Block Page)
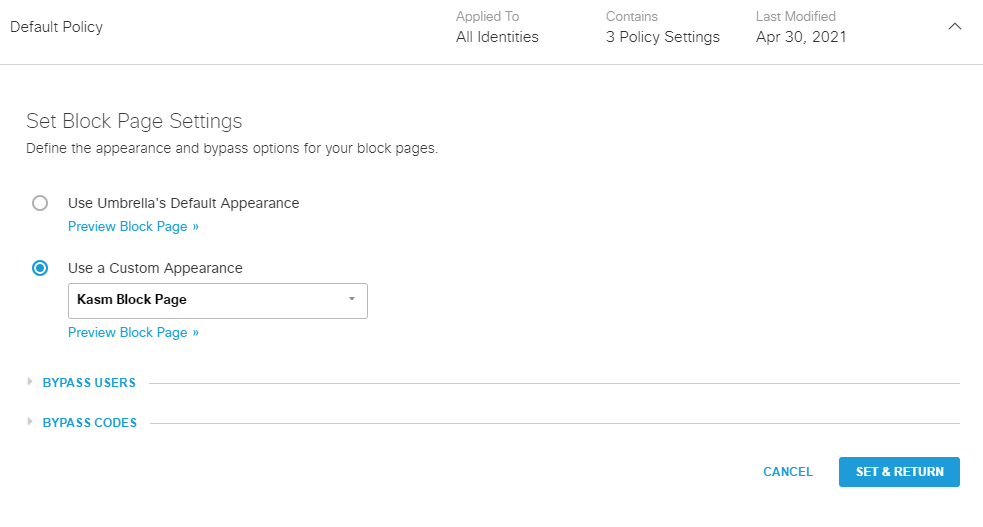
Set Block Page
Select Set & Return then select Save
Note
It may take several minutes for changes to the policy to take effect.
When applicable users violate the policy they should see the configured block page with the option to open the link in Kasm. Cisco provides Test URLs to help verify behavior.
Kasm Sessions as Cisco Umbrella / OpenDNS Clients
DNS Configuration
Administrators can configure Kasm sessions to use custom DNS server such as those provide by Cisco Umbrella / OpenDNS. Use the following steps to locate the Cisco Umbrella DNS servers for the account, then see Custom DNS Servers for configuration details details.
Log into the Cisco Umbrella Portal
Select Deployments -> Core Identities -> Networks
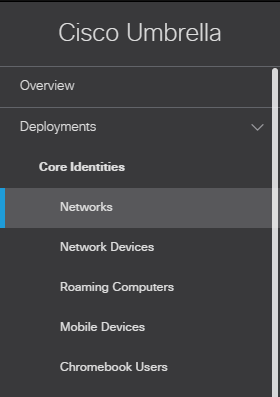
Networks Menu
Select + next to desired networks’s IP address

Network Selection
The DNS Servers are displayed. Utilize the IPv4 DNS Servers when configuring an image with Custom DNS Servers
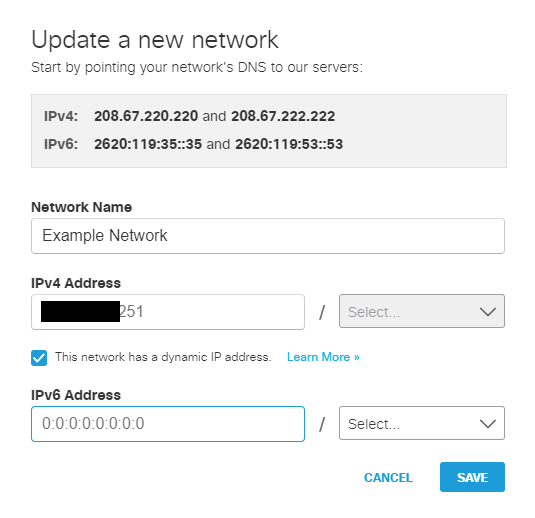
DNS Servers
Once configured, navigate to one of the Test URLs from within the Kasm session to verify the configuration.
Root Certificate Installation
In order to for Cisco Umbrella / OpenDNS to utilize more advanced filtering , inspect SSL traffic and display block pages without the user getting a warning, the custom root certificate must be installed within the Kasm Image. Use the following steps to retrieve the CA cert provided by Cisco. Once retrieved, create a custom Image using the certificate by following the Custom CA Certificates instructions.
Helpful References * https://docs.umbrella.com/umbrella-user-guide/docs/install-the-cisco-umbrella-root-certificate
Log into the Cisco Umbrella Portal
Select Deployments -> Configuration -> Root Certificate
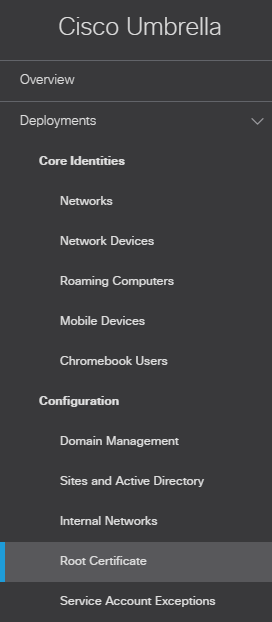
Root Certificate Menu
Select Download Certificate
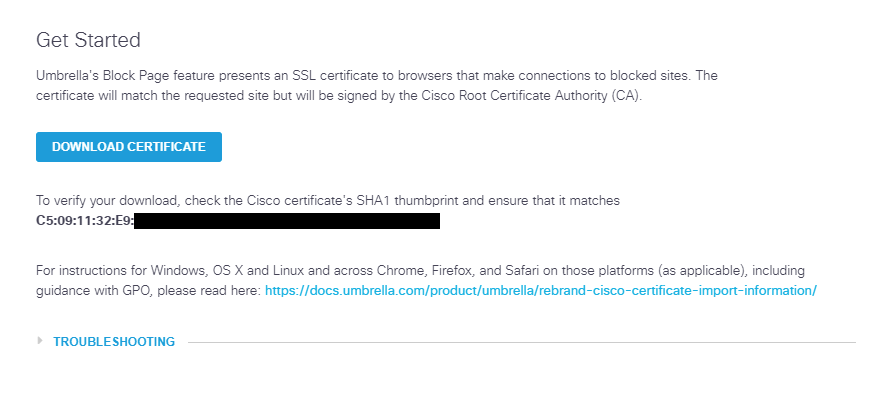
DNS Servers
Create a custom Image using the certificate by following the Custom CA Certificates instructions.