Github OpenID Setup
This guide walks through a basic setup allowing Github users to authenticate with your Kasm deployment
Reference Docs:
Creating a Github OAuth App
Login to Github and select Settings from the profile dropdown: https://github.com/settings/profile
Select Develop Settings.
Select OAuth Apps, then click New OAuth App.
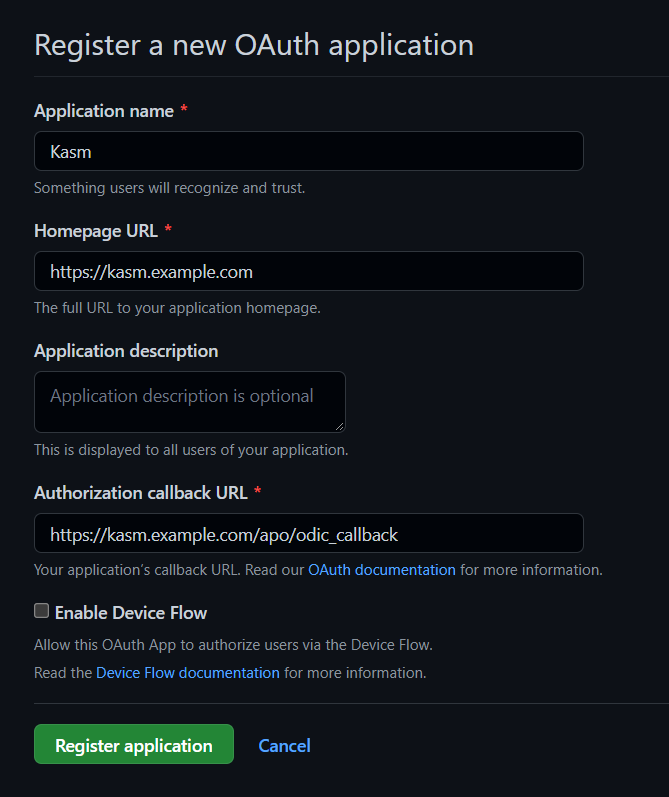
Give the application a name (e.g
Kasm), enter the URL of the deployment in the Homepage URL, and the Authorization callback to behttps://<deployment hostname>/api/oidc_callback.

New OAuth Application
Select Register Application.
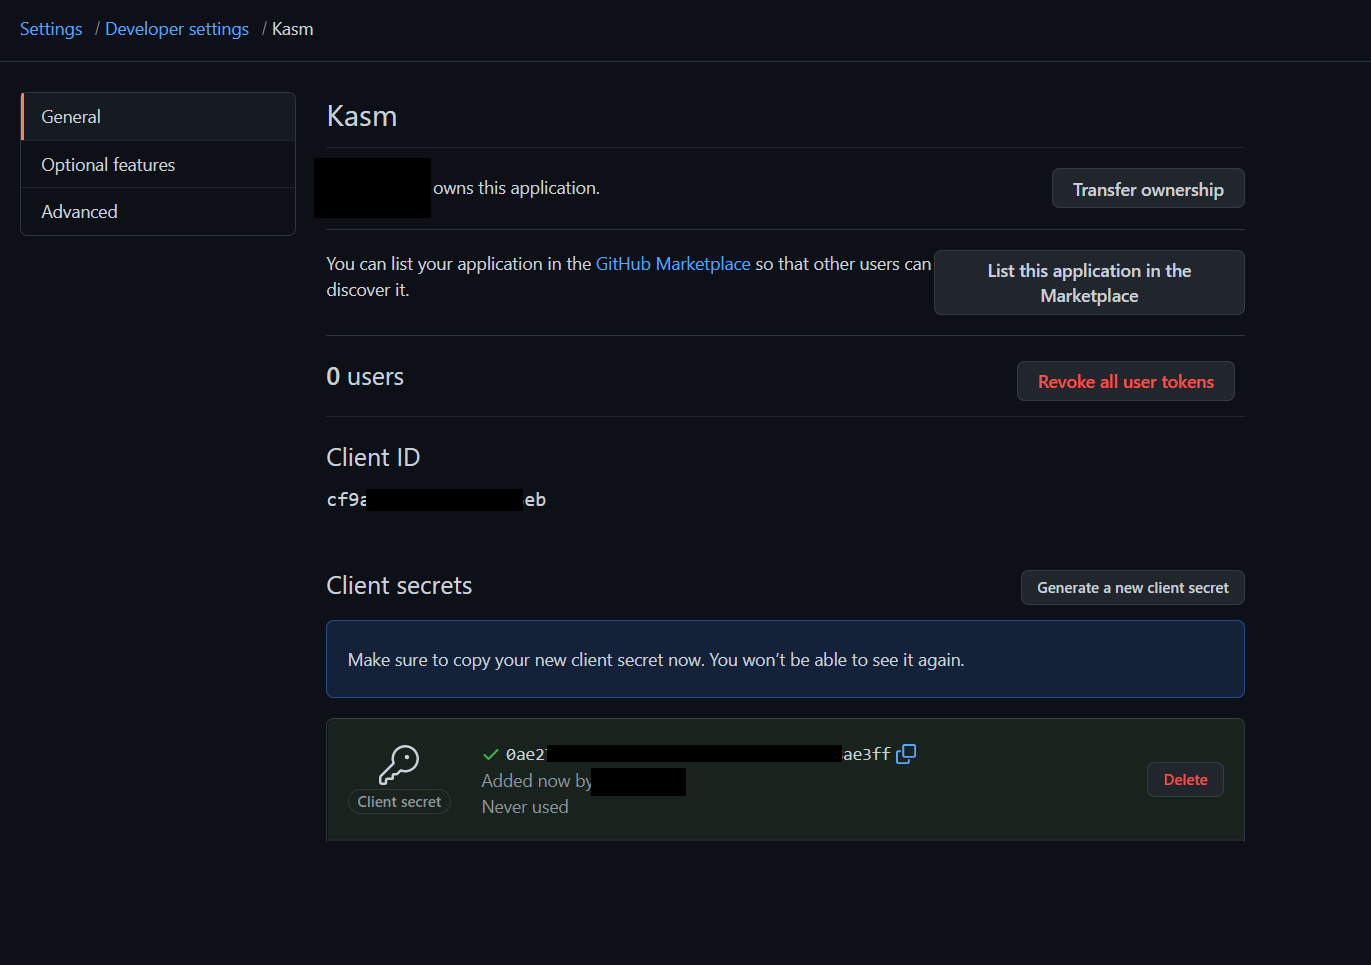
On the next page note the Client ID. It will be needed for upcoming configurations.
Click Generate a new client secret and note the value. It will be needed for upcoming configurations.

Client ID an Client Secret
Kasm OpenID Config
Log into the Kasm UI as an administrator.
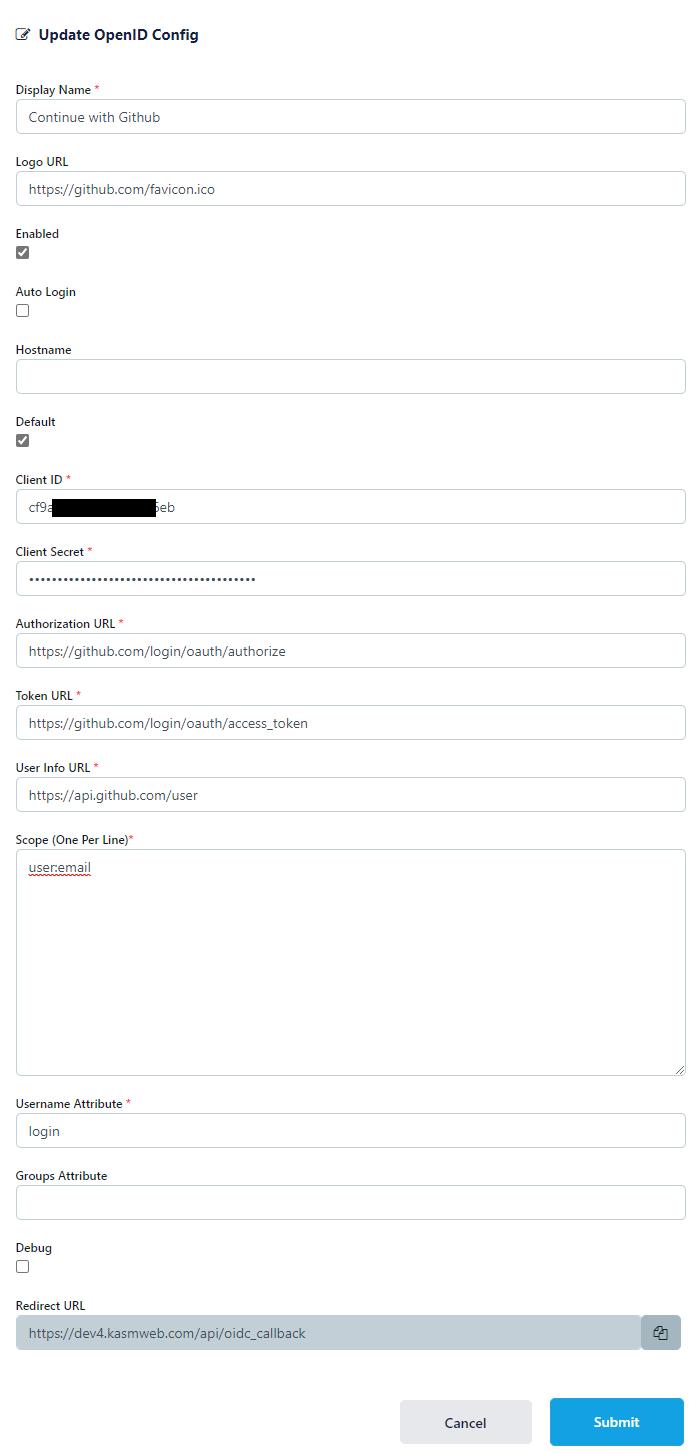
Select Authentication -> OpenID -> Create New Configuration.
Update the form with the following entries, using the Client ID and Client Secret gathered in the previous section.
Property |
Value |
Display Name |
Continue with Github |
Logo URL |
|
Enabled |
Checked |
Auto Login |
Unchecked |
Hostname |
<Empty> |
Default |
Checked |
Client ID |
<Client ID From Github OAuth App> |
Client Secret |
<Client Secret from Github OAuth App> |
Authorization URL |
|
Token URL |
|
User Info URL |
|
Scope |
|
Username Attribute |
|
Groups Attribute |
Unchecked |
Debug |
Unchecked |

Kasm OIDC Configurations
Click Submit to save the changes.
Github Login Test
Logout of the Kasm to display the login screen. The OpenID configuration should be shown.

Login Screen
Click Continue with Github.
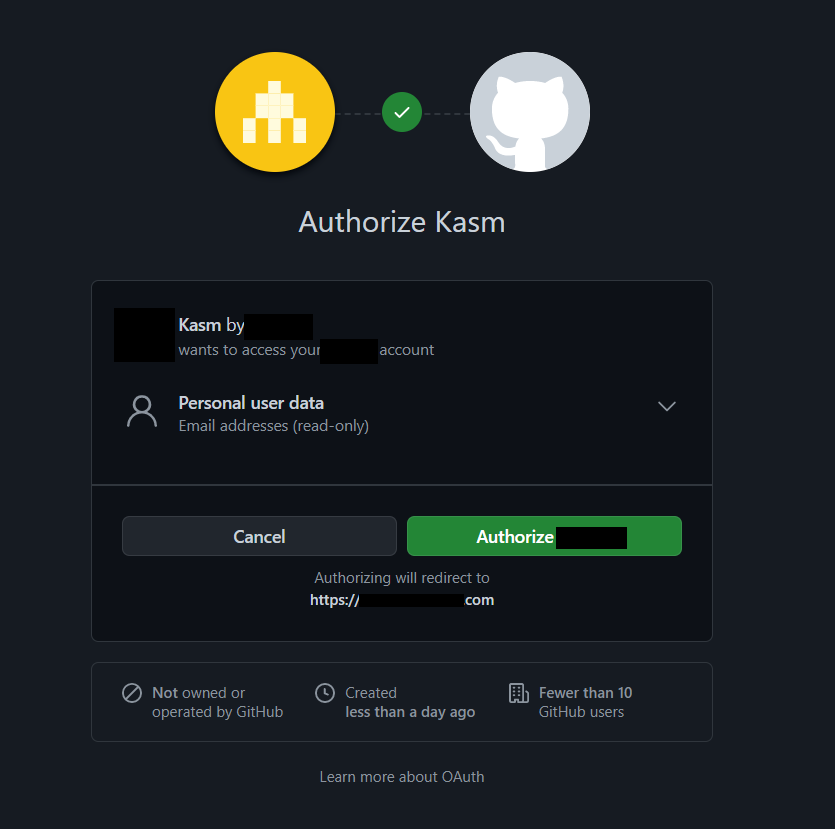
3. The user is redirected to Github. Login if necessary. The first time the user utilizes the OpenID auth, they will be prompted to accept the access requested. Select Authorize

Github Auth
Upon compleation, the user is logged into the Kasm app.